
Like an amazing pair of sky scraper heels, there are some make-up products we like to look at, but don't dare to wear. There are many reasons for it, be it confidence or simply a fear of looking like a clown. Adventurous types will no doubt be wondering what I'm on about considering I've chosen a pink lipstick & blusher here. Pink? That's not unusual, or scary. But these aren't normal, run of the mill pink products, they're pink turned up to 11, and were vivid enough to make my model raise an eye brow when I pulled them out of my kit bag.
Basically, what I wanted to show was how you can balance a look which incorporates colours that are really bright without it all looking garish at the end, and also encourage people to step outside their comfort zone if this type of thing normally makes you run for the hills.
To start, here are a list of the main products used for the look.
- Bourjois Happy Light Foundation (€16.99)
- NARS Dual Intensity Blusher "Adoration" (€39)
- YSL Touche Eclat (€35)
- MAC Blot Powder (€26)
- NYC Smokin' Hot Mascara (€1.99)
- Clinique Pop Lip Colour & Primer in "Punch Pop" (€19.50)
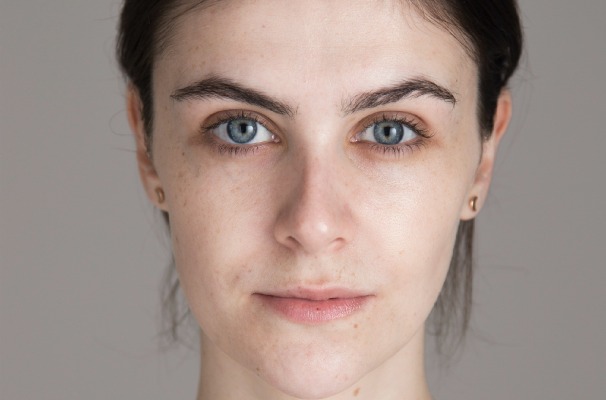
I prepped Sheona's skin using a little Astral Cream (€4.99/200ml) for a smooth base to work with. Starting in the centre of her face, I blended out the foundation towards temples and jawline using downwards strokes to ensure that the foundation didn't catch in any pores or fine hairs.
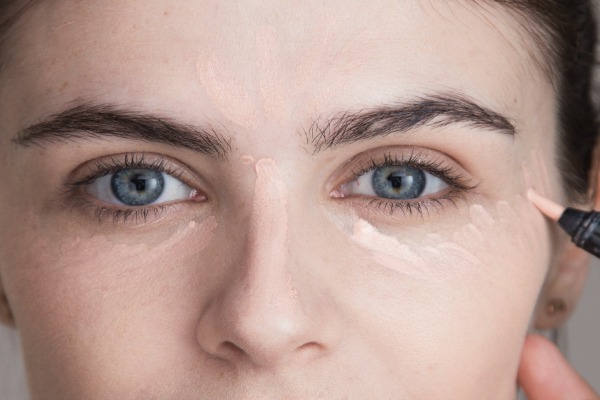
To brighten around her eyes and give a more luminous finish to skin I applied an illuminating highlighter underneath eyes continuing onto the top of cheekbones, down the bridge of the nose, cupids bow and also between brows. I chose YSL Touche Eclat here but you could just as easily use another type of highlighting pen such as Maybelline Dream Touch Lumi (€10.50).
As there's a statement lip and bright blush involved in this look I didn't want too much going on with eyes, so instead of using eyeshadows I wet the paler shade in the Dual Intensity Blusher and applied it to the inner corner of eyes and along the brow bone to catch the light. NARS don't specify if it's ok to use their blushers on eyes though, so if you're particularly sensitive then maybe a cream shadow is better. We didn't have any issues on the day but I feel I should say it!
Advertised
Once that was blended in I set the base using MAC Blot powder which I love because it just melts into skin, mattifying as it goes.
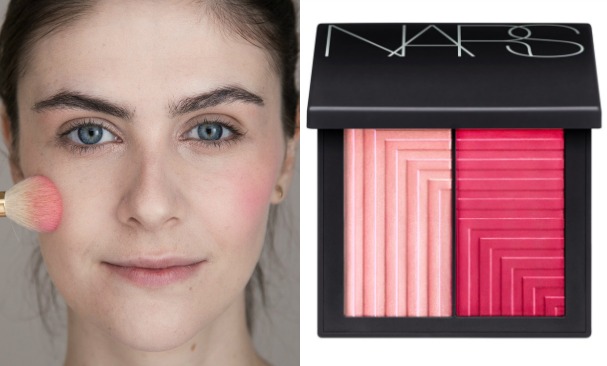
With my base on and highlights in place, I dabbed my brush into the brighter blush colour. What I really like about these is that not only do you get 2 shades which can be swirled together but you can also use them wet and dry. When dry, the colour isn't nearly as strong as you'd imagine, but it can be built up, if, for example you have a darker complexion and can carry a more vibrant tone.
Sheona is quite pale and didn't need much to lift her complexion so I simply dusted the blusher over the apples of her cheeks and then added a little of the lighter shade on top for an added sheen.
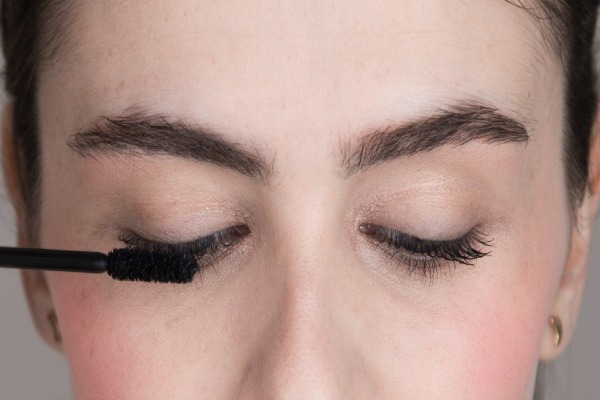
I decided to not bother with liner on the day as I had a feeling that mascara alone would be enough to define eyes. Everyone is different though, I know on myself I'd probably want to add a little bit of black or dark brown eye shadow, pushed into lashes to make them look thicker, so if that sounds like you then feel free to add that step on. Similarly you could also add a white/cream/flesh tone pencil along the inner waterline to open up eyes more.
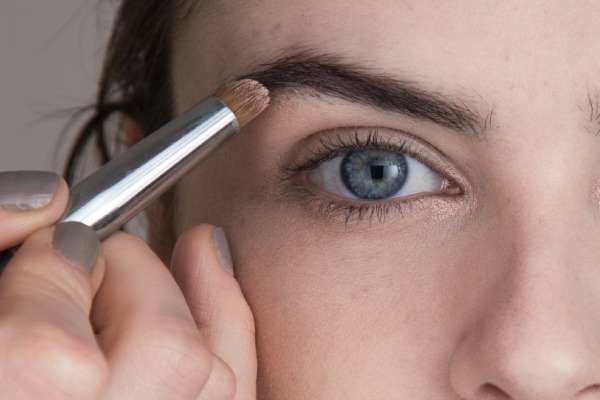
I brushed through and up brows using a brow mascara but if you're in need of alternatives then check out my article about different brow product options.
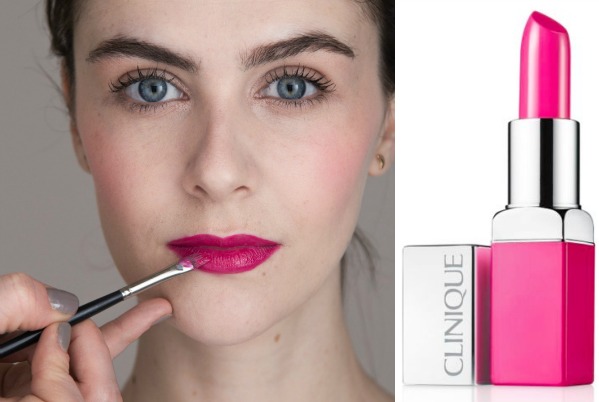
The last step was to add my statement pink lipstick and this particular one from Clinique is a doozy! I love how rich the colour is and the shine from it is so beautiful. I've tested out the Cherry Pop shade on myself and can also confirm that they are comfortable to wear and last well so if you're a lipstick kind of girl I'd recommend checking them out asap.
Advertised
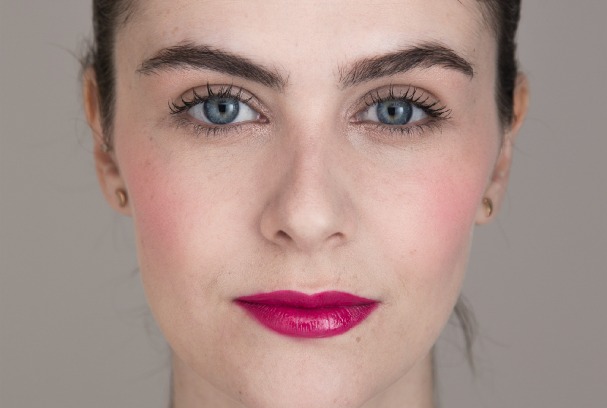
These images have not been retouched or enhanced as we want to give as true a representation of product colour and texture as possible. Credits: Photography: Aaron Hurley // Location: Daylight44 Studios // Make-up: Sarah Lanagan @ Distinct Model Management // Model: Sheona Harding @1st Option Models. Photography Assistant: Aoife Horan

