

I've never attended a wedding where the bride wasn't wearing makeup. I have lots of friends who wear minimal or no makeup on a daily basis, but when it comes to the big day, they all decided that they wanted to wear makeup.
As spring and summer approach, so does the traditional wedding season. Along with the pressures of arranging the largest and most complicated event you'll (most likely) ever have to manage, choosing the all-important dress, having a rake of (possibly quite annoying) new in-laws and worrying about keeping 'druncle' Jim away from the bar, you'll probably be worrying about makeup.
Perhaps you're very knowledgeable about makeup and wear it every day. Perhaps you like makeup and wear it sometimes. Perhaps you never wear it and have no idea where to start, but would like to wear some on your wedding day. Regardless of which category you fit into, you'll be worrying about how to make arrangements and figure out what suits you best.
Most brides hire a makeup artist for their wedding day, and if you can find an artist who you trust and 'gets you', that's wonderful. But paying an artist can be another expense to worry about, and it is absolutely possible to do your own makeup on your wedding day. The trick is to keep it simple and be aware of the effects of photography. Here's how to achieve a really simple Spring bridal makeup all by yourself!

Step One
- You need to prep your skin really well. Adopting a thorough skincare routine several months before the big day will have your skin looking its best. Finding the right products for your skin type is just a matter of research and testing things out.
- Applying a hydrating mask (like this one) for ten minutes prior to applying foundation will give you the smooth, prepped canvas that makeup looks best on.
- When you're ready, apply a foundation of your choice. It should have the level of coverage you desire, suit your skin type and colour, and contain no SPF. I've discussed the relationship between SPF and photography here, if you want to check it out. If you need help finding the right colour match, head to a makeup counter for advice.
- To keep your base in place all day, I'd recommend using a primer. Benefit's Porefessional is excellent - it gives an airbrushed finish and blurs away pores. Apply it with clean fingers.
- I've chosen Stila's Stay All Day Foundation and Concealer. It has medium to full buildable coverage, and the fact that it doesn't contain SPF means that it won't reflect too much light and look white in photos. I'm applying it with a Real Techniques Expert Face Brush. Apply foundation lightly to the neck too, and any exposed areas.
- To cover any blueness under the eyes, I'm applying a little Nars Radiant Creamy Concealer.
Step Two
Advertised
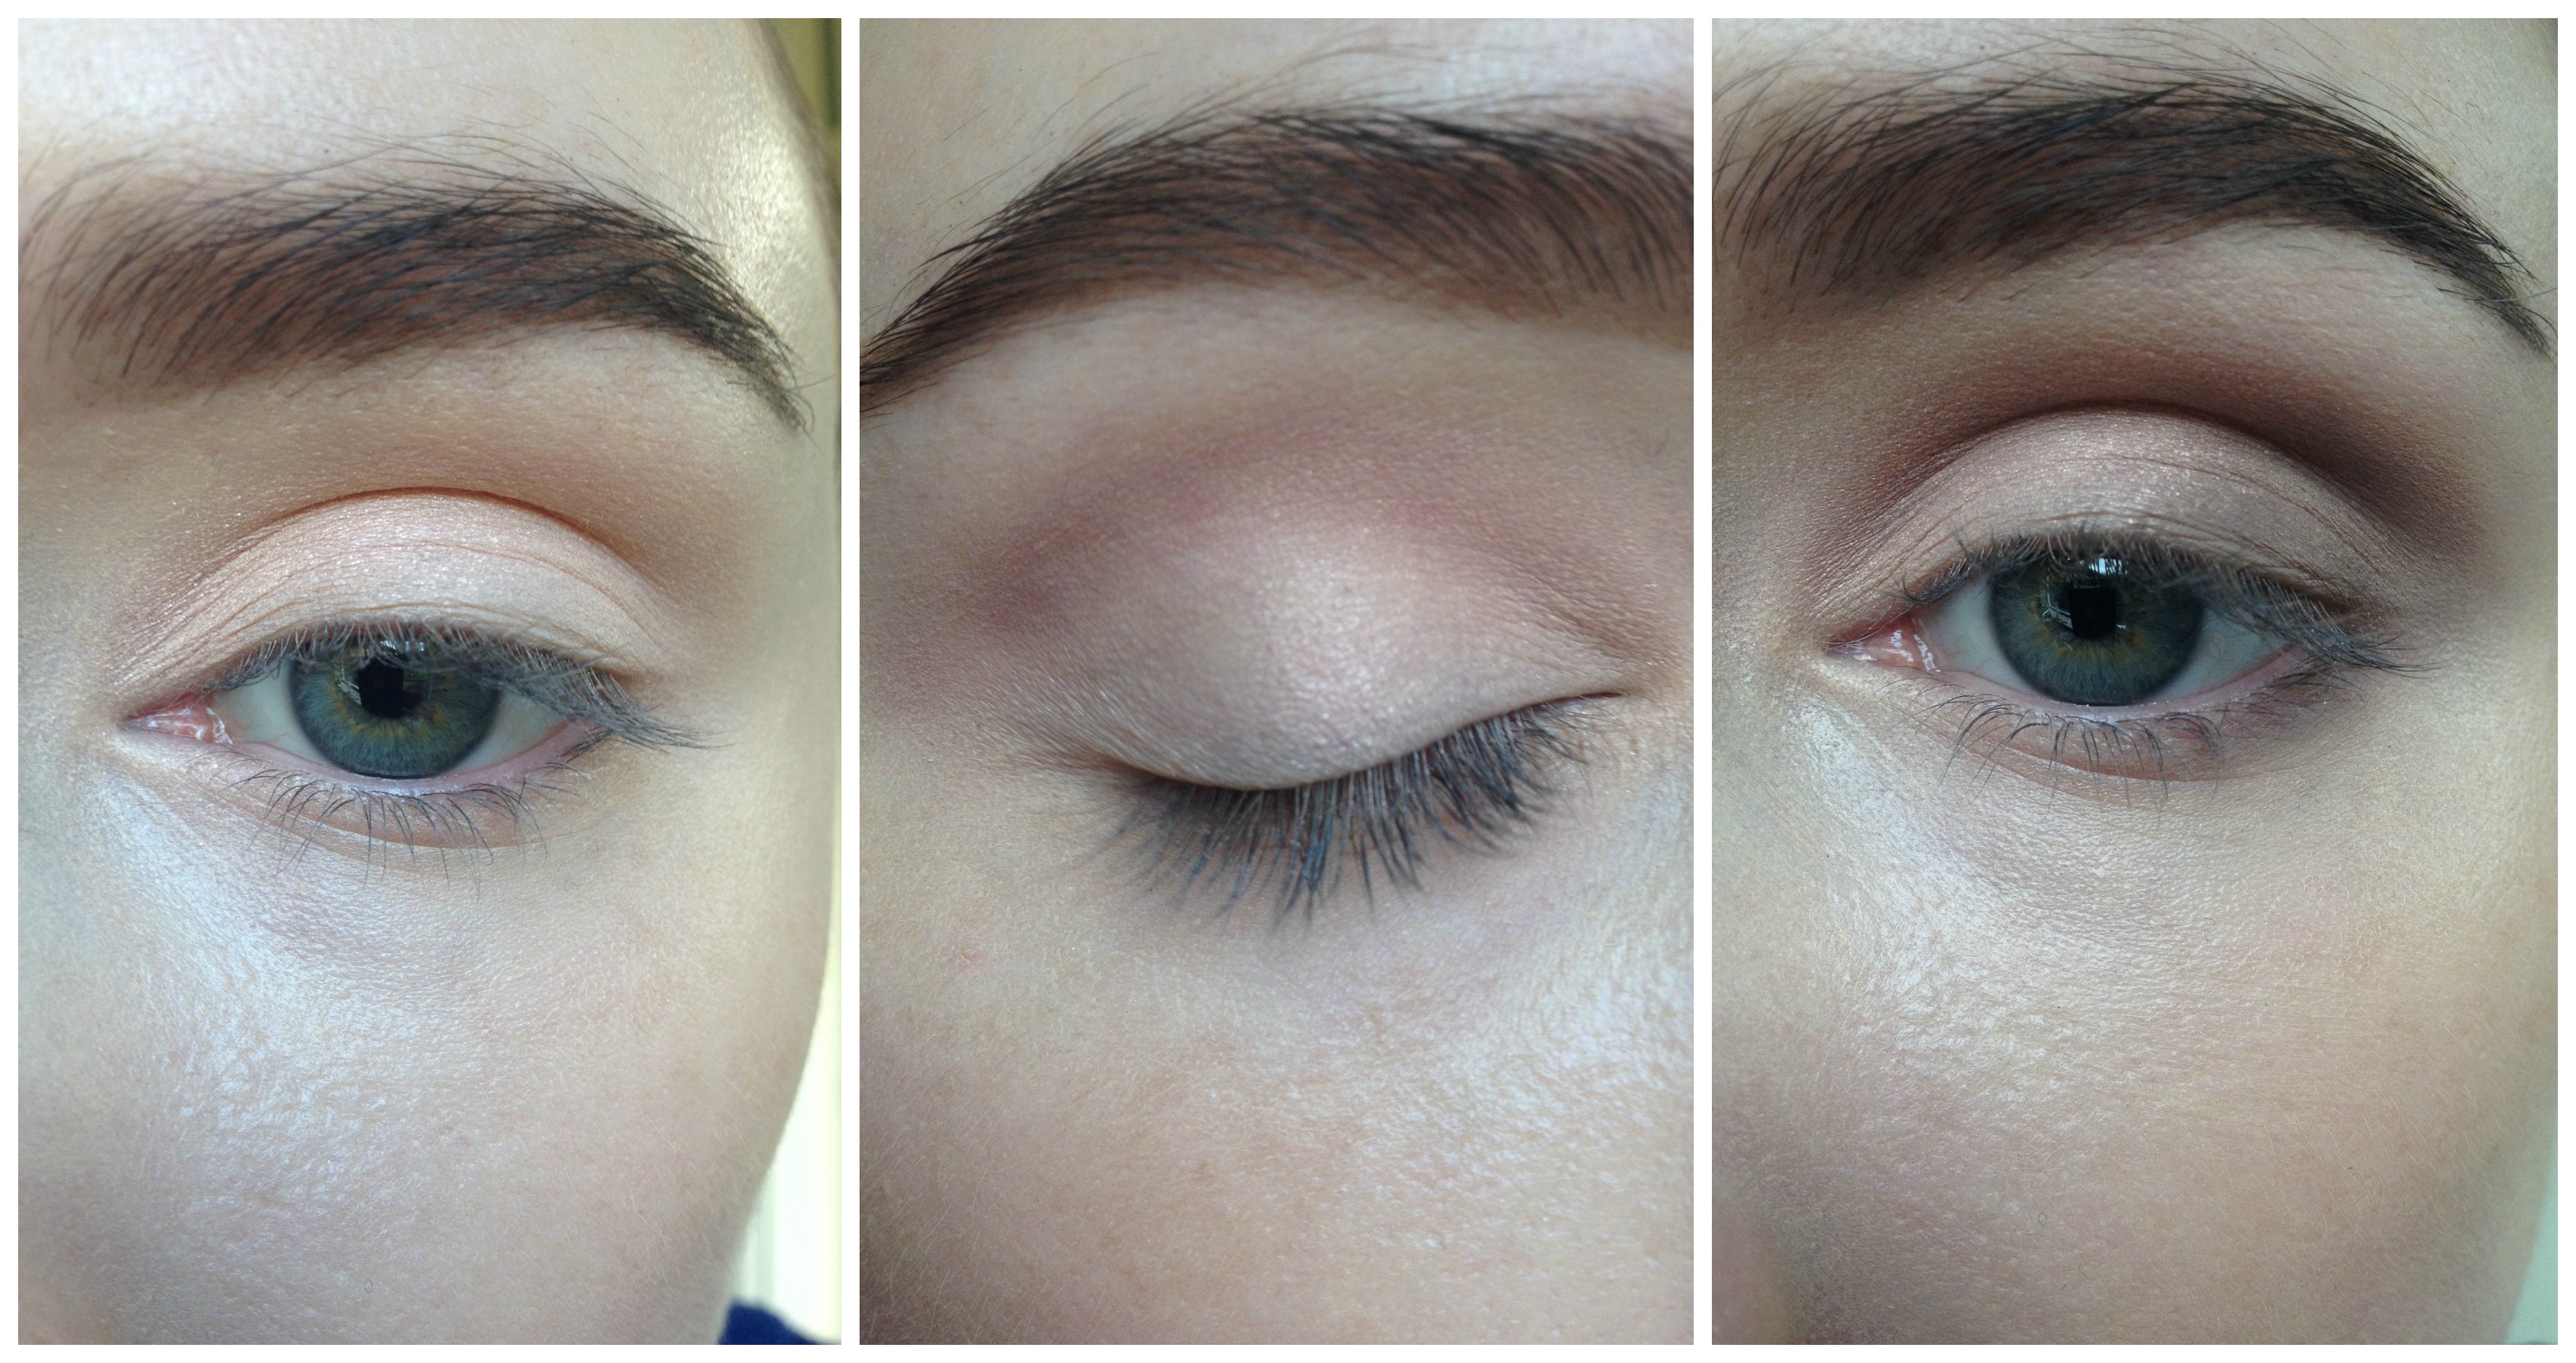
- I'm adding some brow powder to my eyebrows, just to add shape and definition. I'm using my old reliables - Mac shadows in omega and concrete, then setting my brows with some Catrice Brow Gel.
- Before applying eyeshadow, prime the eyes to keep your makeup in place all day. I'm using my favourite - Nars Smudge Proof Eyeshadow Base. Just dab it onto the lid area with your ring finger.
- I'm doffing my cap to this season's pink trend by applying a very soft shimmering nude-pink shadow all over the lid. I've chosen the lovely All About Nude Eyeshadow Palette from Essence. I'm then applying the matte taupe shade through the crease with a soft, fluffy brush to add some dimension.
- Next, with a flat shadow brush, apply the dark metallic brown from the palette to the outer third of your eyelid. Blend away with a clean fluffy brush to get rid of any harsh lines.
- To deepen the eye contour more, I'm adding a dark matte shadow over the top of what I've already applied to my crease, and taking this along the outer third of the lower lashline.
Step Three
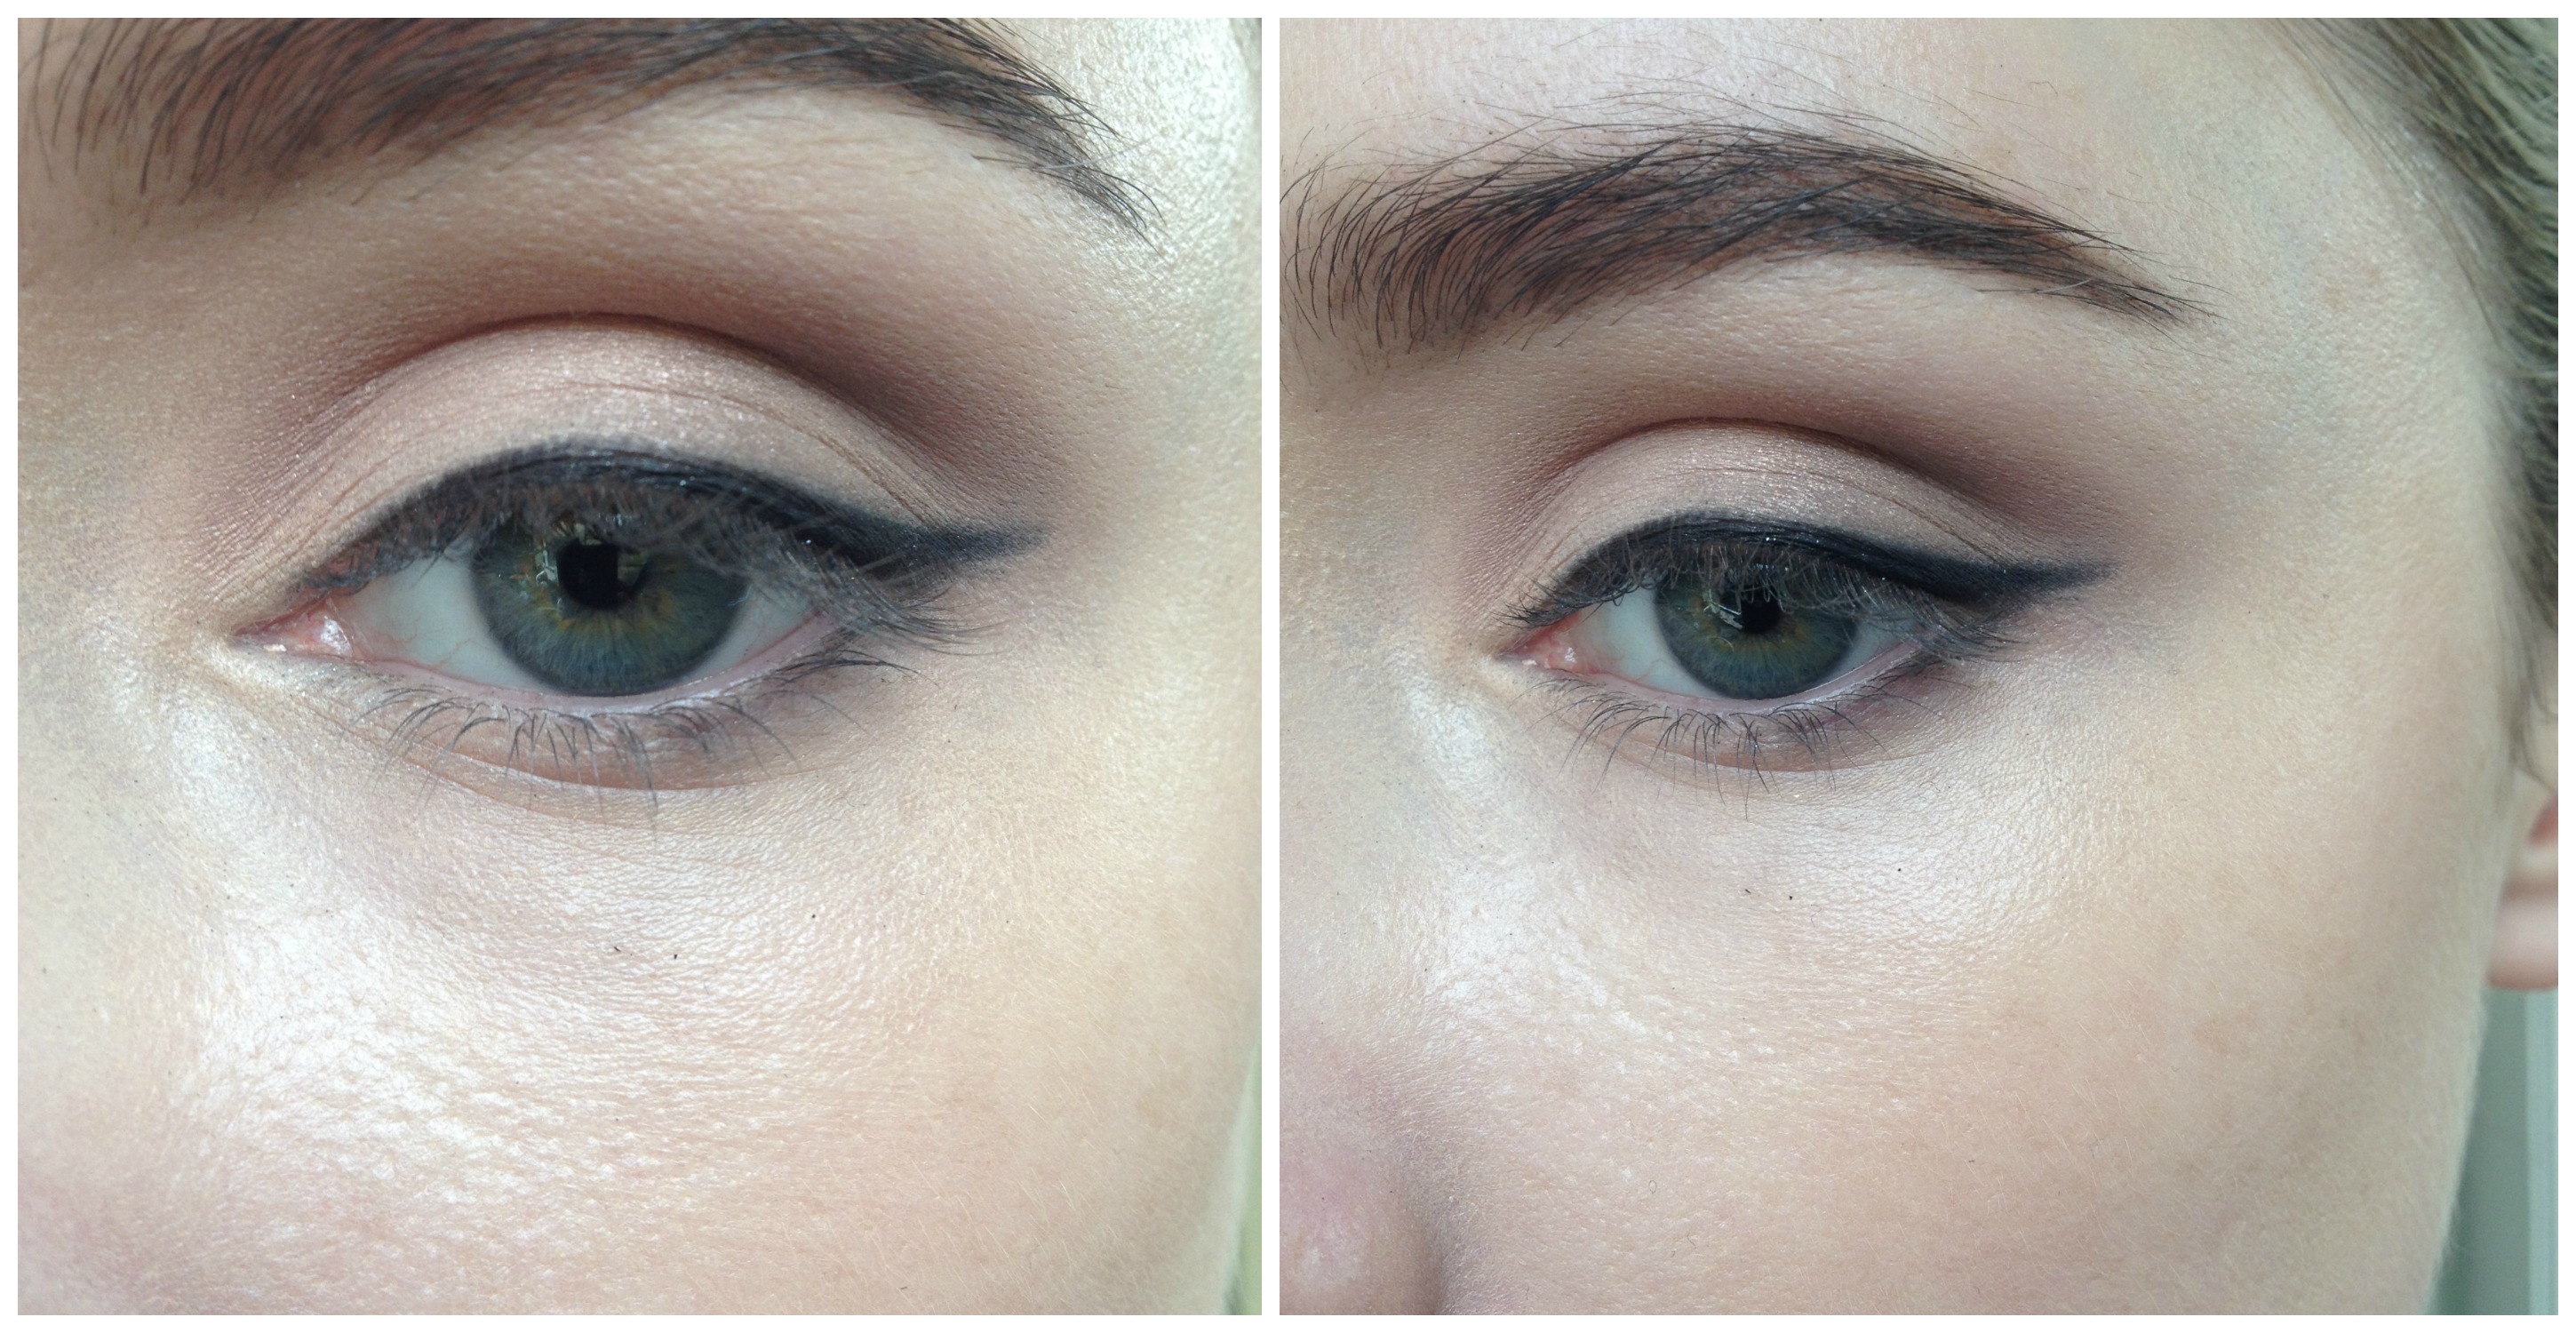
- Next, grab a waterproof gel liner - I'm using Avon's Supershock liner, and with an angled brush, line your upper lashline. Wing the liner out a little, but don't worry about making it perfect- we'll soften the line with eyeshadow.
- Keep the liner thin and understated. Also, don't take it beyond the starting point of your eyelashes at the inner corner - that way, you won't end up with liner moving into the inner corner and robbing the eye look of its fresh, open feel.
- When you're happy with your line, grab a black shadow (or brown if you want to go even softer) and dab it over the top of the line you've just created, pulling the brush upward gently to blur the harsh line.
- Take the shadow along the outer third of your lower lashline too, just to elongate the eye.
- I prefer to avoid applying much eye makeup to the lower lashline in bridal looks... just in case things get emotional!
- Next, whack on a couple of coats of your favourite waterproof mascara - again, we don't want panda face in the event of a touching (or deeply offensive...) best man speech!
Step Four
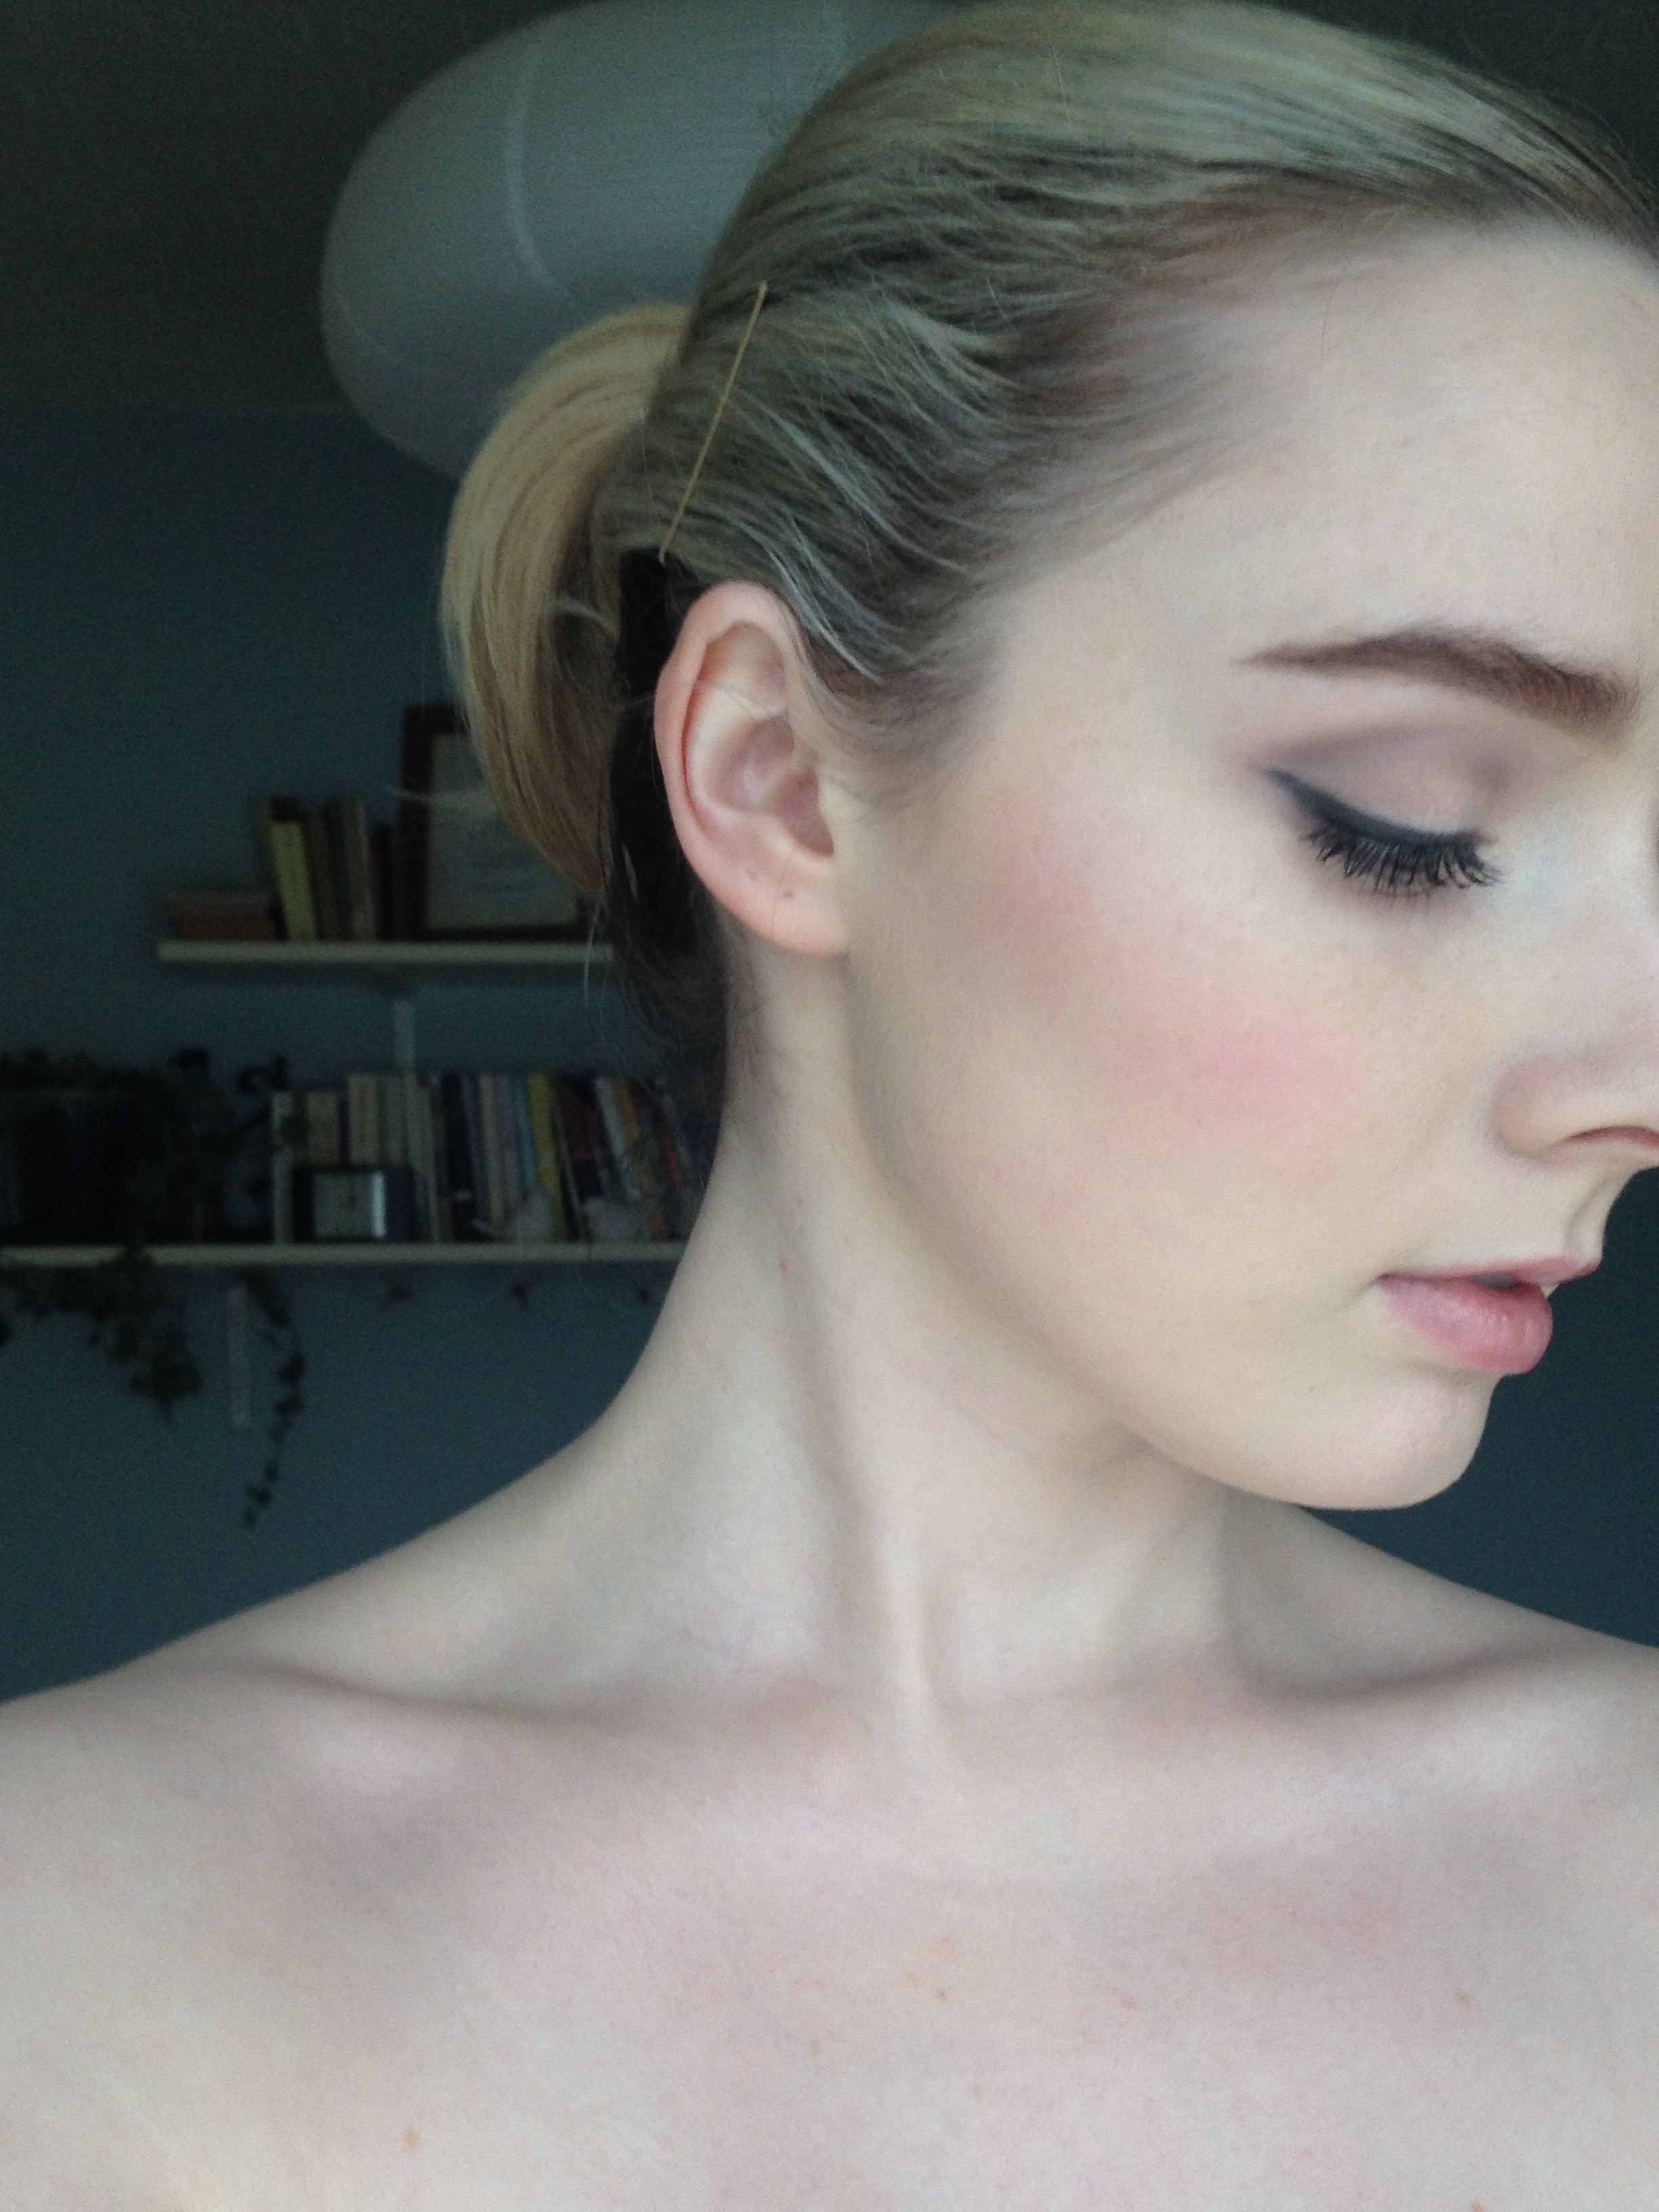
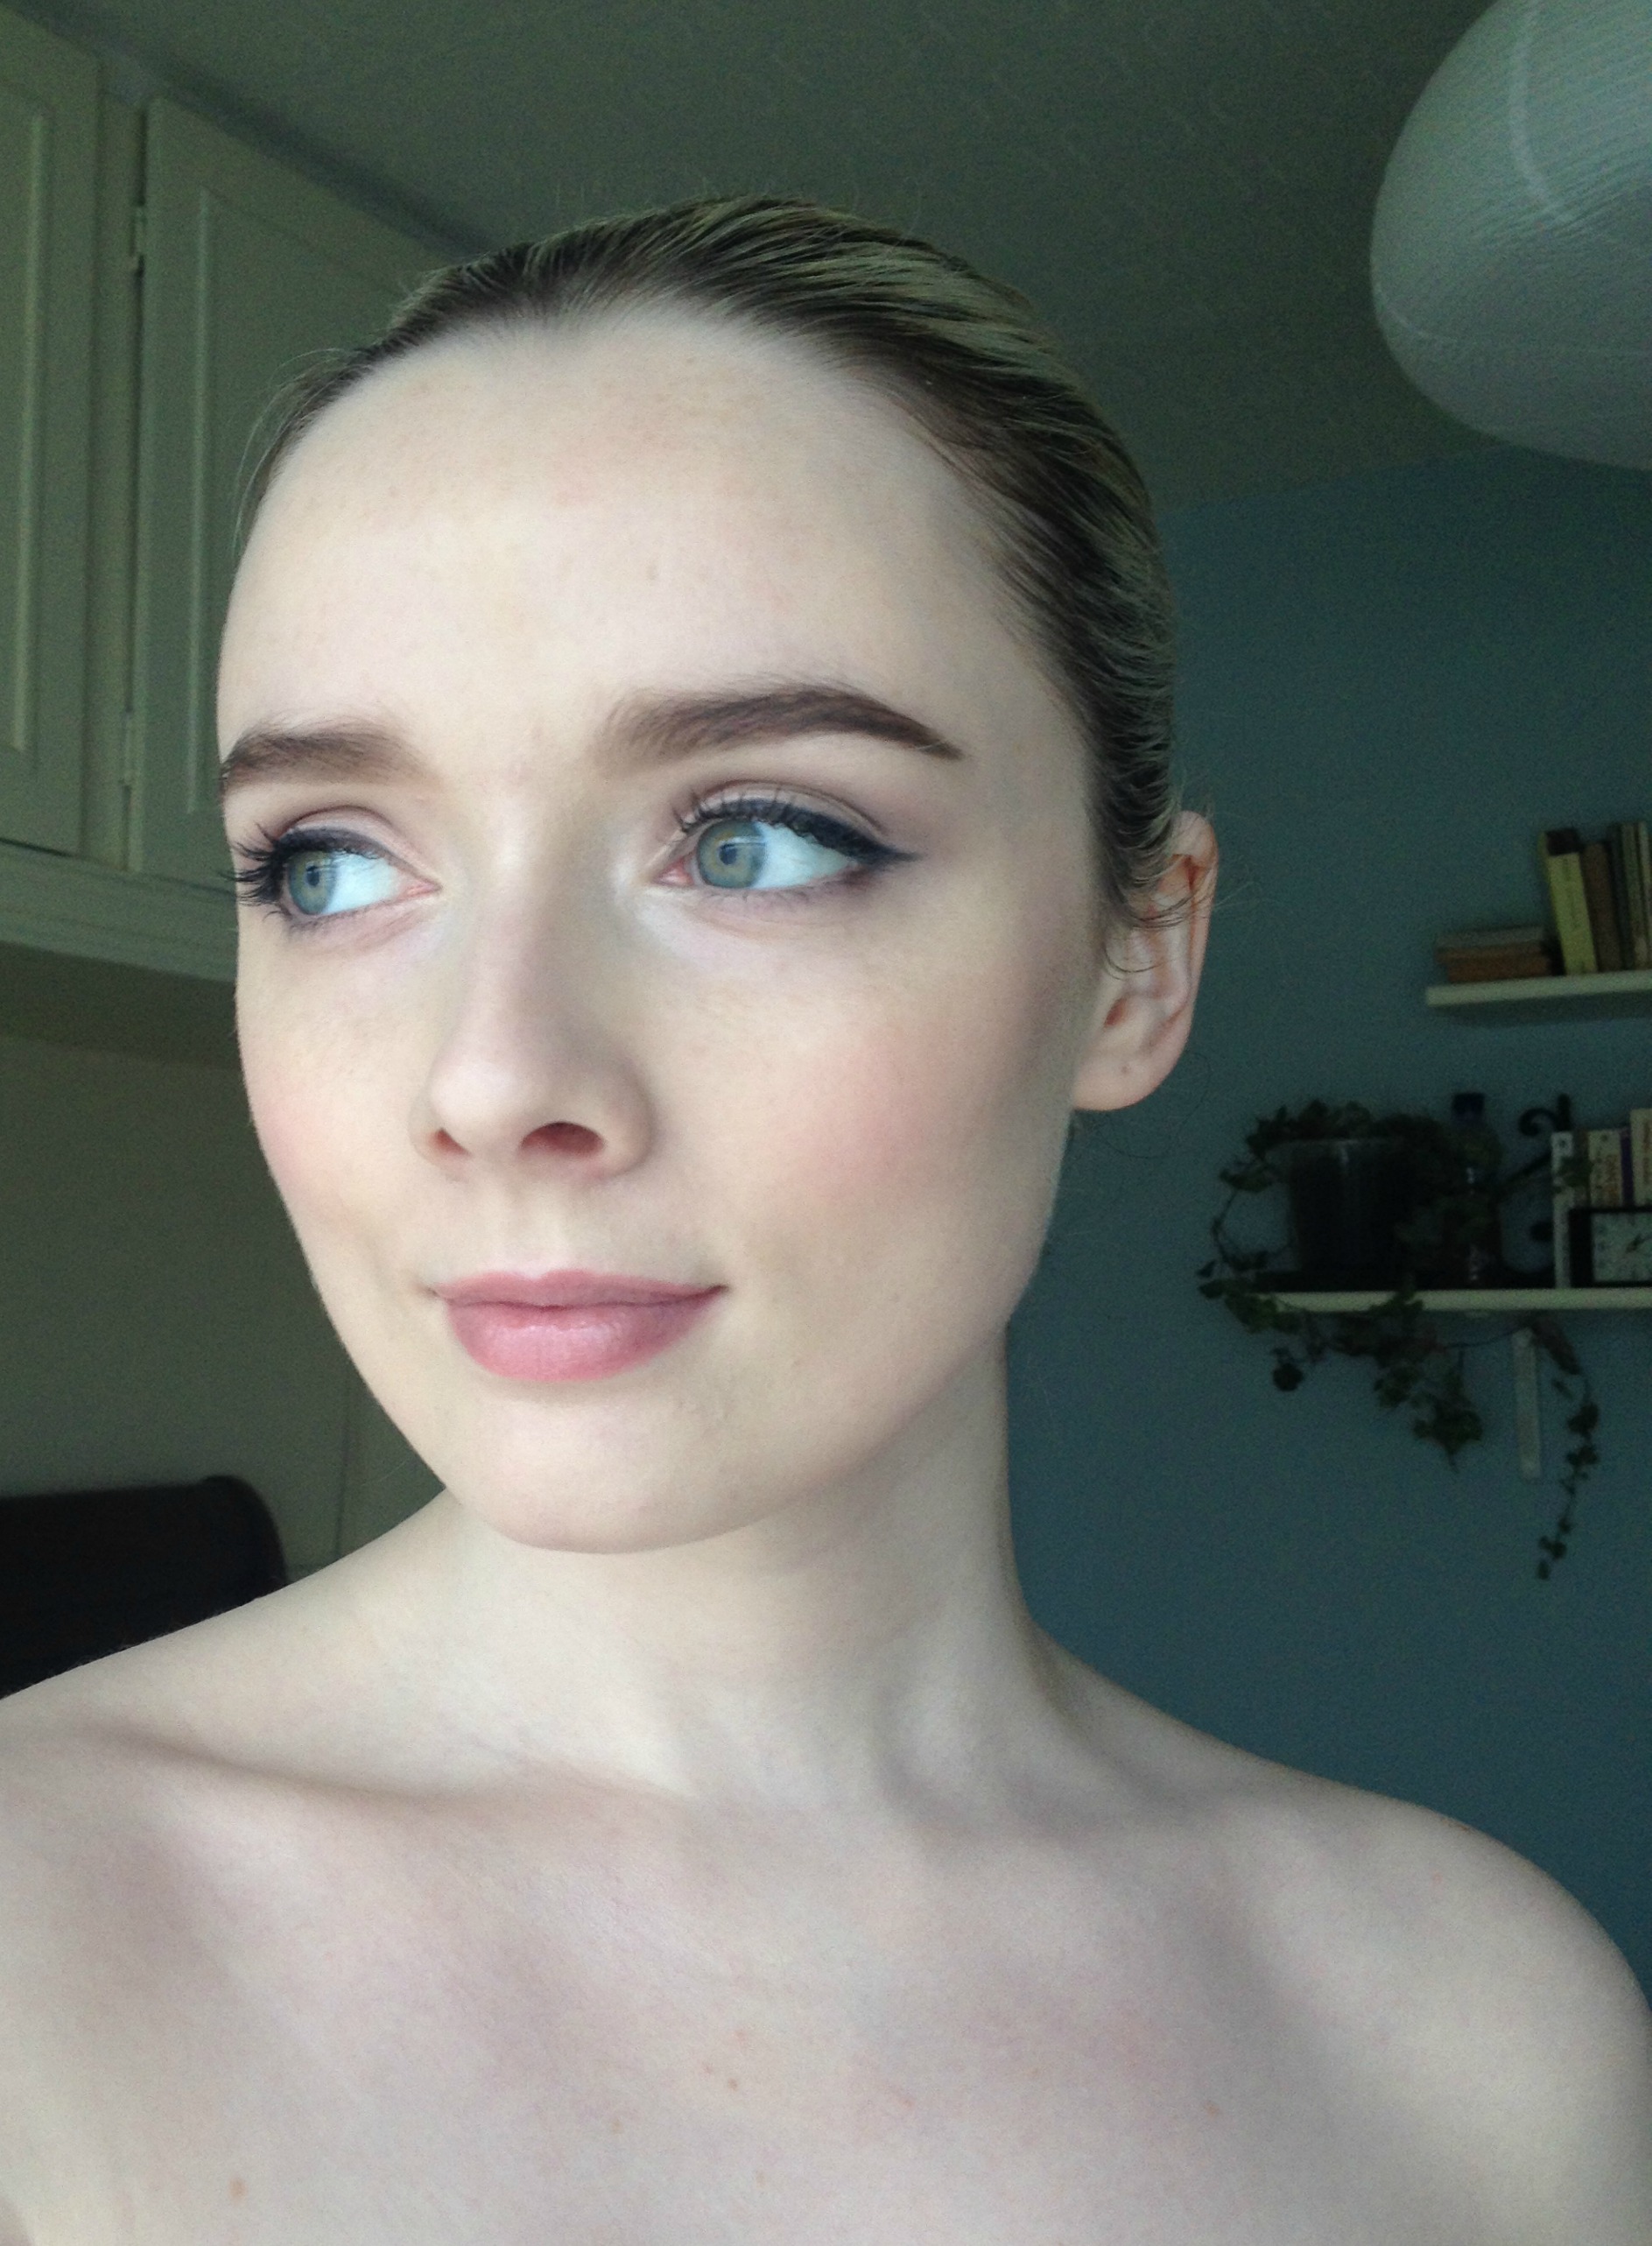
- To my cheeks, I'm applying No. 7's new Pop and Glow cream blush in Rose Blossom. Just dab it on and blend away with fingers.
- To keep lips natural but give them a little structure, I'm lining them with a nude liner. L'oréal's lip liner in Almost Toasted is a classic nude. When you've finished lining the lips, fill them in completely with the liner. This is a great way to achieve an understated lip for bridal makeup. If it wears off while you are eating or with the wear and tear of a long day, it won't be obvious, so you don't have to worry about touching up and can enjoy yourself instead!
- For extra oomph, add a nude gloss. I've fallen creepily, stalkily in love with this Armani Flash Lacquer Crystal Shine Gloss in Ivy. It is literally the perfect nude, and in the spirit of weddings, I want to marry it.
- For a subtle highlight, I'm applying some of Mac's white Crystal Avalanche eyeshadow with a fluffy brush along the cheekbones, brow bones, bridge of the nose, inner corner of the eyes and cupid's bow.
- Be sure to highlight any exposed skin where the light would naturally hit - such as shoulders and collarbones.
Advertised
Bridal makeup seems intimidating, and you might feel that you'd be more comfortable with a professional than you would doing your own makeup. With practice and the right products, however, it's completely possible. I trust you!
Are there any brides here who have done, or intend to do their own wedding makeup? Let's swap tips!

