Beaut.ie How To: Christmas Pudding Nails
I really can't bake worth a damn - my repertoire consists of one cake recipe, although it is a delicious singularity - but Christmassy desserts as a form of nail adornment? Now that I can do...
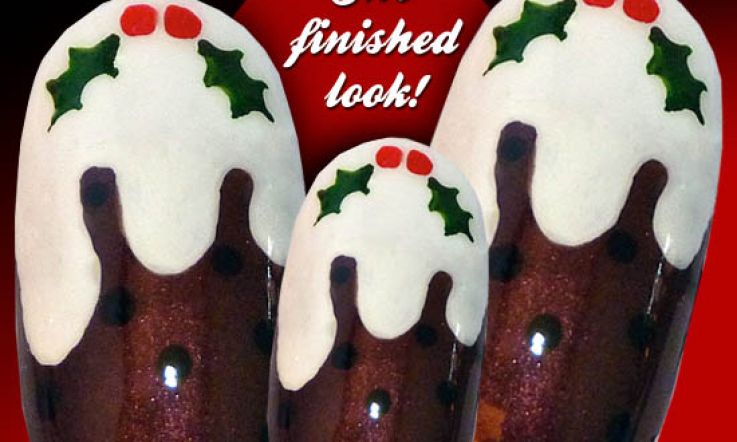
1. Paint the lower third of the nail brown, and work in a couple of stripes if you can manage it to resemble the bits of pudding that cream/custard/ice cream hasn't yet dripped onto.
2. Paint the upper third of the nail white to represent cream/custard/ice cream heaped on top of the pudding, and use a nail art pen or striper brush, if you have one, to fill in the drips. If you don't, you can always simply use a little care and the brush of your white nail polish to do them by wiping off most of the excess from the bristles, leaving just a bead of white polish on the end of the brush. Apply this bead of polish to the nail by gently laying the brush on the nail plate to create a rounded drippy shape and then reduce the pressure on the brush as you draw it towards the tip to help taper the shape of the drip slightly.
Advertisement
3. To garnish your pud, use red polish to dot on holly berries at the tip of the nail (read my dotting tutorial here if you need help) and a green one to create prickly leaves. Wipe almost all of the green polish from the brush, use the edge of its tip to create a rough X shape, and then use that same edge to lay down a line going through the X. (Those who like their nail art with a side of realism can also add fruit-like black dots to the brown 'pudding' portion of the nail.)
4. Pop on some nail art friendly topcoat like Seche Vite or Sally Hansen Insta Dri and you're all done!