

Even when you love makeup as we do here at Beaut.ie HQ, sometimes you just can't be bothered. You want quick makeup that looks great without having to make too much effort. If that's your mood today, then look no further. Here's a simple smoky eye which looks far more complicated than it is. You can add more of the same colours using the same techniques to take it to an amped up evening look, or you can keep it as I've done it below for a defined, doe-eyed, fuss free look.
If your eyes are close set, then this eye makeup will pull them outward. This look will also give longer, narrower eyes a wider, rounder look. You'll need a few shadows from nude to brown, but most of us have a few of those basic colours knocking around the makeup bag! I'll be using the new Stroke of Midnight Palette from the Mac Cinderella collection, because it's jammed with gorgeous, understated colours which will suit everyone!
Step One
- If you're off on your way to do something exciting, then apply your favourite foundation. Since I'm just getting ready for an average working day, and my skin has been playing up recently, I'm trying to be kind to it and leave of the foundation, so I'll just be using concealer in the centre of my face and blending it outward with a Real Techniques Expert Face Brush.
- I'm using Seventeen Stay Time Concealer because it offers nice coverage without settling into the skin, and never looks dry or cakey.
- Next, I'm filling in my brows using an angled brush and two shades of matte brown shadow, as I always do. (Read about how I do it and what I use here!)
Step Two
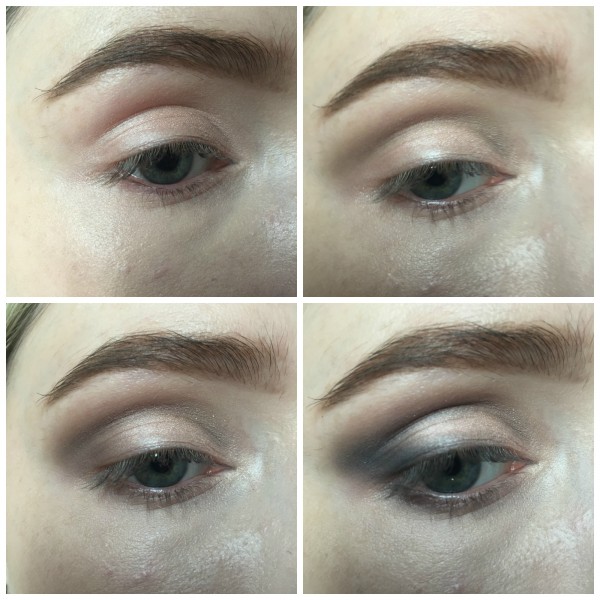
- You don't need the Stroke of Midnight palette for this look; just grab what you do happen to have. First, apply a shimmering nude shadow all over the lid and into the inner corner to open up the eye, as in the top left photo. I'm using Phloof! from the palette, patting it all over the lid with a flat shadow brush.
- Next, to add some depth in the crease of the eye (the part which folds when you open your lid), grab a warm mid toned brown. I'm using Omega, and blending it into and along the crease with a pointed blending brush. Take your time with this step, sweeping the brush over and back as well as in little circles to ensure that your shadow doesn't look harsh.
- I'm using numerous colours for this eye look to ensure that the makeup looks interesting close up, but has a lovely depth even from a distance, so next I'm using Satin Taupe - a chocolatey iridescent shade and a Mac classic - and blending it over the top of the omega with the same brush.
- Because my eyes are roundish in shape, I generally prefer to sweep my shadow outward to make my eyes look longer, but today I'm going for a wide, doe-eyed look. To achieve this, when I get to the outer corner of my eye with my Satin Taupe, I'm looping the shadow down from the crease to my lower lashline, almost in the shape of a letter 'c'. You can see that I've done this in the bottom left photo above. The shadow at the outer corner has a slightly rounded edge.
- Keep blending to ensure a lovely wispy softness to the edges!
- The final shadow is Stroke of Midnight, a warm aubergine shot through with sparkle. I'm focussing this on the outer corner of the eye, blending it half way along the upper lashline and into a 'v' shape at the outer corner of the eyelid, as in the bottom right photo above. You'll see this more clearly in the below photo for step three.
Advertised
Step Three
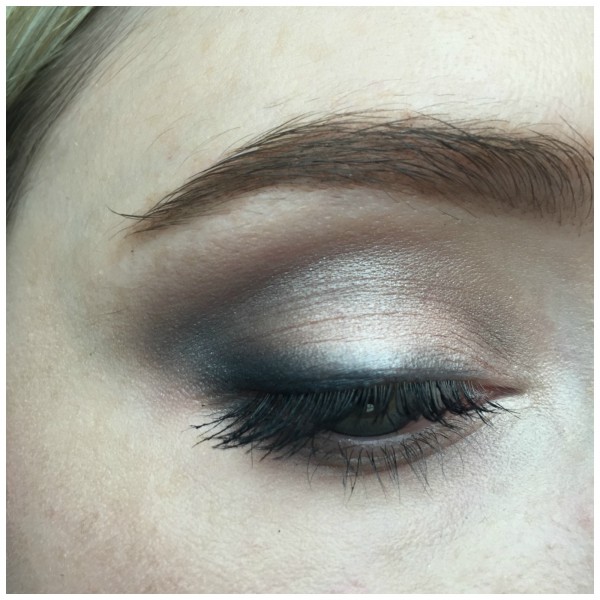
- As you can see, the eye is softly defined and interesting to look at with a range of textures, even though it's subtle enough for every day. If you want to bump up the look for a night time smoky eye, just keep adding more of the deeper colours using exactly the same method, and some false lashes. You'll end up with a really intense look.
- To add more definition, I'm smudging some black pencil liner - any you have to hand will do - half way along the upper lashline to open up the eye. I'm not winging it out though, we're trying to keep a rounder shape. Blend with all your might!
- Next, some mascara. I recommend using something volumising to really open up the eye. Two coats minimum!
Step Four
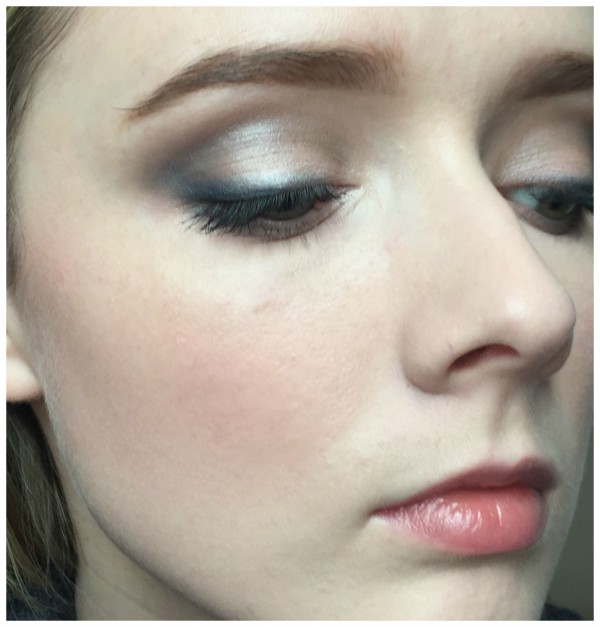
- In keeping with bare(ish!) skin, I'm going lightly on the rest of my makeup, but you don't have to!I'm adding a pop of colour to my cheeks with Clarins Multi-Blush in Grenadine, which is my go-to for a 'natural' flush (don't tell anyone).
- On lips, I'm just wearing the glorious new YSL Volupté Tint-in-Oil which is my current favourite lip product. I'm wearing No 3 Undress Me, which is pretty much without pigment, but is beautiful anyway!
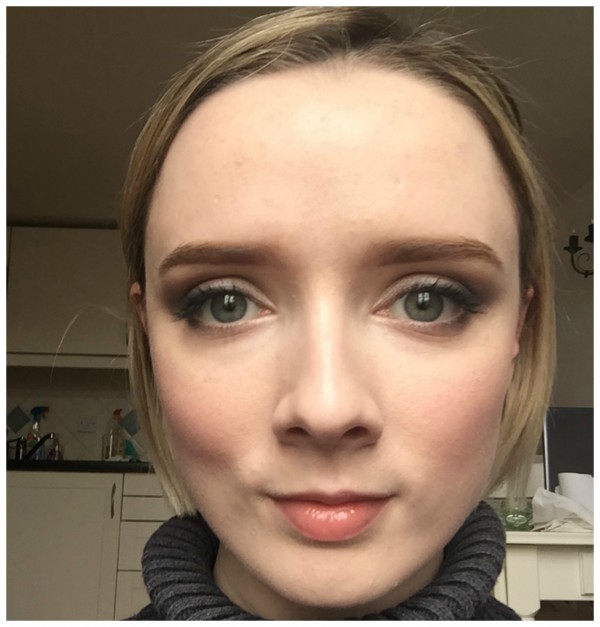
There you have it. Very simple, a great starting point for all kinds of makeup looks, and great to tailor to your own preferences. A little more liner or shadow will give you a really intense eye. Contouring will give you a doe-eyed, sculpted look, and lashes and lipstick will give you full-on glamour! Forgive the flyaway hairs in the photo; I've been trialling some sub-par new hair products!
Advertised
Are you a fan of simple, understated makeup, or more of a glamourpuss? Let us know in the comments! Happy makeupping!

