

Hurrah! It's Saturday, and you know what that means. You get to let your hair down and have some fun.
And we've broken out of our normal weekday territory and into the weekend so we can help you get ready for whatever you're doing this Saturday night. So whether you're headed out for a night on the town, or just feel like experimenting with your makeup in a onesie at home, get your kit together!
This smokey eye will work for everyone. You can tone it down if you want a subtler look, and you can amp it up if you're looking for something really dramatic!
Step One
- I'm using mostly Mac eyeshadows, but you can use anything you have in a similar colour. For my base, I'm applying Mac's Brulee all over the eyelid with a flat shadow brush.
- Next, with a fluffy brush, I'm blending some Mac Woodwinked, an antique gold shade, into the socket of my eye from the inner corner all the way through the crease of the eye. Take this under the eye too - half way across.
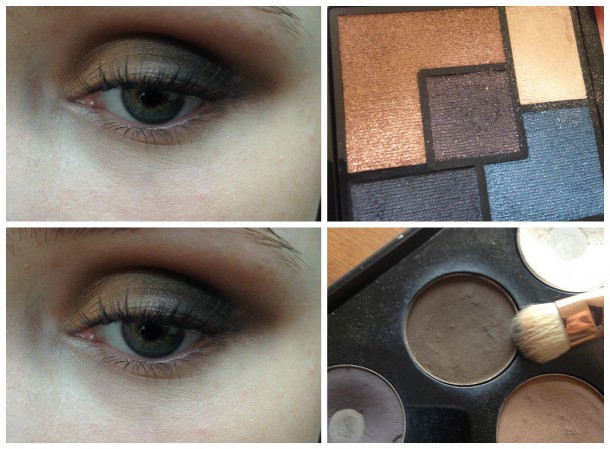
Step Two
- Next, take a deep brown shadow on a flat shadow brush. I'm using the central brown shade from my YSL Black Fétiche Collection Palette.
- Pat this on the outer third of the eyelid, as in the above photo, and blend with a clean fluffy brush until there are no harsh lines.
- Next, to blend your colours together nicely, blend a matte brown shade through the socket. I'm using Mac's Brun- it ties the other shadow colours together.
- Grab your burnt gold shadow again (Woodwinked) and run it half way along the lower lashline from the inner corner.
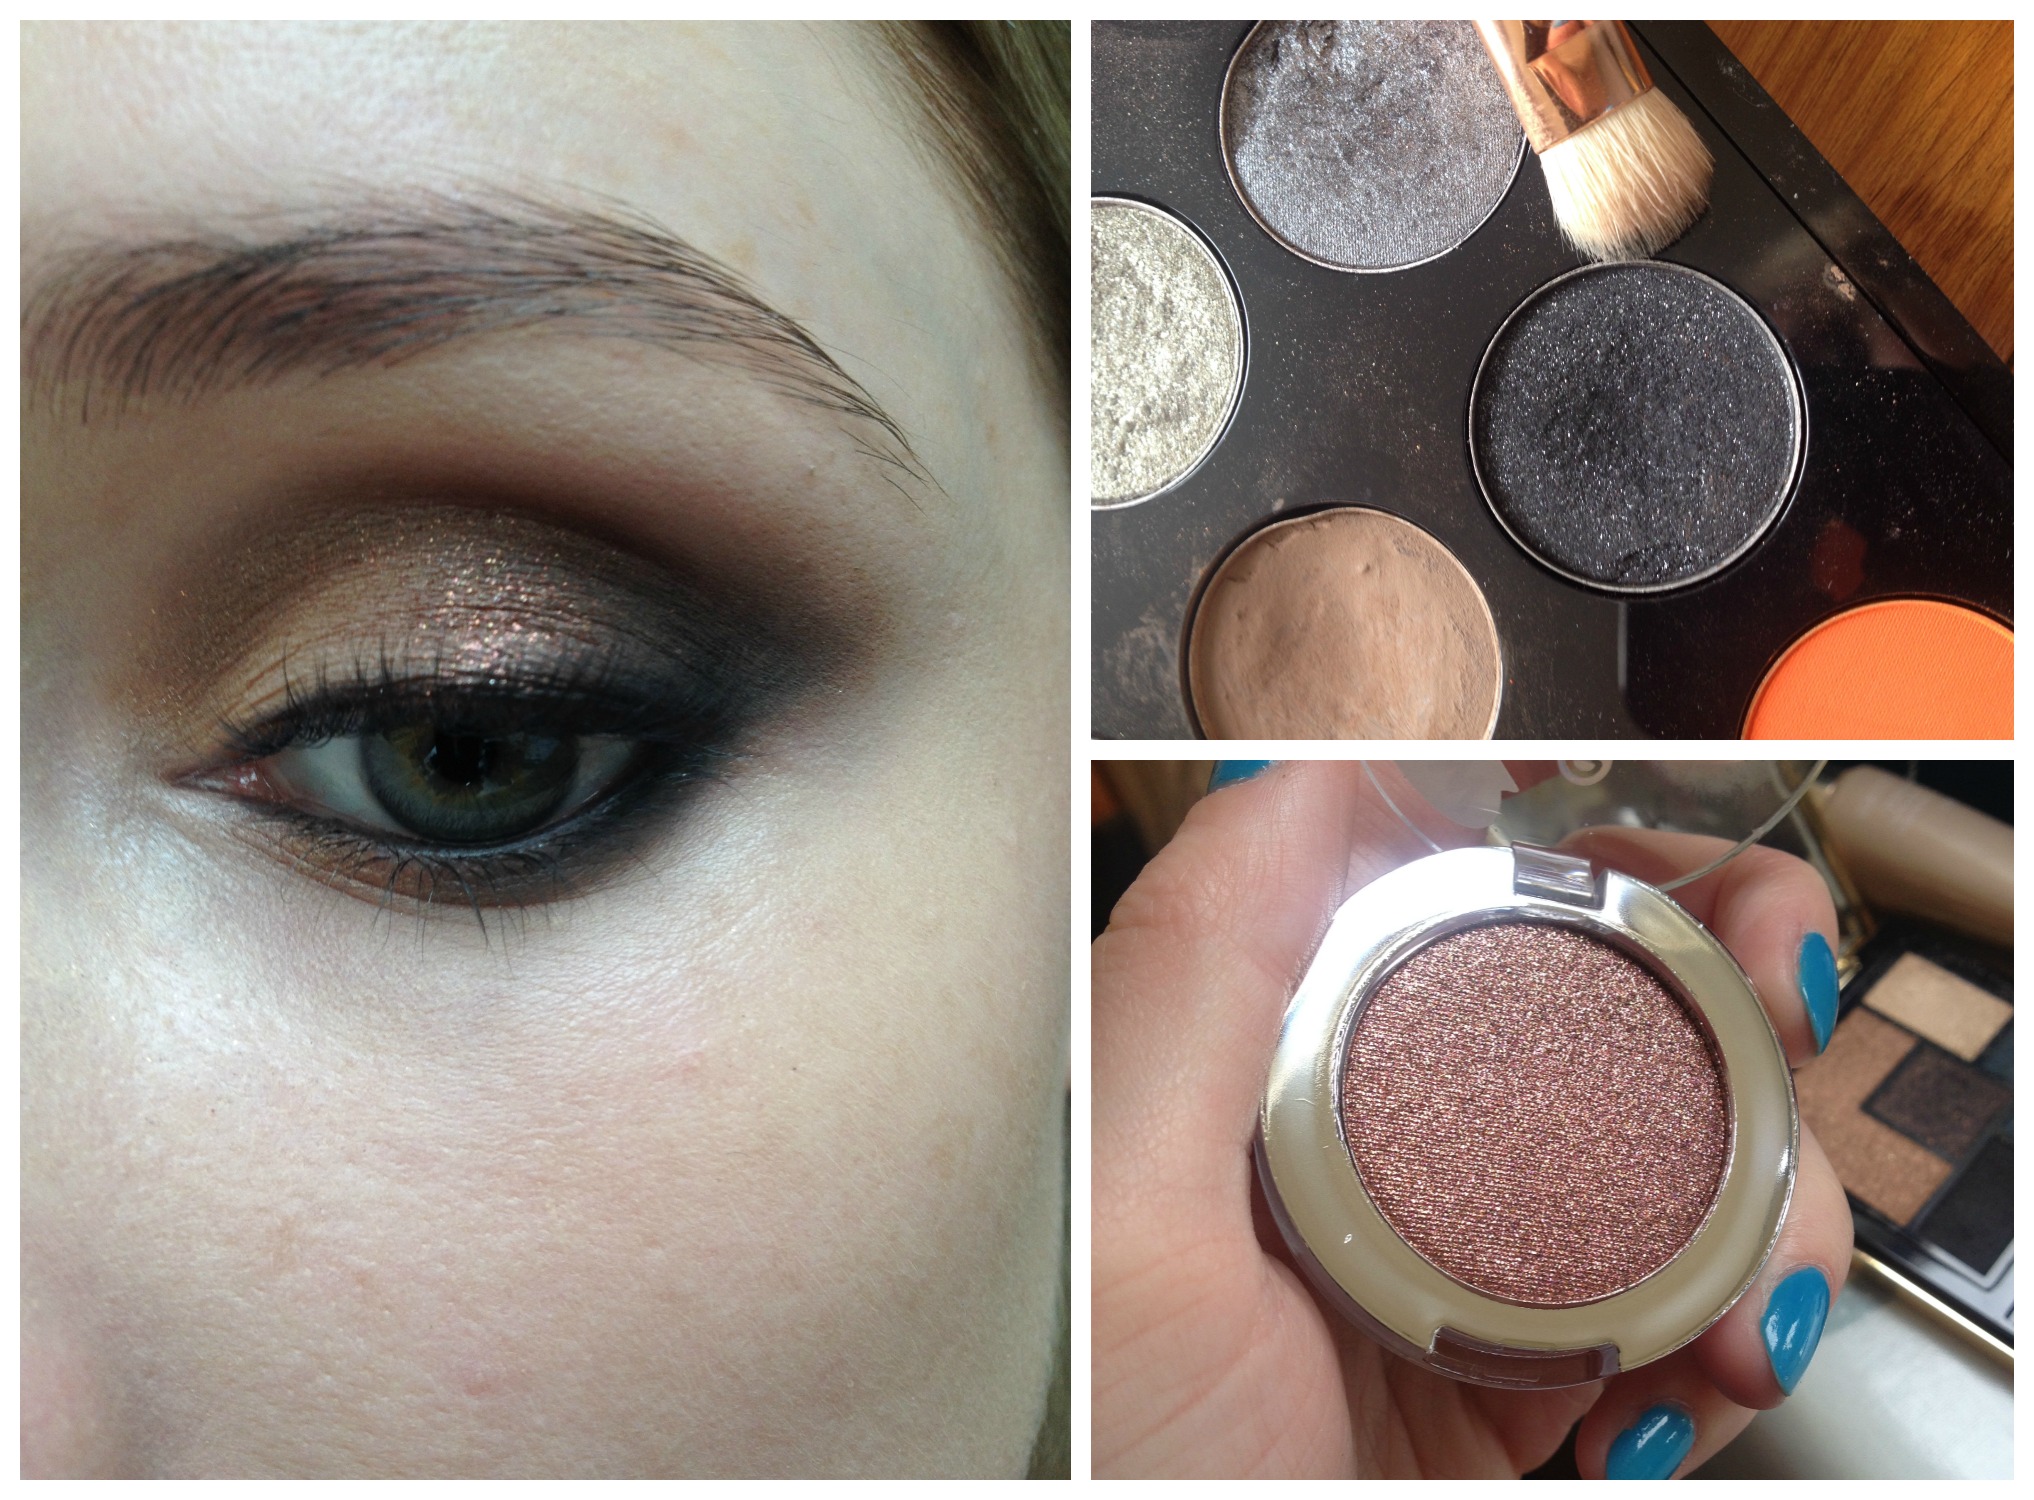
Step Three
- Grab an angled liner brush and some black eyeshadow - I'm using Mac's sparkly Black Tied shadow- and line your eye. Shadow is easier to work with than gel or liquid liner. Just pat it along the upper lashline, pulling upwards as you go to blend away the hard edge and create a smokier look.
Advertised
- Blend this under the eye too, half way along.
- To add some extra dimension, I'm adding a touch of glittery amber eyeshadow just to the centre of the eyelid. I'm using essence metal glam shadow in Choco-chic. I'm just dabbing it on with my ring finger.
- Grab your favourite black eyeliner and line your waterline - top and bottom. If having the pencil in your eye gives you the heebie jeebies, skip this step. It isn't essential.
- Mascara time! You can apply some falsies to give the eye some serious oomph, but I'm just going with two coats of volumising mascara.
- You can also now gauge how much brow makeup you want. Your normal amount might look too heavy with such a strong eye, so apply it after the eye makeup to keep everything in proportion. I've filled mine in with omega shadow from Mac.
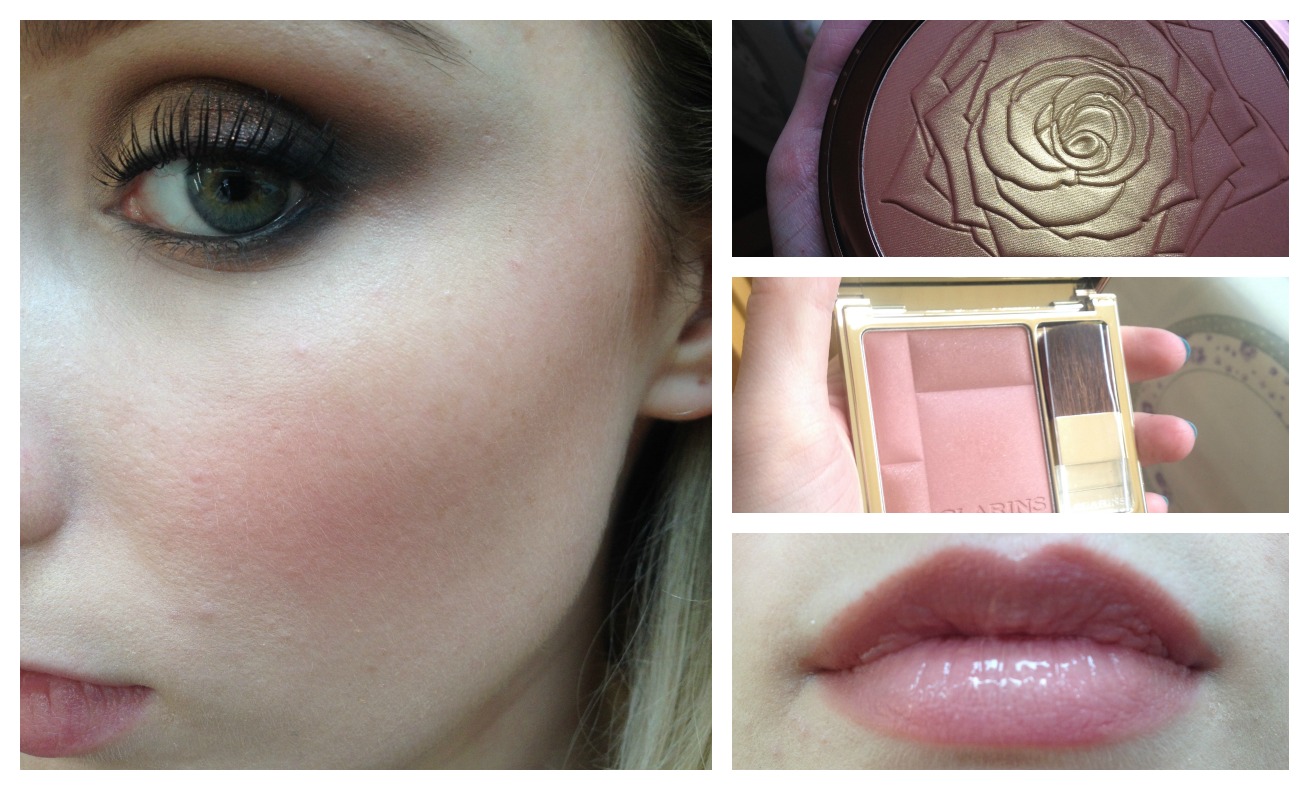
Step Four
- Because the eye makeup is extensive and you will get some falldown, it's best to wait till your eyes are finished before applying foundation. I've chosen MakeUpForEver HD foundation, and I'm applying it with a Real Techniques Expert Face Brush, which creates an airbrushed finish.
- Since this is an evening look, a little contouring will add definition without looking too obvious. I'm using my beloved Lancome Star Bonzer. I'm avoiding the gold area in the centre of the palette (see photo) and using just the matte part around the edges, applying it in the hollow of my cheekbone and on my temples. Start with a little, then build it up until you're happy with how it looks!
- I'm applying some blush - just to the apples of my cheeks. I'm using Blush Prodige in Tawny Pink from the latest Clarins autumn collection. It has a perfect deep pink undertone without looking heavy.
- To top it off, I'm going for a natural lip colour. I've lined and filled in my lips with Mac Cream O' Spice lip liner and added a touch of nude gloss to the centre of my lips to give the impression of a little more volume! I'm using Armani Flash Lacquer in shade 514.
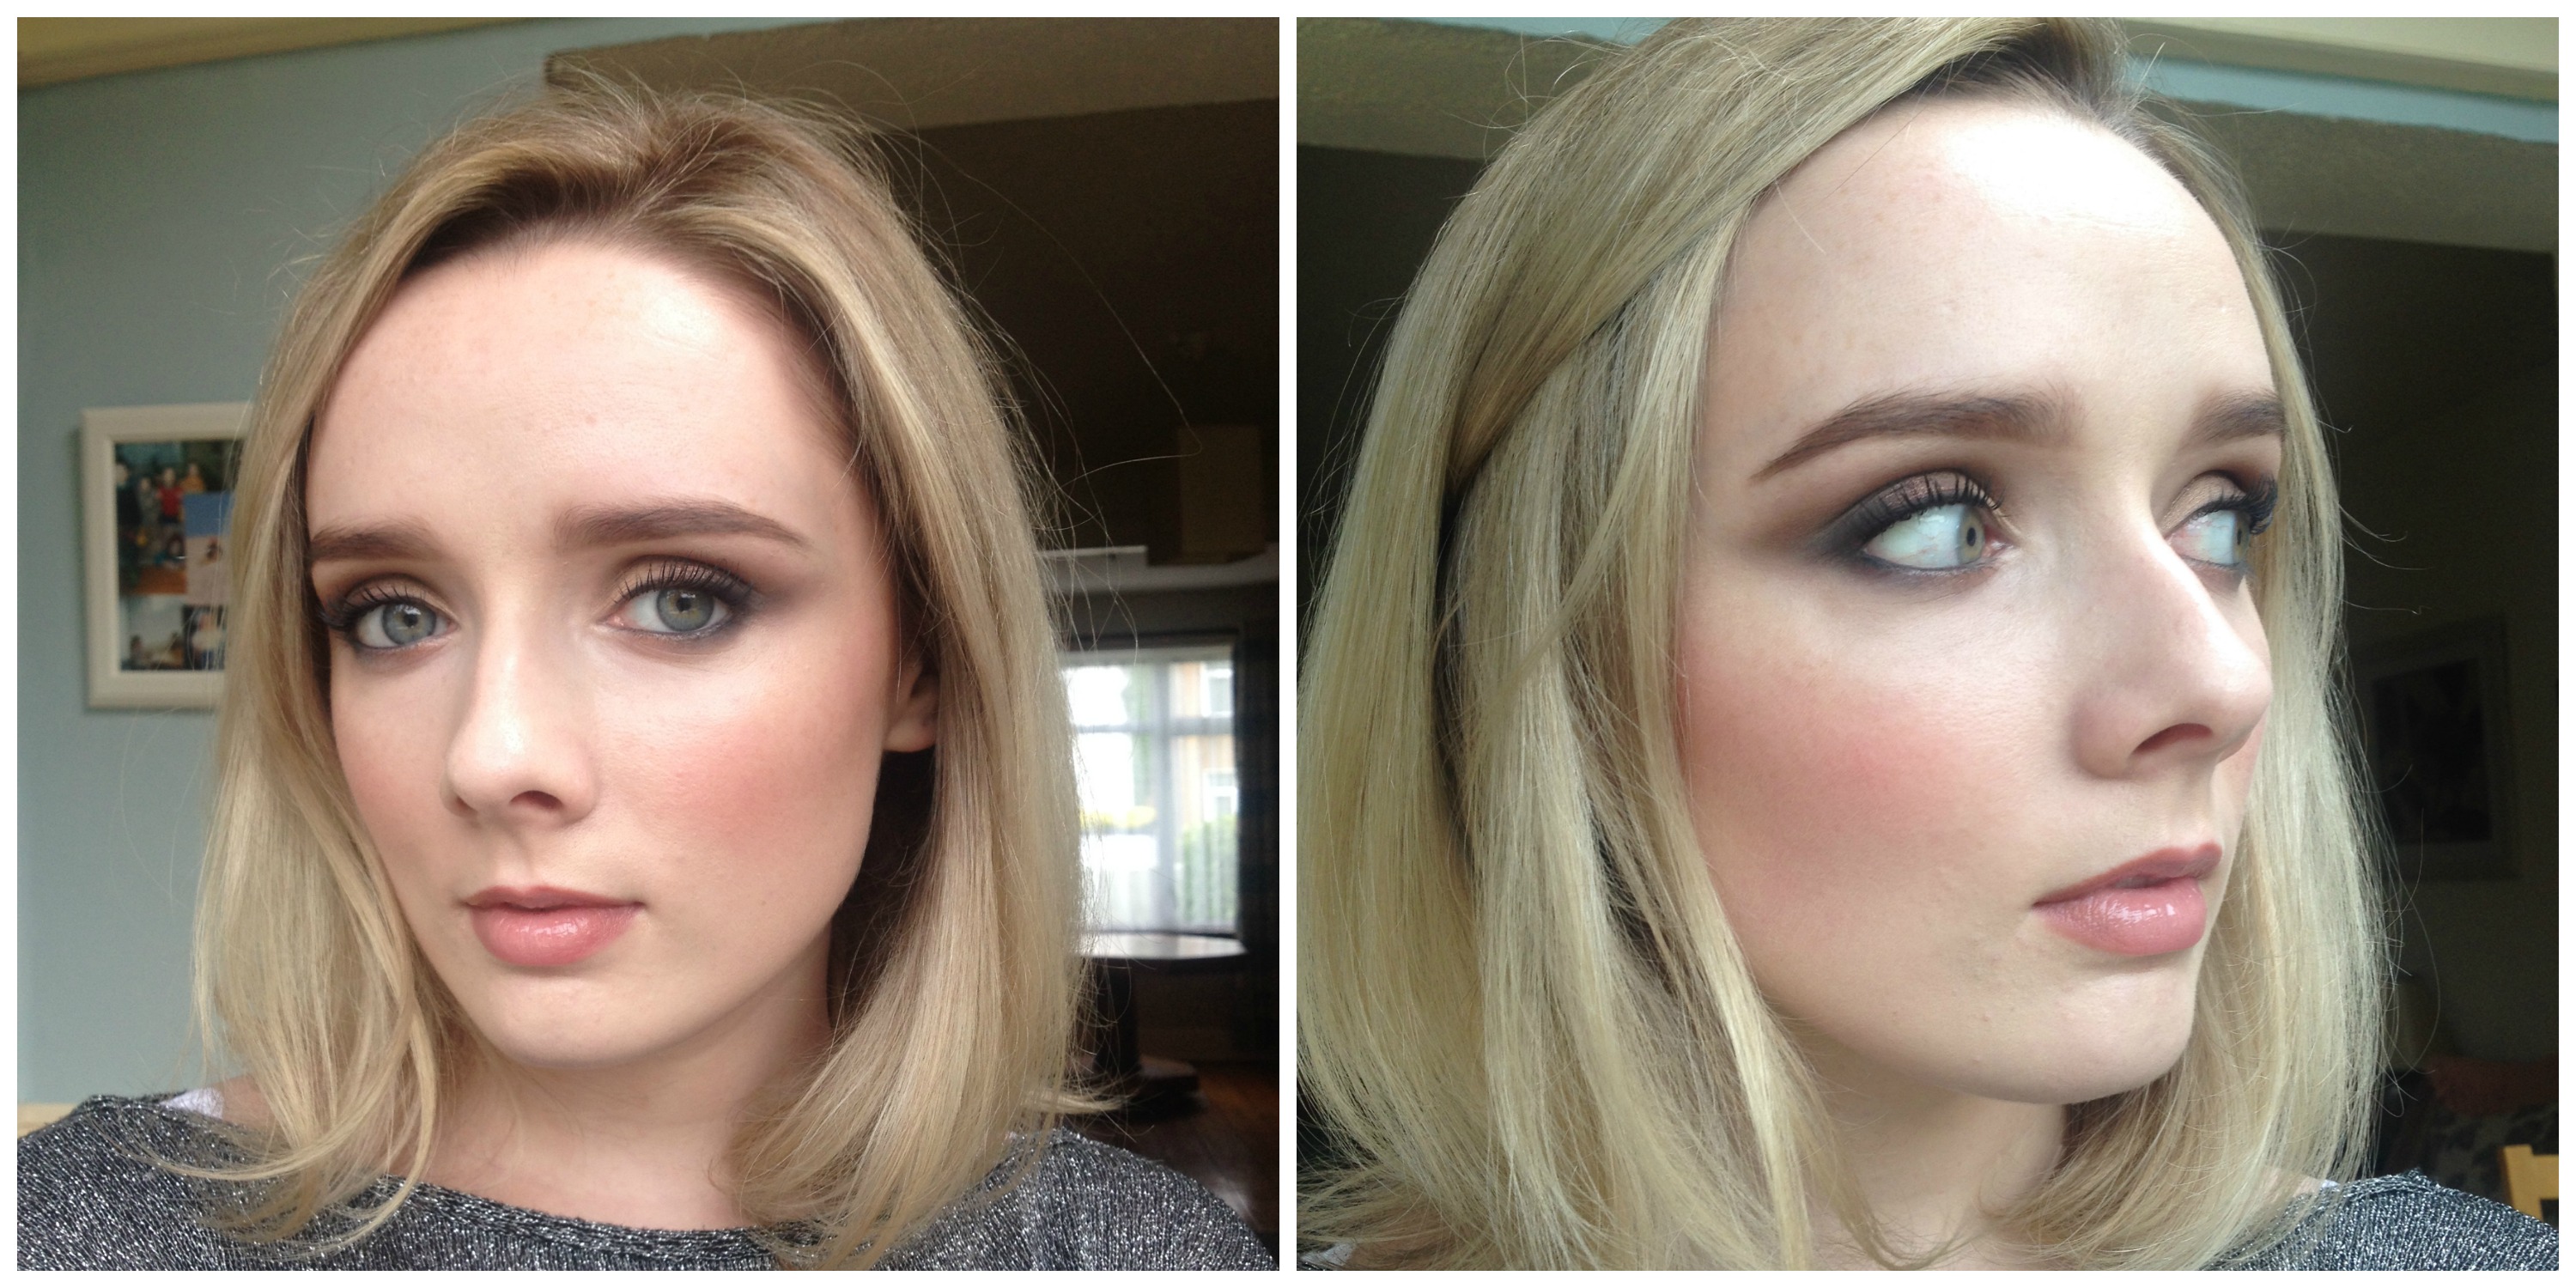
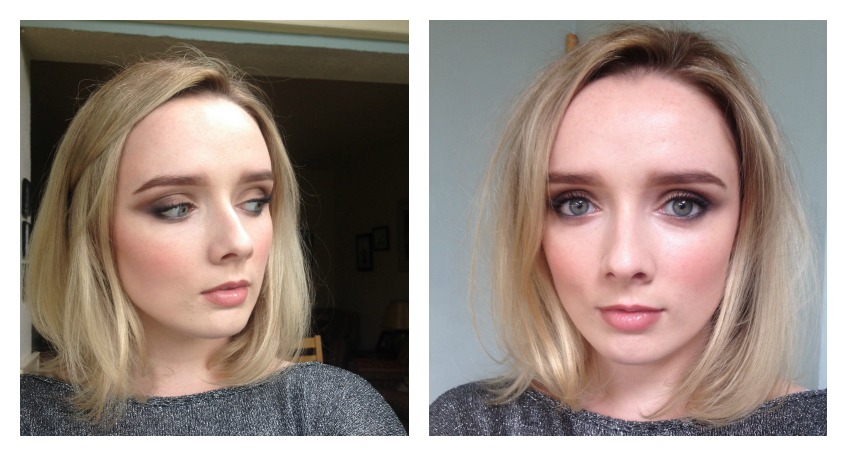
Done!
Advertised
We will be doing a series of Saturday posts, all showing you how to get a particular look in our step-by-step tutorials. We can't be in your bedroom with you, topping up your glass and showing you how to hold the brush to blend perfectly, but this is the next best thing. All the Beauties are getting ready together! And we'd LOVE to see some finished shots so feel free to tweet us @Beautie. And if you have any looks that you'd love to see a tutorial for, do let us know in the comments.
So what are you doing tonight? And will you be trying out this look? And who is bringing the nachos?

