

The glory of our sparkly Christmas tutorials is sadly ended. Though here at Beaut.ie, we will still be wearing glitter all year round. We sprinkle it on the biscuits and dash it over any visitor to Beaut.ie HQ with what might be described as excessive enthusiasm.
Though we love some OTT sparkle, we also like to master the basics, and we know that lots of people love the idea of makeup, but just don't know where to start! We've already looked at mastering brows and the basics of lipstick. We've even covered basic cat eyeliner!
Blush might seem pretty straightforward to more practised makeup lovers, but nothing is simple until you know how to do it, so we're going all the way back to the beginning with this one!
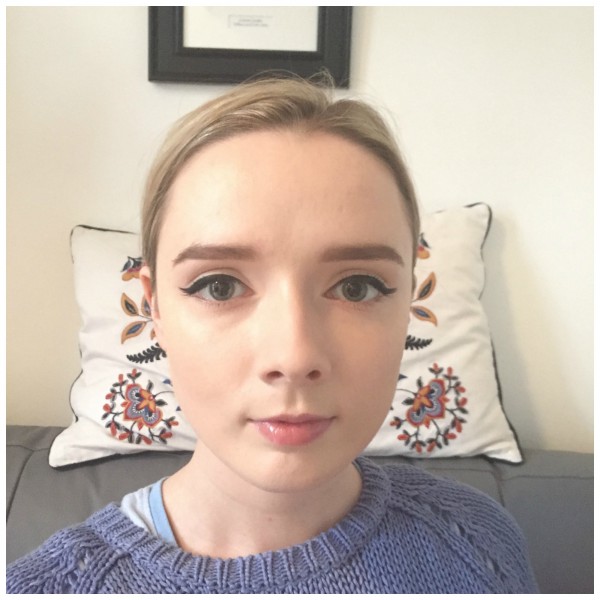 Blush-free!
As you can see in the above photo, my makeup is fully done apart from the blush. Though I don't look terrible, I look a little rounder and more baby-faced than I do with blush, and more importantly, my complexion looks flat. So I look like I'm wearing more foundation than I will appear to be wearing when I apply blush and restore balance to my face!
Cream Blush
- There are lots of different formulations of blush, but the two standard kinds are cream and powder. And today I am going to tackle the cream version.
- With a cream, unless it is matte, you will generally get a dewier finish which gives the skin some glow.
- When applying cream blush, always do so before powder. So apply it straight onto a face which is still a little tacky from foundation. Blush applied over powder will clog and look mottled and uneven.
- I like to apply cream blush with my fingers - it gives me ultimate control, and blends the product into the skin for a seamless finish.
- There are many ways to apply blush, but I'm going for a sweet, fresh-faced look with this Blush (It's Mac's Lip and Cheek Colour in Lazy Sunday), so I'm only applying it to the apples of my cheeks. To find the apple, smile! It's the pillowy part of your cheek that forms when you grin into the mirror!
- Apply a little first, building up slowly. It's easy to add more, but difficult to remove too much. Dab the blush into your cheek and blend the edges away with a clean finger. Be very gentle, otherwise you will redden your skin, and pull the foundation away from underneath.
- Voilá! (See below image).
Advertised
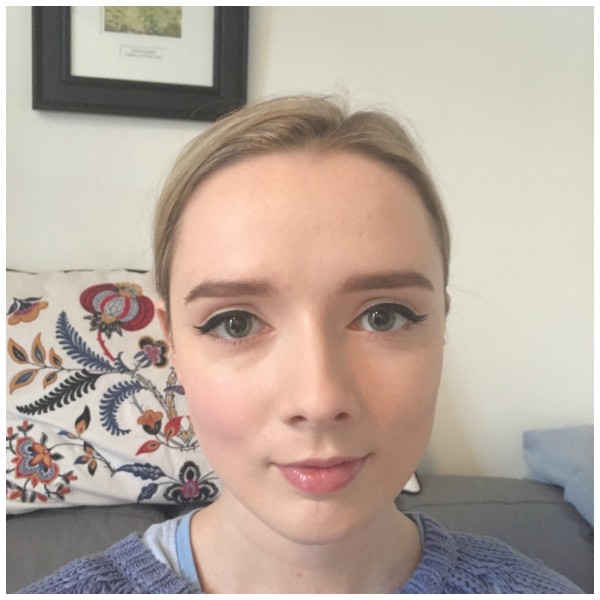 Cream blush on left cheek only
As you can see, the side of my face with blush (left) looks more sculpted (even though the right cheekbone is in shadow, which should actually make it look more defined, not less). The left cheekbone looks higher, and my face looks generally perkier and less flat than it did in the previous photo!
I popped some powder blush on my right cheek to balance it up and I'll be chatting a little bit more about the differences between powder and cream next week on site so make sure you check back in for that!
 Left cheek: Cream Blush. Right Cheek: Powder Blush
In comparison to the first photo above, my skin definitely looks glowier my face looks more awake!
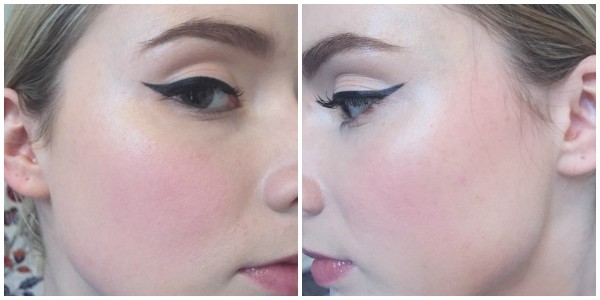 Left: Cream blush applied to apple of the cheek. Right: Powder Blush applied on the apple and back as far as the hairline.
Advertised
The two application methods produce a subtly different finish - use whichever feel best for you. You can equally apply powder blush just to the apple, or take your cream blush back along the cheekbone to add more structure!
Are you a blush fanatic, or are you a bit frightened of it? Feel free to post your blush-related questions below, and I'll be back to you in a jiffy! To the comments!

