

A smoky eye works on literally everyone. A subtle version looks good for day, and a more intense version will suit any evening occasion. A smoky eye doesn't have to be black; you can use literally any colour scheme.
Working with a matte finish can be tougher than working with metallics or satin finishes, which can be more forgiving. Blending is always very important, but badly blended shadow is most obvious with mattes, so it's best to build up slowly and take your time.
Here's a great brown-based matte smoky eye look for whatever you might be doing tonight! It's a classic and will never let you down.
Step One
- This eye look is good for blending beginners as it's tonal - blending different colours into one another is tougher. Here, I'm sticking to graduated shades of brown from light to dark.
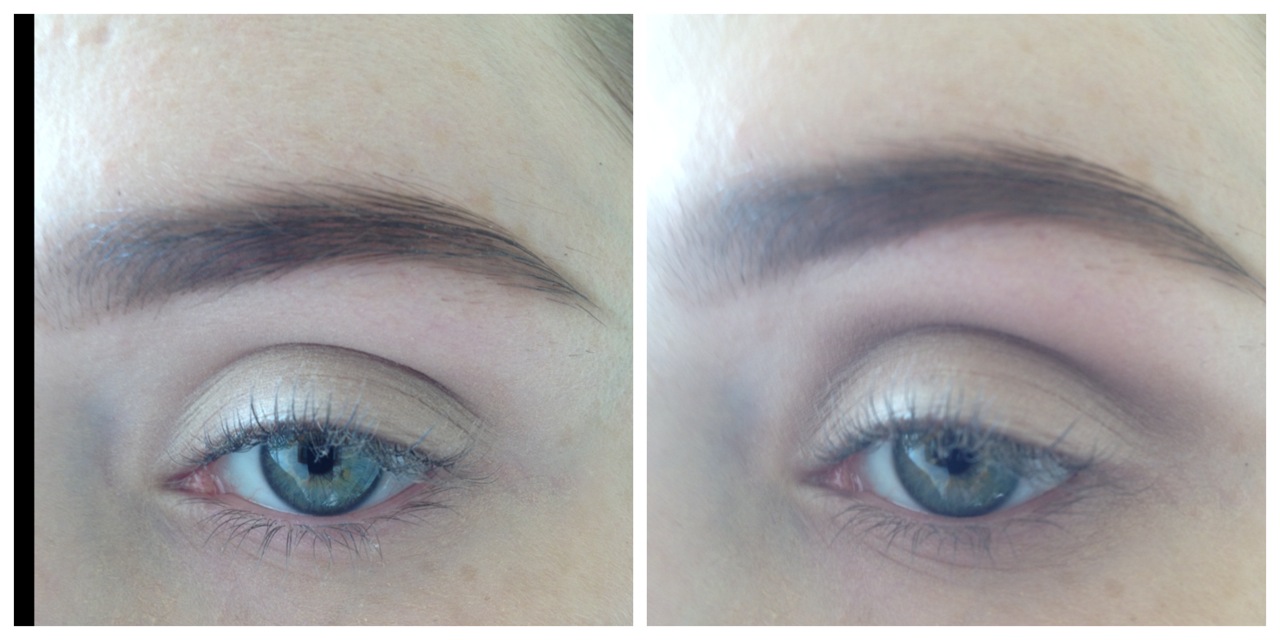
- You might prefer to leave your base and do your eyes first - working with a lot of shadows can cause dropdown which will ruin your foundation. I'm going to apply my base now, though. I'm using YSL's Fusion Ink Foundation, and I'm applying it with fingers
- Next, fill in your brows as normal. I'm using my go-to shadow from Mac in Omega and an angled brush. I'm filling them in, but I'm not going too heavily; brows aren't the focus of this look.
Step Two
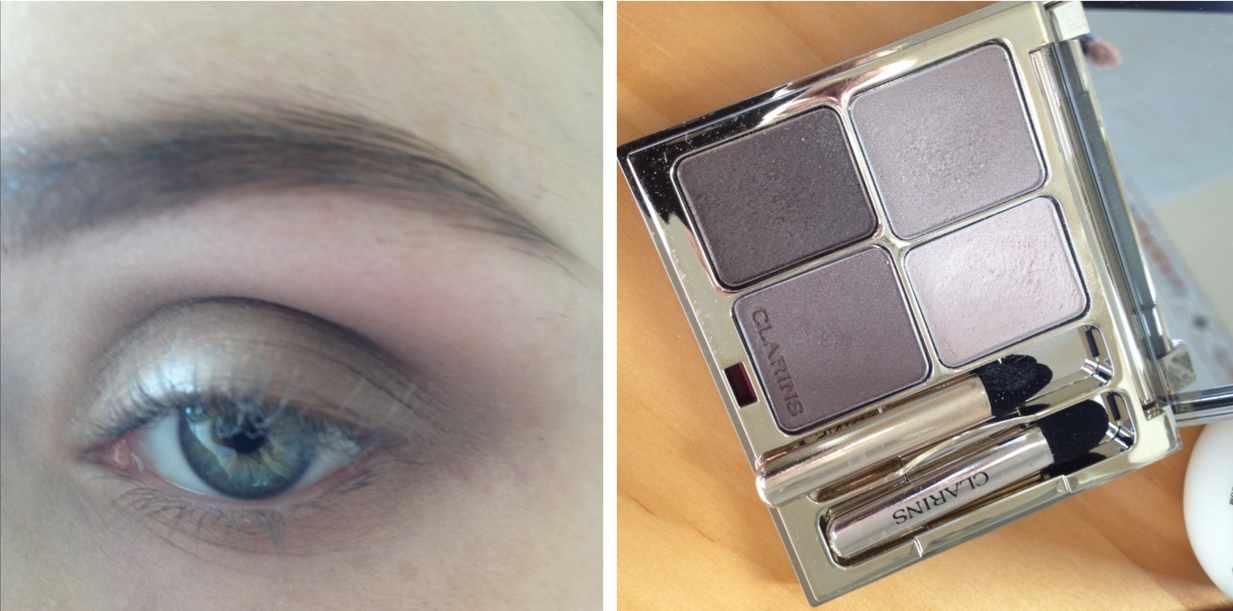
- This Clarins Palette is the perfect all rounder. Its earth tones range from a taupey beige to rich chocolate and its perfect for day or evening makeup. This is one of those reliable palettes you'll use to death without leaving any of the colours untouched.
- With a flat shadow brush, press the nude shade all over the lid all the way up to your brow. Using a pressing motion rather than dragging the brush will keep falldown to a minimum. You want the shadow on your eyes, not all over your face!
- Take the lightest brown shade - obviously you don't need this palette, any matte browns will do - on a fluffy brush and apply it to the outer third of the eyelid, blending as you go. Take your time and blend blend blend until all the edges are soft!
Advertised
Step Three
- With the same fluffy brush, apply the next darkest brown shade in along the crease of your eye, taking care to blend as you go. Take this over the outer third of the lid as well, and along the lower lashline. You should be starting to see definition now!
- Next, apply the darkest brown shade along the lower lashline and through the crease of the eye. Instead of elongating the eye by drawing the shadow out into a flick as I usually might, I'm bringing the dark brown shadow around and down from the crease to meet the lower lashline in a sort of C shape at the outer corner. This will give a more roundeyed look.
- To help with seamless blending, grab a clean fluffy brush at this point. Load a little of the lightest brown shadow on it, and use that to blend the edges of the dark shadow.
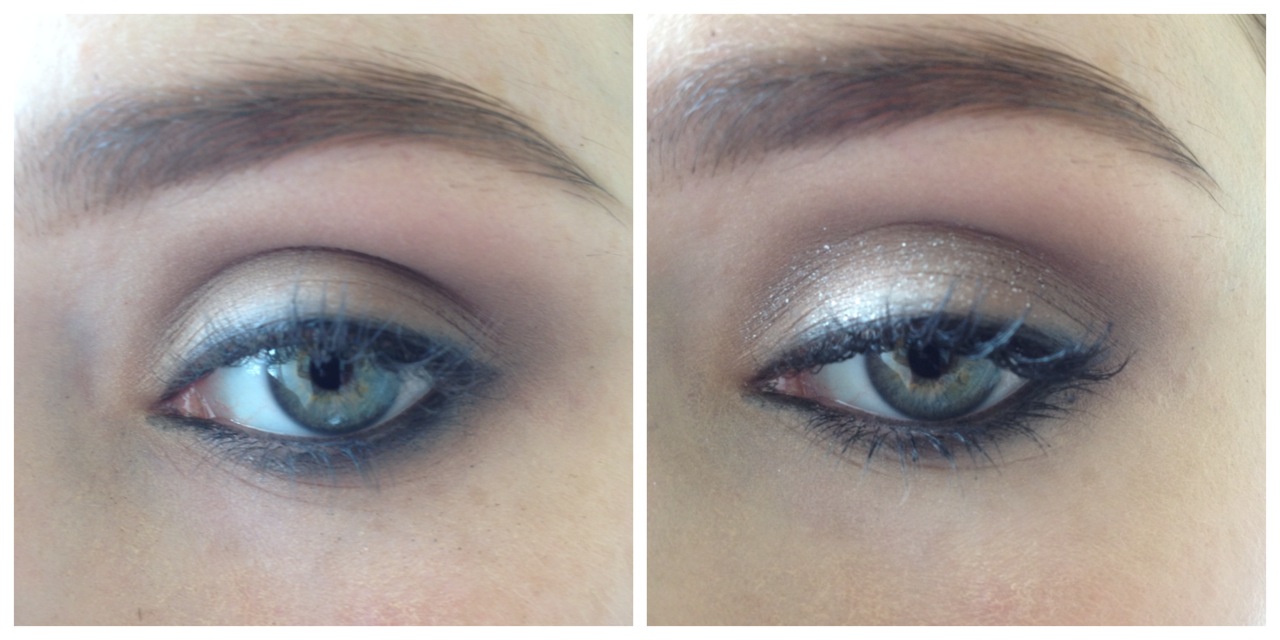
- Add a generic silver glitter over the centre of the lid to add some dimension. I'm using a loose pigment from Mac.
Step Four
- Next, it's time for liner! A flick would ruin our round-eyed look, so I'm just using a pencil liner (Bourjois' Volume Clubbing Waterproof) and running it along the upper lashline. Use a blending brush to smudge it. Do the same along the lower lashline, then run the liner along the upper and lower waterline. If you're a bit squeamish about your eyes, skip this step.
- False lashes would widen the eye more than I want, so I'm using some serious mascara instead. I'd never really considered Laura Mercier as a brand for mascara, but I'm seriously impressed with this full Blown Volume Supreme Lash Building Mascara. Go for two coats, and don't be shy about it!
Step Five
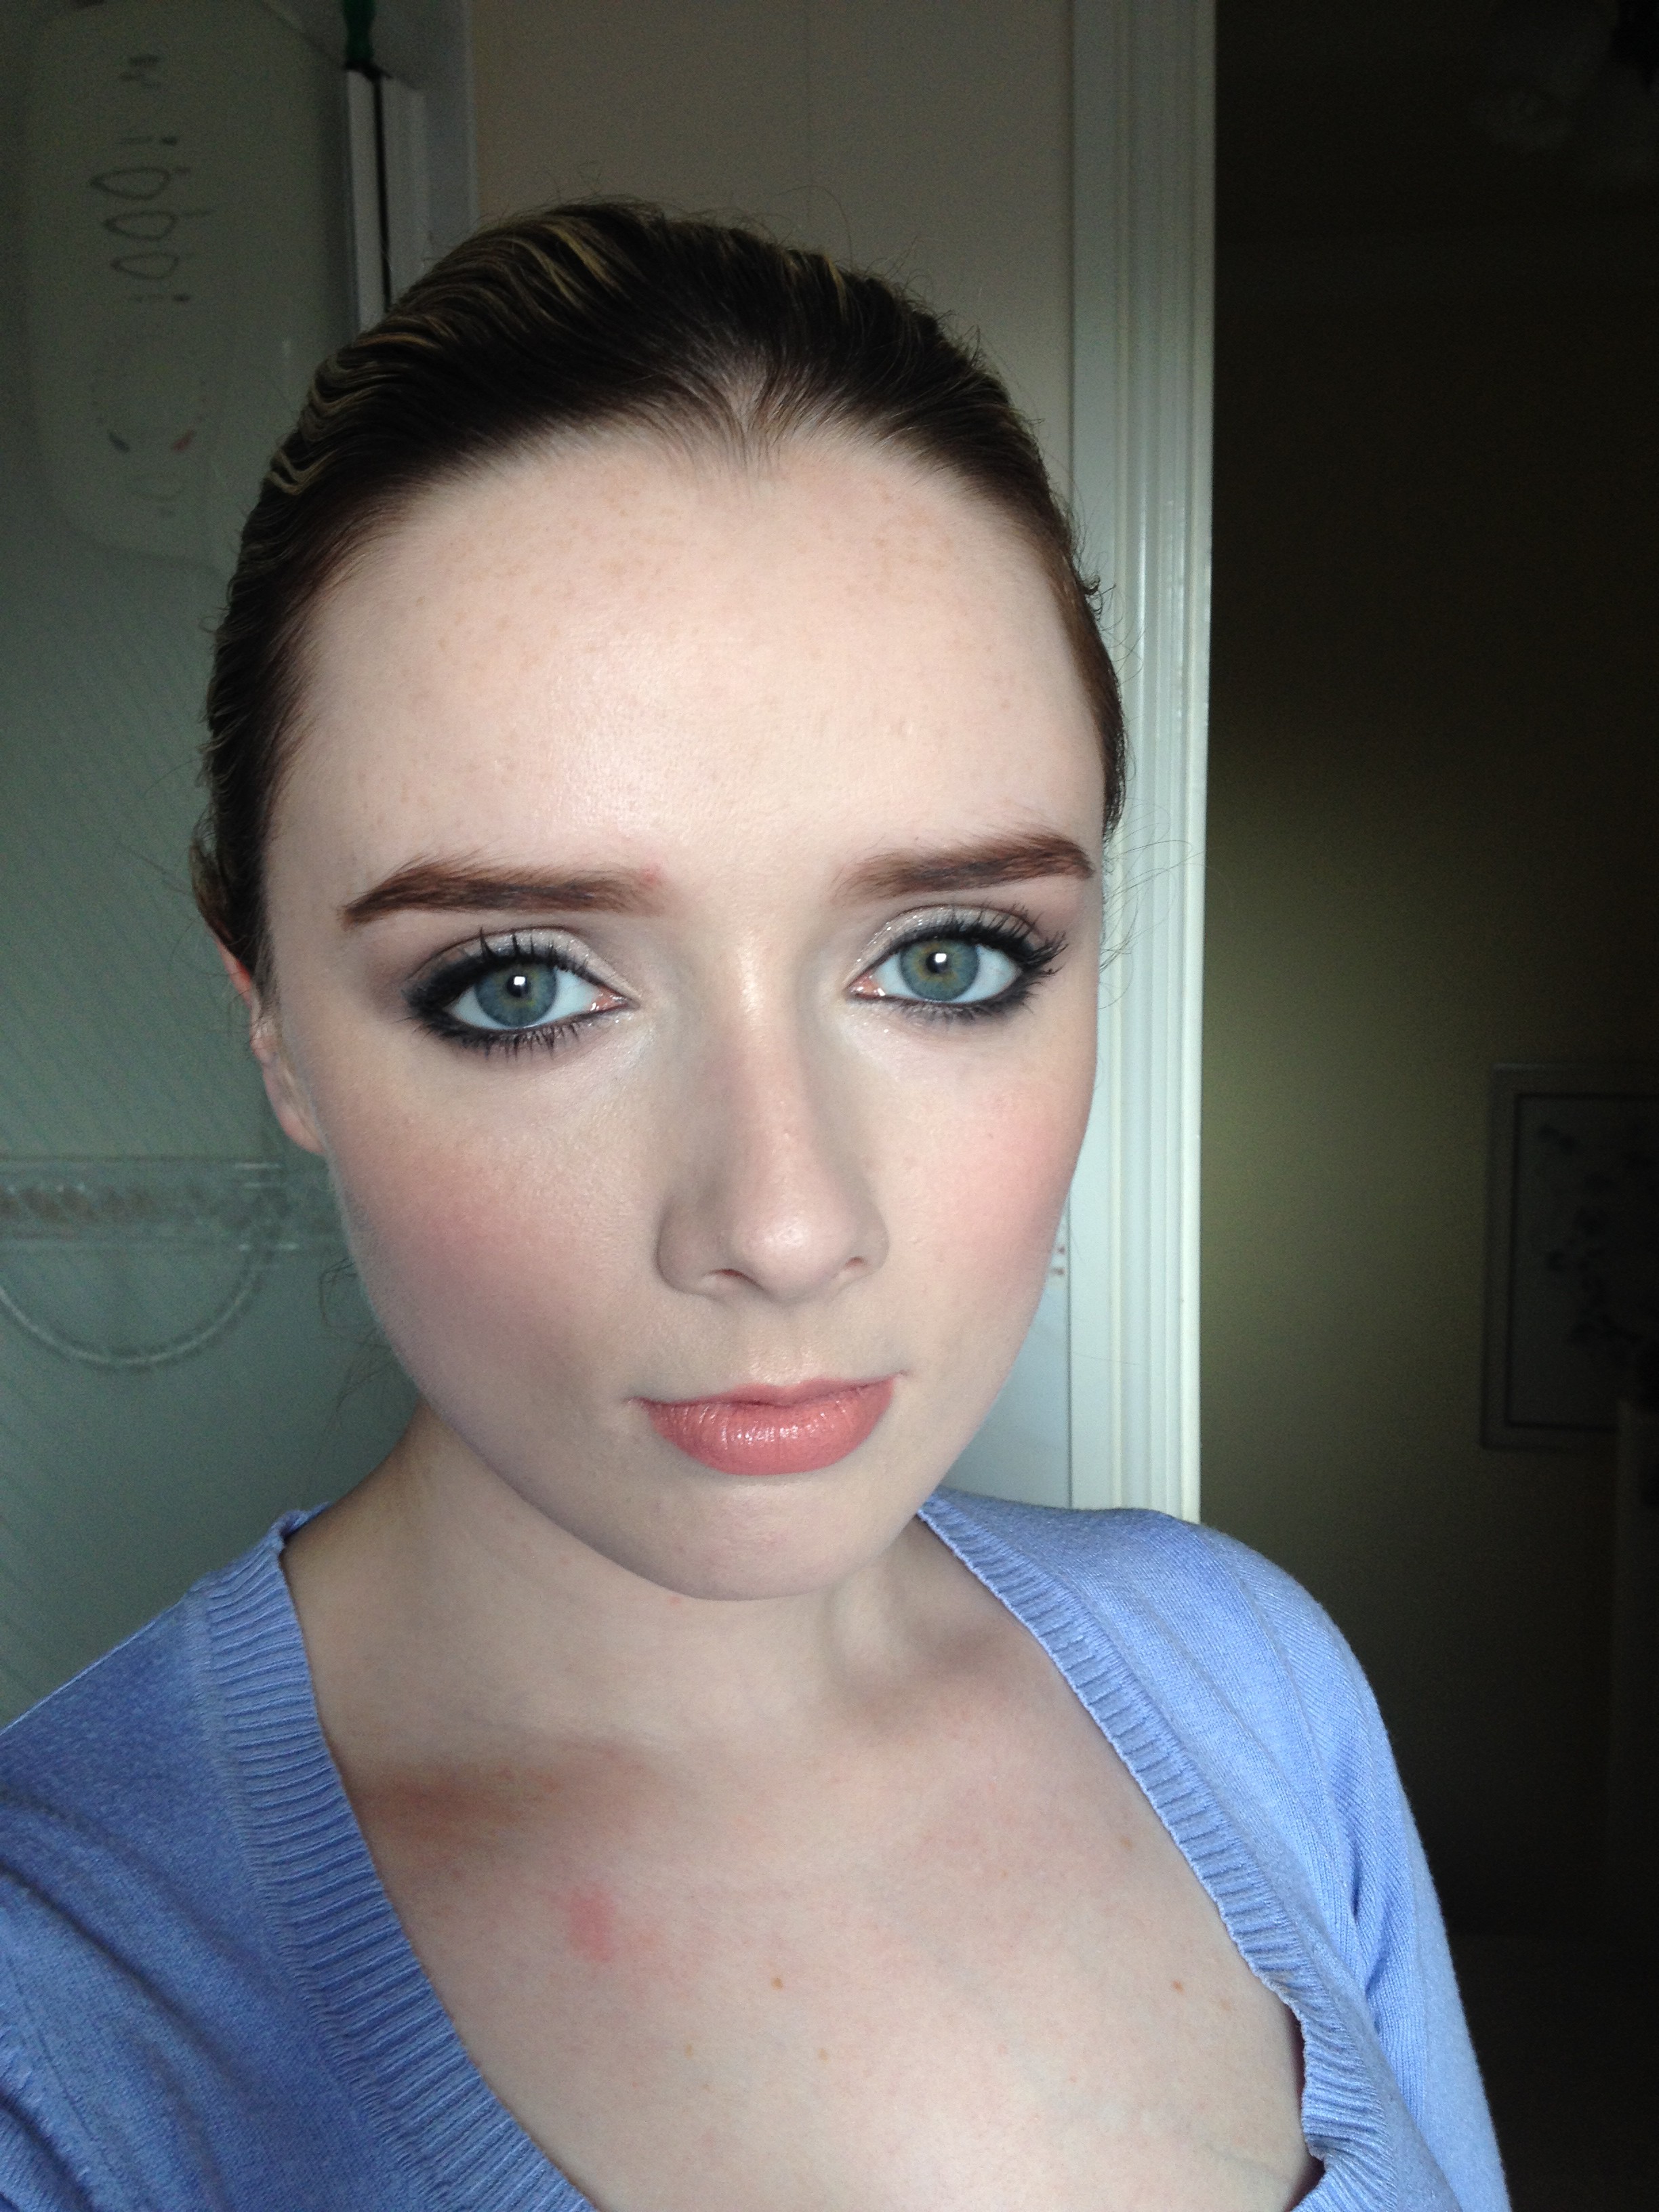
- Next, finish the face with some blush. I'm applying a light dusting of Mac's Pinch O' Peach to the apples of my cheeks. It's a seriously pigmented blush, but just a smidge leaves a very pretty finish.
- Then, some powder for coverage and to set the look - I'm using Mac Studio Fix Powder in NW10, the lightest shade. It will keep everything in place.
- To finish the skin and get that glossy skin look, you need highlighter! I'm dusting some of Mac's Mineralize Skin Finish along the tops of the cheekbones, down the bridge of the nose, and on the brow bone.
Advertised
A nude lip will finish the look - I'm going for Pure Zen lipstick from Mac.
This is a classic makeup look. What do you think? Tell us which face you'll be putting forward tonight in the comments!

