

Achieving the perfect brow shape can be a tricky challenge for most women out there. Most brow decisions leave the average woman in a tizzy whether it involves deciding on what the best product is, to what brush to use to how to draw the perfect shape.
All methods of makeup application are based around personal preference and the methods I use in my daily routine work best for me.
Firstly, to really help you understand the shape of your eyebrow here are three simple pointers.
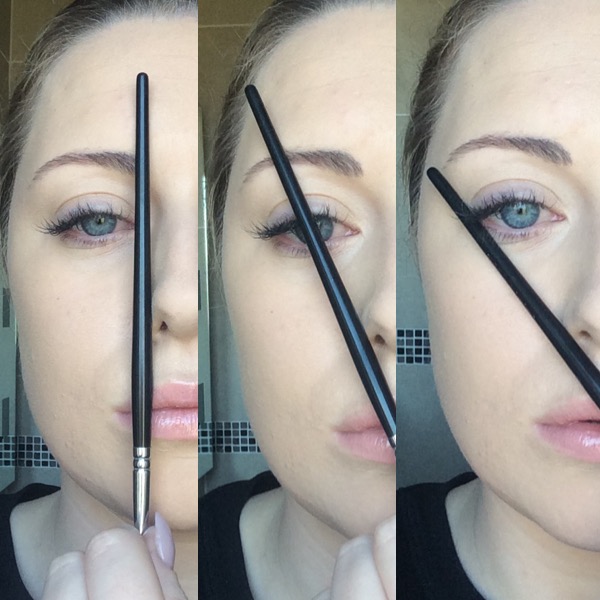
- Place a makeup brush against your nostril pointing vertically towards your eyebrows. This is a good indication of where the start of your brows should be.
- Next, keep your brush resting against your nostril but this time, starting from the nostril create a diagonal line through the centre of your pupil. This is a good indication of where the highest point of your brow should be.
- Finally, starting from the nostril again create a diagonal line across the lower lash line, clipping the outer corner of the eye. This is a good indication of where your brows should end.
I think when you can comprehend where the start, middle, high point and end point of your brows should be, applying products becomes a whole lot easier.
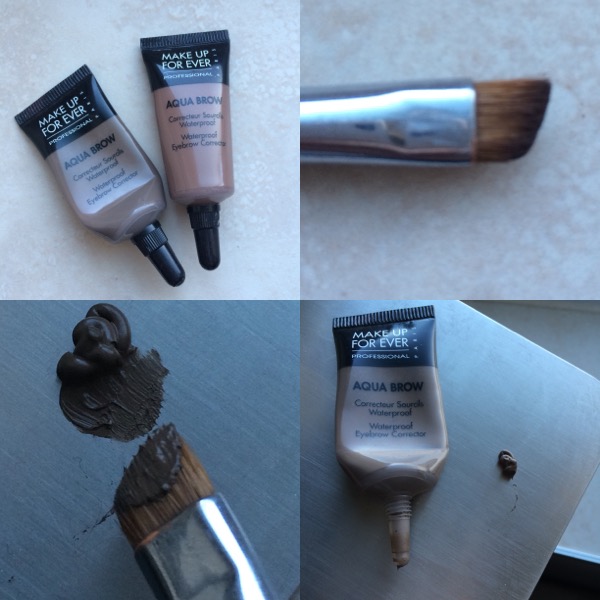
Another commonly asked question is what are the best brow products to use? Whether you use gel, cream, powders or pencils, it's all a matter of personal preference. I like to use all types of brow products but my all-time favourite has to be Make Up For Ever Aqua Brow. Aqua Brow is a waterproof eyebrow corrector that fills, defines and lengthens brows. Formulated with volatile oil and carnauba wax, its creamy gel texture gives an even, natural result with a long lasting hold.
Advertised
I’m a divil for rubbing my eyes during the day, forgetting that I’m wearing makeup so what I like about this is it just doesn’t budge. It remains flawless throughout the day and can withstand extreme conditions such as heat and rain.
I start by squeezing a small amount of the product on to my steel mixing palette and work from here with my brush. The brush I recommend using for brows is an angled liner brush. I also recommend using a steel mixing palette when using cream or gel brow products. They can be quite prone to drying out quickly so the coolness of the steel gives you an extra bit of time to work with as oppose to the heat of the back of your hand.
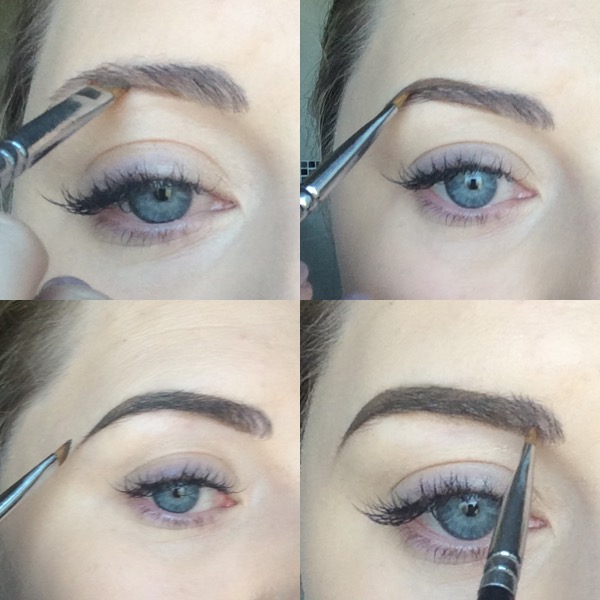
I usually start about half way up my brow and start building my shape by creating a diagonal line towards the high point. Once I have the desired shape underneath, I move to the top of the brow and work on perfecting my curve at the highest point.
I then create a straight line and end it with a precise point. I don’t apply extra product to my brush when I am shading in the start of my brows which prevents that boxy harshness, I use the left-over product on my brush and simply colour in from the halfway point in a backward and forward motion which achieves that gradual faded out effect.
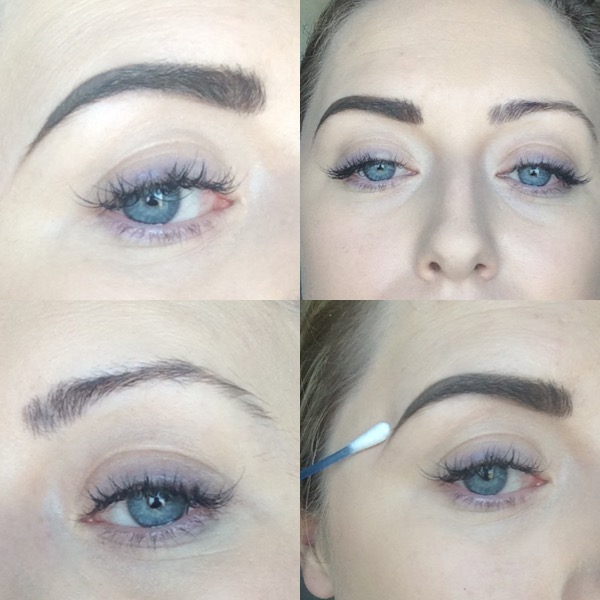
A top tip for creating really precise lines is to swipe the harsh edges with a cotton bud dipped in a little bit of remover.
Advertised
So there you have it! As a last tip for the day that's in it...don't substitute your brow powder for one in a green shade. Just...don't. For more on all things eyes, see our eye makeup section here!

