

Last week, we tackled foundation choice. This week in the Back to Basics Series, we're looking at makeup brushes. The availability of great quality brushes at any price range is better than it's ever been - we're literally spoilt for choice. If you find the whole brush thing a bit baffling, then having so much choice doesn't necessarily help.
Synthetic or natural fibres? Can brushes be used only for the role specified on their packaging? Which brushes are actually necessary, and when will fingers do? How should you hold a brush? How often do they need washing?
I like to use brushes when necessary, but only when they will actually enhance the makeup application. If fingers will do the job, then I'll happily use those instead. If you're looking to build a little wardrobe of very reliable basic makeup brushes, then go for the essentials - brushes which do a job that fingers can't.
Most of the time, I apply foundation with my fingers. It gives more control than a brush, and the pressure with which you tap the product into the skin can create different effects. Famed makeup artist Mary Greenwell always applies foundation to models with her hands - her method can look hilariously slap dab, but when she's finished, the effect is always flawless and highly skilled. So don't feel that you 'have' to use a foundation brush. They're not really necessary.
When I do use a brush for foundation, I generally don't use a classic flat foundation brush. In fact, if I'm honest, I hate them. The product sits on them, they streak, and they never produce a nice, buffed finish. Don't think for a moment that you can only use a brush for the stated purpose. I find natural fibre, fluffy brushes (like blush brushes) can be fantastic for buffing on foundation. I discovered this when studying makeup artistry after years of being told that this was an absolute no no. So experiment! If you like the effect produced, then keep doing whatever you're doing.
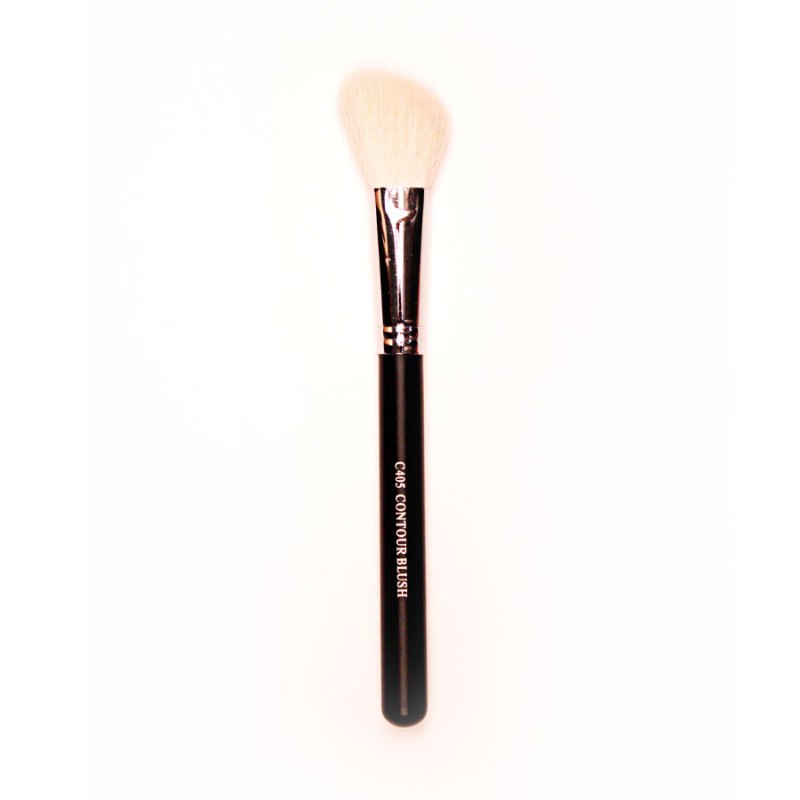
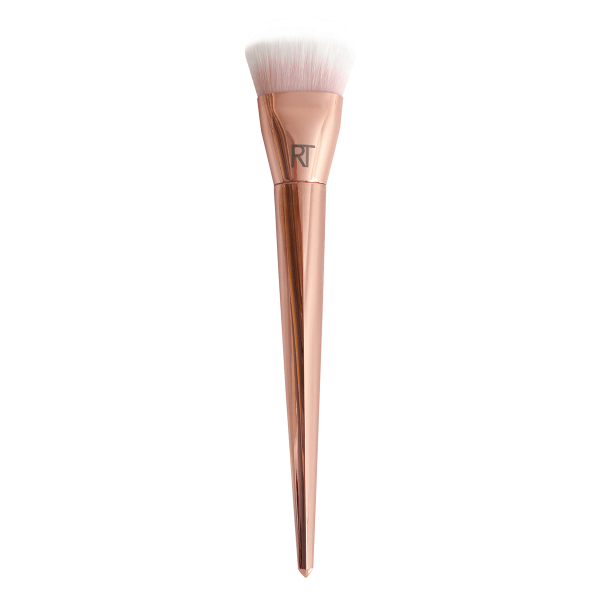
This contour brush (above) by Crown costs just €10.40. It works wonderfully for powder blush and bronzer, but I love to use it for foundation.
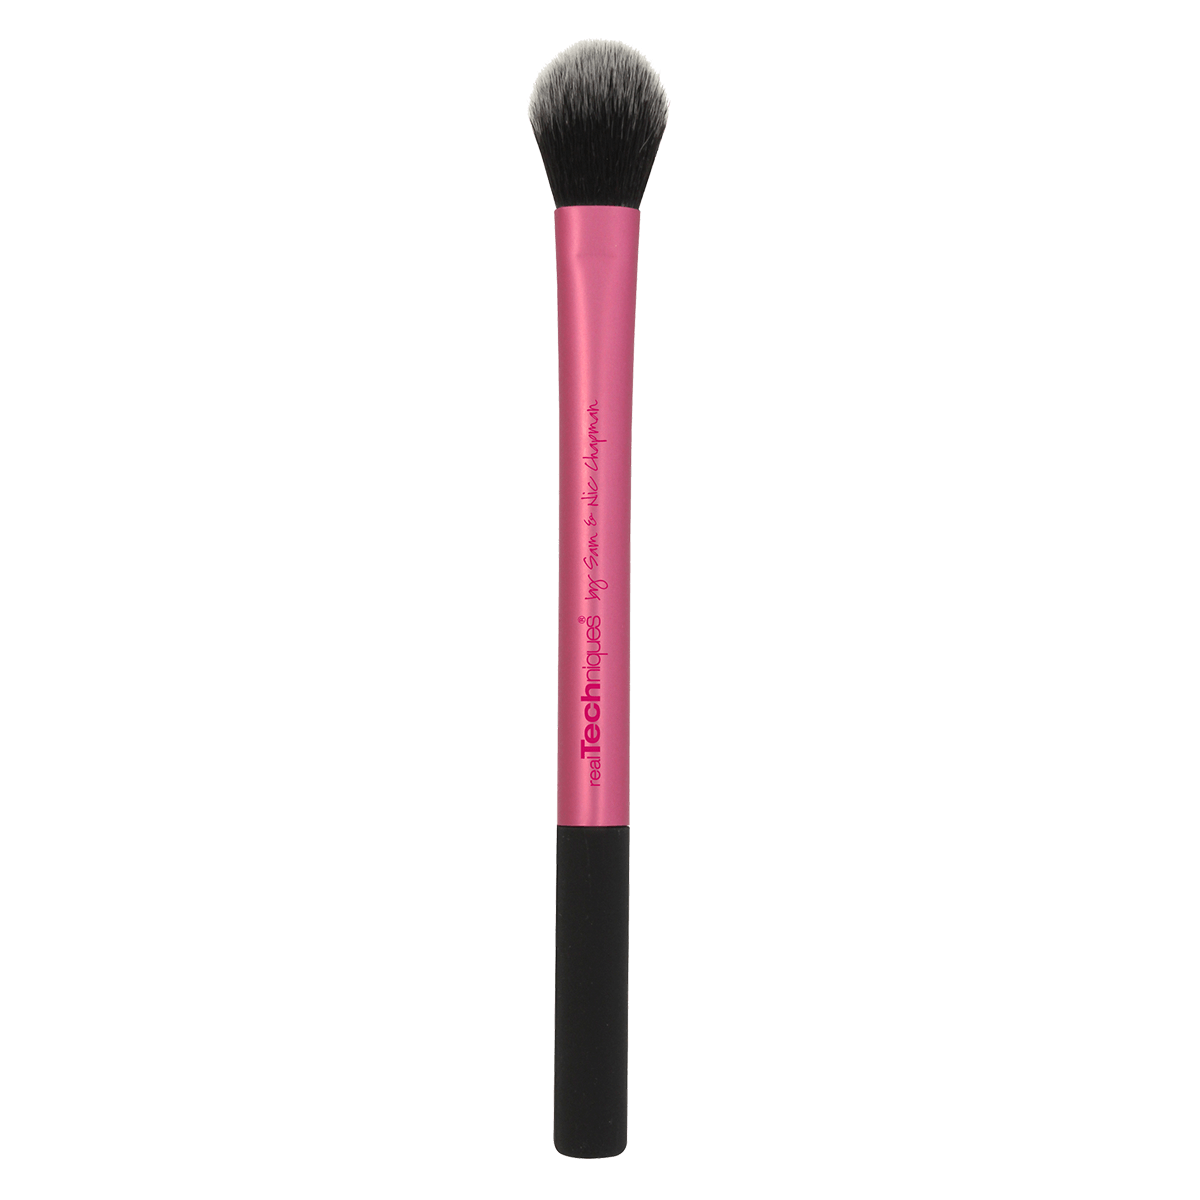
This unassuming little setting brush by Real Techniques (€11.99) is my favourite brush. I have a big collection of brushes, but this fellow is my favourite because its such a multi-tasker. I have two - and keep one in my handbag with my beloved Nars Radiant Creamy Concealer in case I need to sweep some under my eyes or cover a sudden blemish. It buffs concealer (and foundation, if you have the time!) seamlessly and can be used to set hard to reach places with powder. In a fix, it will even blend eyeshadow. If you happen to meet me on the street, it'll be in my bag. I never leave the house without it!
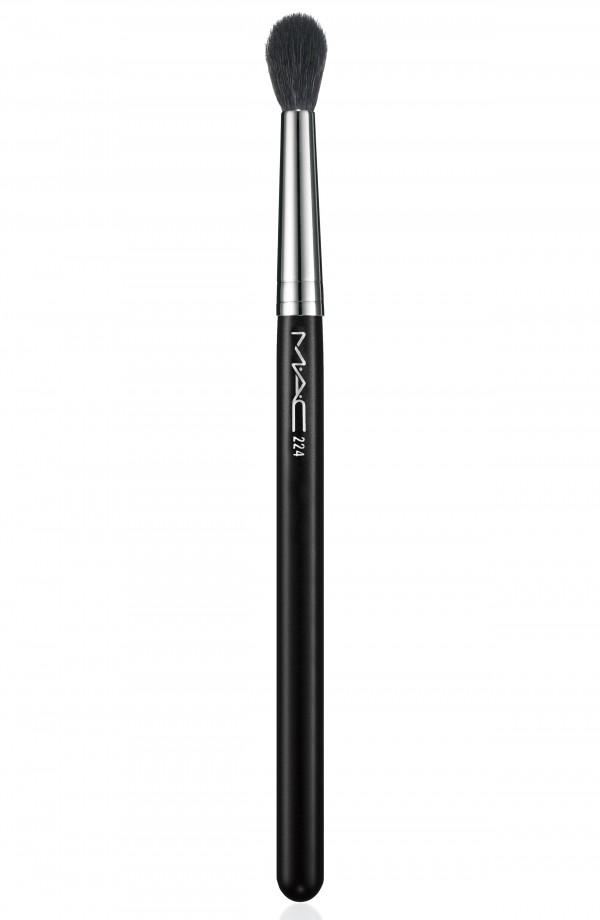
Mac's 224 Tapered Blending Brush (€32.50) is a thing of beauty. Blending powder eyeshadow to create that smoky effect is something only a brush can do, and if you like to wear blended eye makeup every day, this is entirely worth the investment.
Advertised
Remember with all brushes that where you hold them is important. For eye blending with a brush like this, hold the brush at the very back of the handle - this prevents you from putting pressure on the tip and ensures lightness of touch and a properly buffed finish. Be patient with blending. It's a matter of sticking with it until a globby mess has transformed into a smoky wonder. Keep at it and it will happen - you can correct any errors with a touch of concealer.
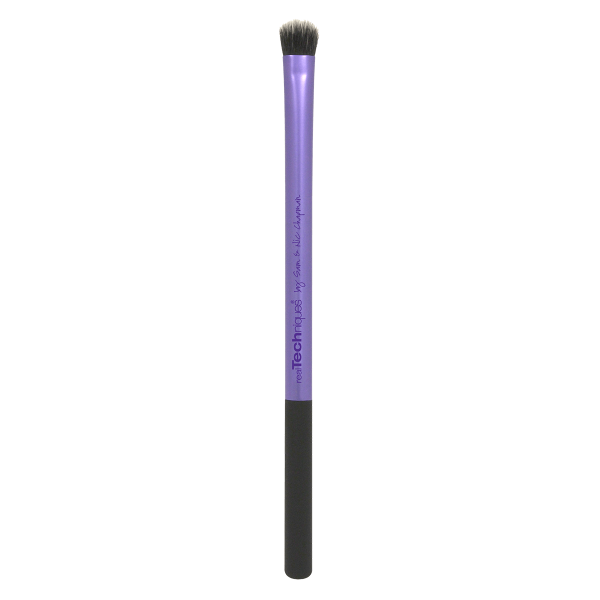
Concealing can be tricky business. For the fiddly work and pinpoint concealing of little blemishes, a small fluffy brush is what I prefer. Again, I love this shading brush from Real Techniques (€10.49). The synthetic fibres don't absorb too much product and the tiny brush head makes concealing in fiddly areas like under brows or the sides of the nose a breeze. And yes, I know that it's technically for eyeshadow (it works really well for that too) but I like multi-tasking brushes! That's why I like Real Techniques - the brushes are affordable, excellent quality and good multi-taskers. If you're investing in your first set of good brushes, I'd stick to an affordable brand like this one, or Crown Brushes.
Once (and if!) you feel ready to graduate onto some more skill-specific brushes, you might like to invest in a flat contour brush like this one (301) from the Real Techniques Bold Metals range (€28). This is brilliant for cream products - like blush and contour, and can also be used for foundation if you're feeling experimental.
You need to wash your makeup brushes. It's a soul-destroyingly dull and repetitive task, but it has to be done. The level of bacteria that builds up in brushes is obscene, and also, when they become clogged with old product, they don't work well. A fluffy foundation brush clogged up with nasty old foundation will streak and your makeup won't look as good. If you're a makeup artist, you obviously need to wash your brushes absolutely every time you use them. For everyone else, wash them weekly. But you really shouldn't leave it longer than that. I'll judge you.
What you want to wash them with is up to you. There are specific brush cleansers, but really who can be arsed to pay what they cost? A touch of shampoo or fairy liquid with a drop of olive oil added will do nicely. Wet the brush under a tepid tap, put your cleanser on the palm of your hand, and sweep the brush around your palm to make a lather, then rinse. Don't mash the bristles or tug at them - you paid for the brush; treating it gently will ensure a longer lifespan. Synthetic brushes are also easier to wash than natural fibre ones.
Repeat this process until the water runs clear through the bristles, then give them a little squeeze to drain out the excess, and leave them to dry. Everyone has a theory about how you should leave brushes to dry. Some people leave theirs on a surface leaning against a wall so that the brushes are standing on their bristles. This does keep water out of the glue which bonds the bristles to the handle, but it also warps the bristles, so I don't recommend it. Never leave them vertically with the bristles facing up either, as the water seeps back through the bristles and sits in the glue, which will eventually cause the bristles to fall out.
I leave mine horizontally, angled a little bit forward (so I prop the end of the brush on a book, and leave the bristles just barely poking over the edge of the kitchen worktop to ensure they dry back into their original shape. This is the best way I know to protect both the bristles and the glue, but do tell us in the comments if you have another method!
So that's brushes 101! Have any comments or questions? Leave them below!
Advertised

