

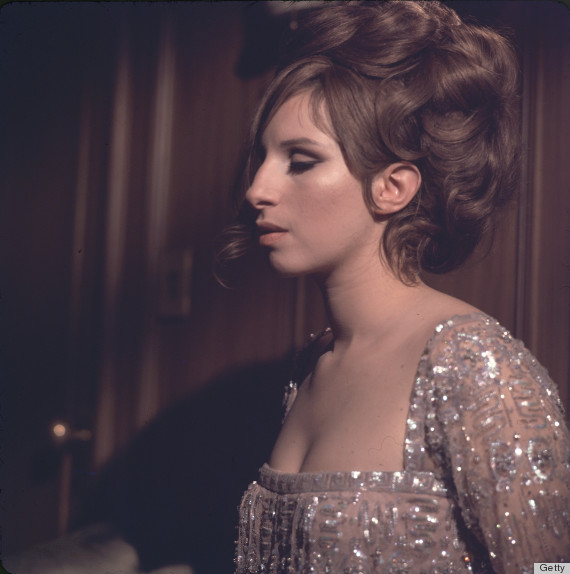
I recently watched 'Funny Girl' again, and was reminded of what an absolute makeup genius Barbra Streisand was in her youth. She was innovative, skilled, on-trend for the period and knew exactly how to adapt her makeup to her own face. Since she was known for her 'weird' facial features and surrounded by conventionally beautiful actresses, she knew how to use makeup to stand out.
She did her own makeup for the film, and since '60s makeup is popping up on the catwalks again this year, I thought I'd revitalise an old gem which can be adapted to any eye shape. And don't be dissing Barbra - her face in profile is just magical; it's strange and interesting. And that's beautiful!
I'm going to modernise the look, but here's our inspiration!
This is DEFINITELY glamorous enough to take you anywhere this Saturday night!
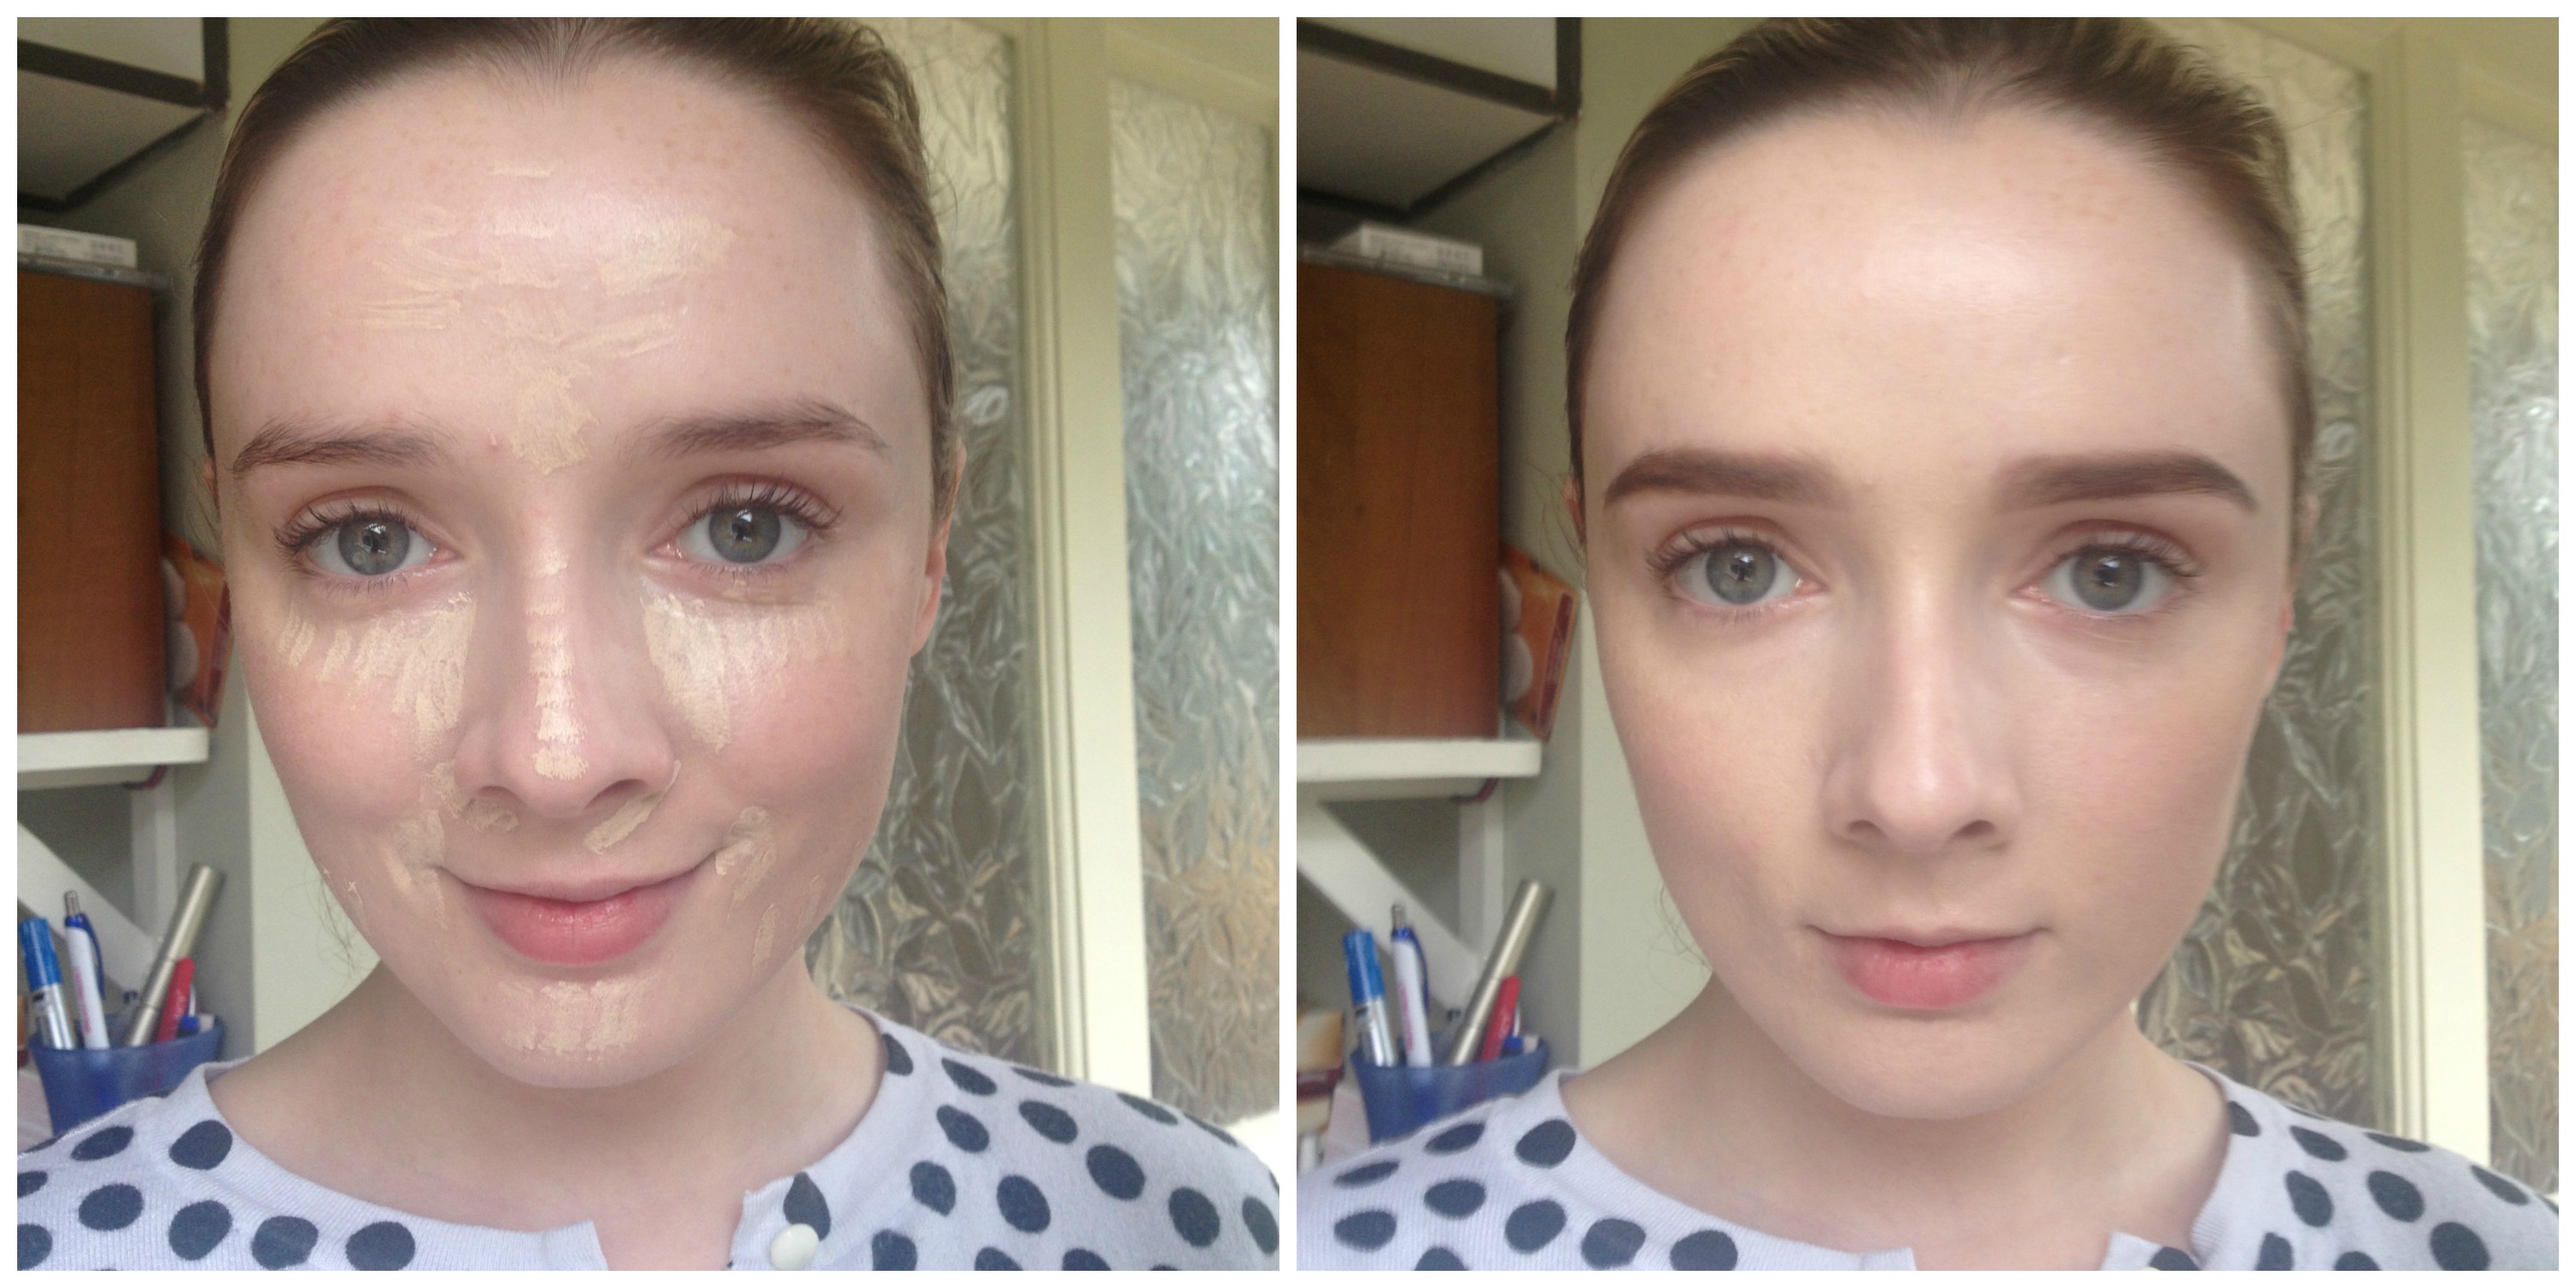
Step One
- I'm using YSL's Fusion Ink Foundation . I've mixed in two drops of my beloved YSL Rose Gold Primer (which is really a highlighter, for that extra sheen of '60s skin.
- Now don't be scared! I will add some subtle contour later, but I'm using some light concealer - Nars Radiant Creamy Concealer in Chantilly - to do a spot of reverse contouring. By applying it in a 'V' from the undereye area in toward my nose, on the centre of my forehead, down the nose an chin, I'm bringing light to the centre and high points of the face. Everything else will naturally recede! If you're frightened of contouring, this is a subtler way to add structure to the face.
- Again, to modernise the look, I'm going with a fuller brow - not hard, just subtly defined. Mac shadow in Omega on an angled brush does the job nicely.
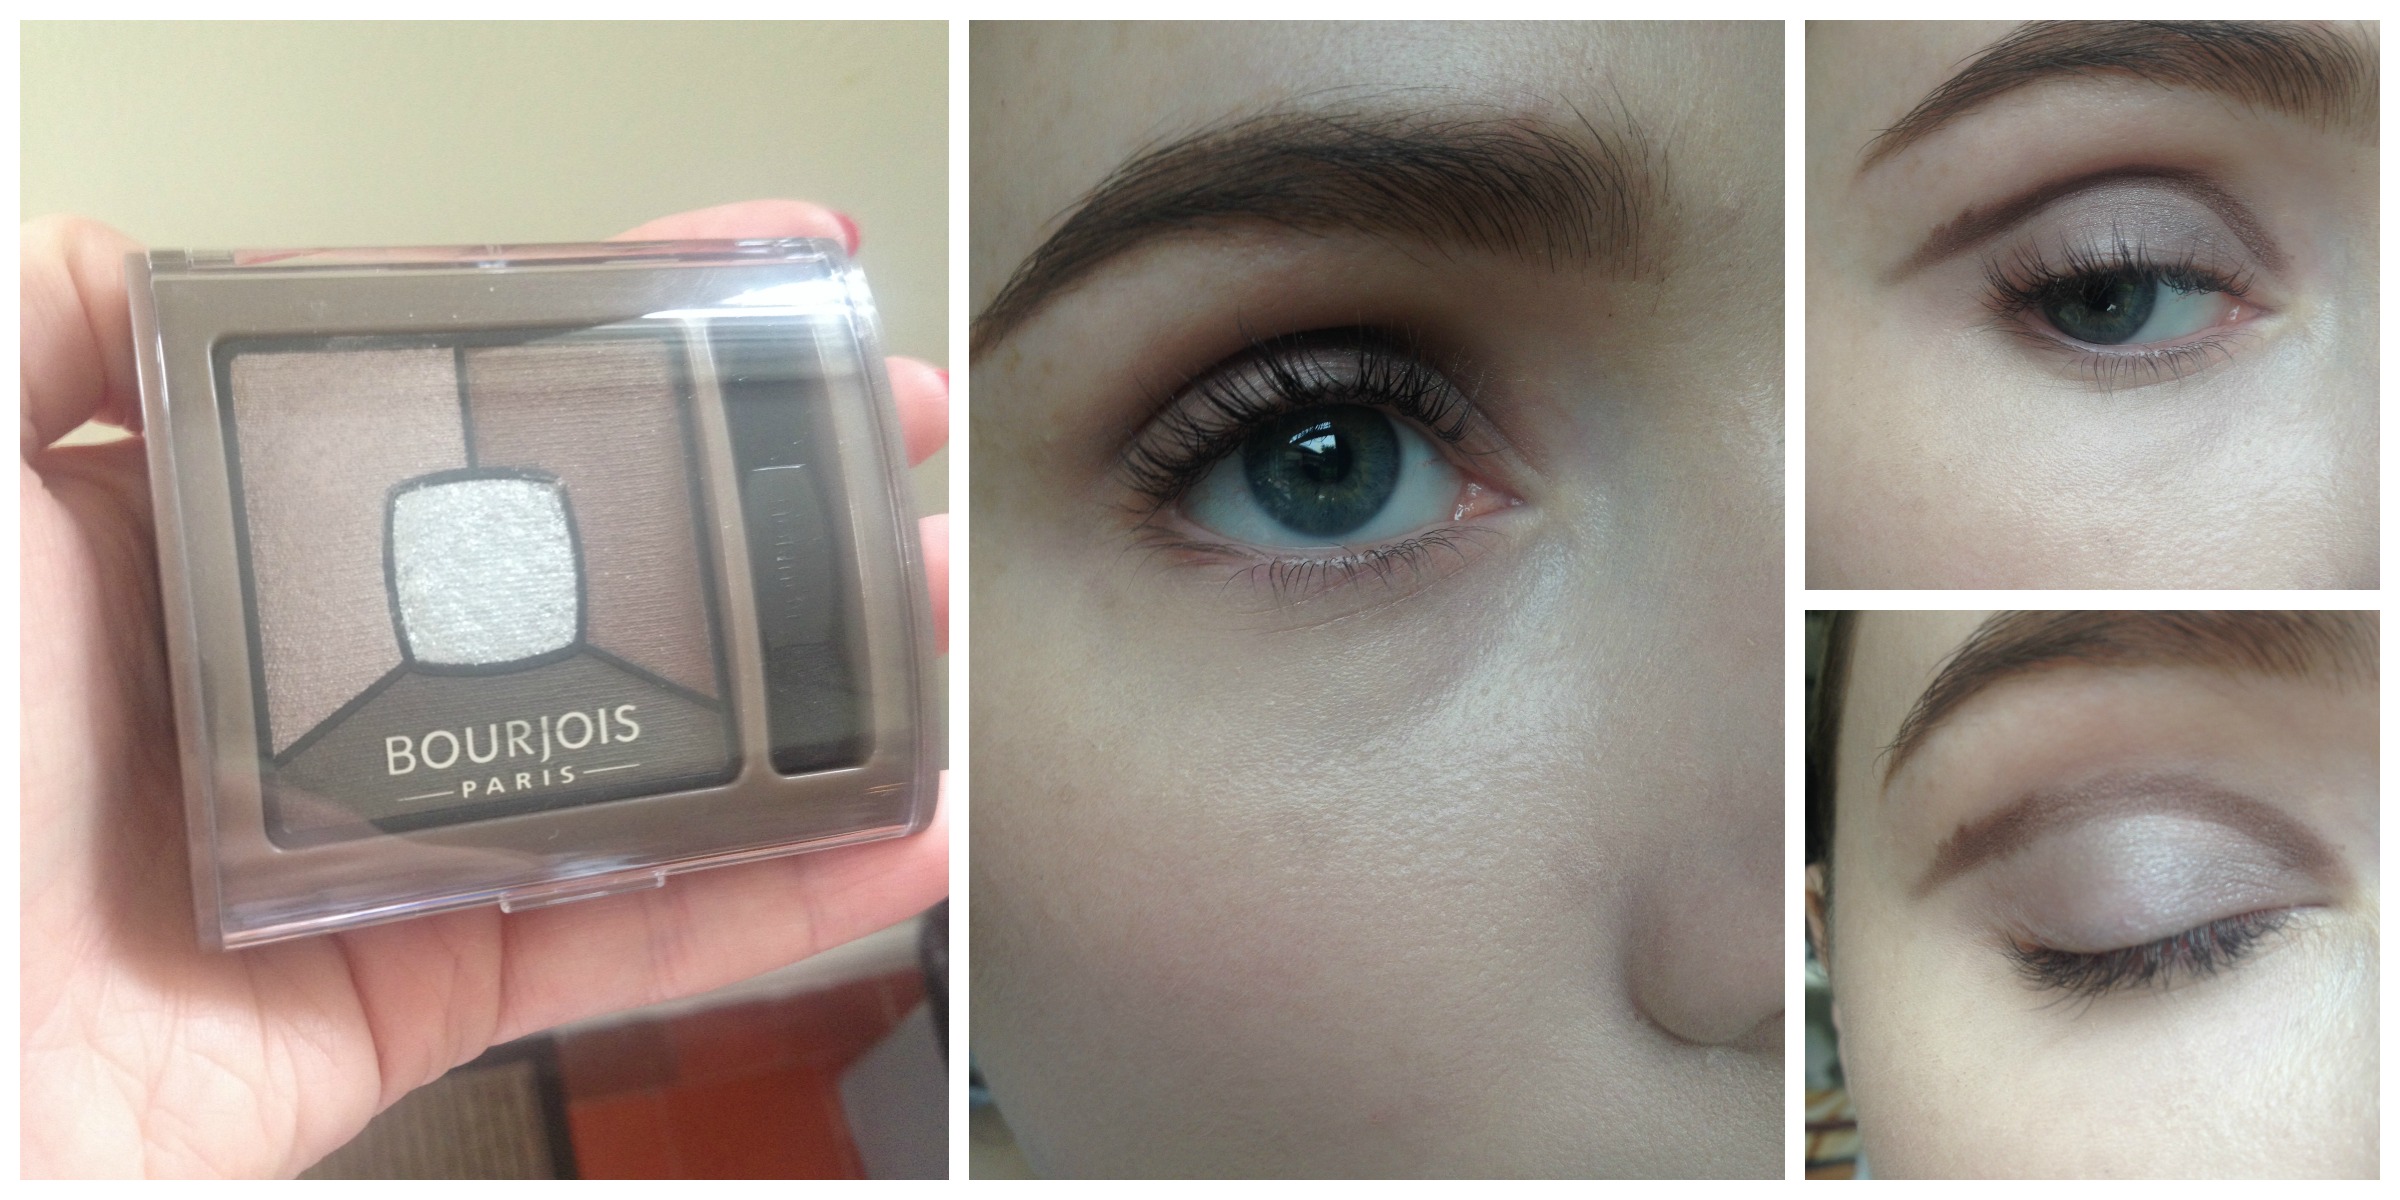
Step Two
- On to the eyes, which are always the focus of any '60s look. I'm using the Bourjois Smoky Stories Eyeshadow Quad that we sneak peaked for you yesterday. My chosen one is 05 Good Nude.
- Start with the taupey shade on the left, applying it all over the lid with the pad of your ring finger.
- Next, the slightly fiddly bit. Grab an angled eyeshadow brush and the medium brown shade. Obviously, any brown shadows you have lying around the house will do!
- Draw a cleanish line along the natural crease of your eyelid. You need to follow the natural line so that when you open your eye, the line remains straight.

Step Three
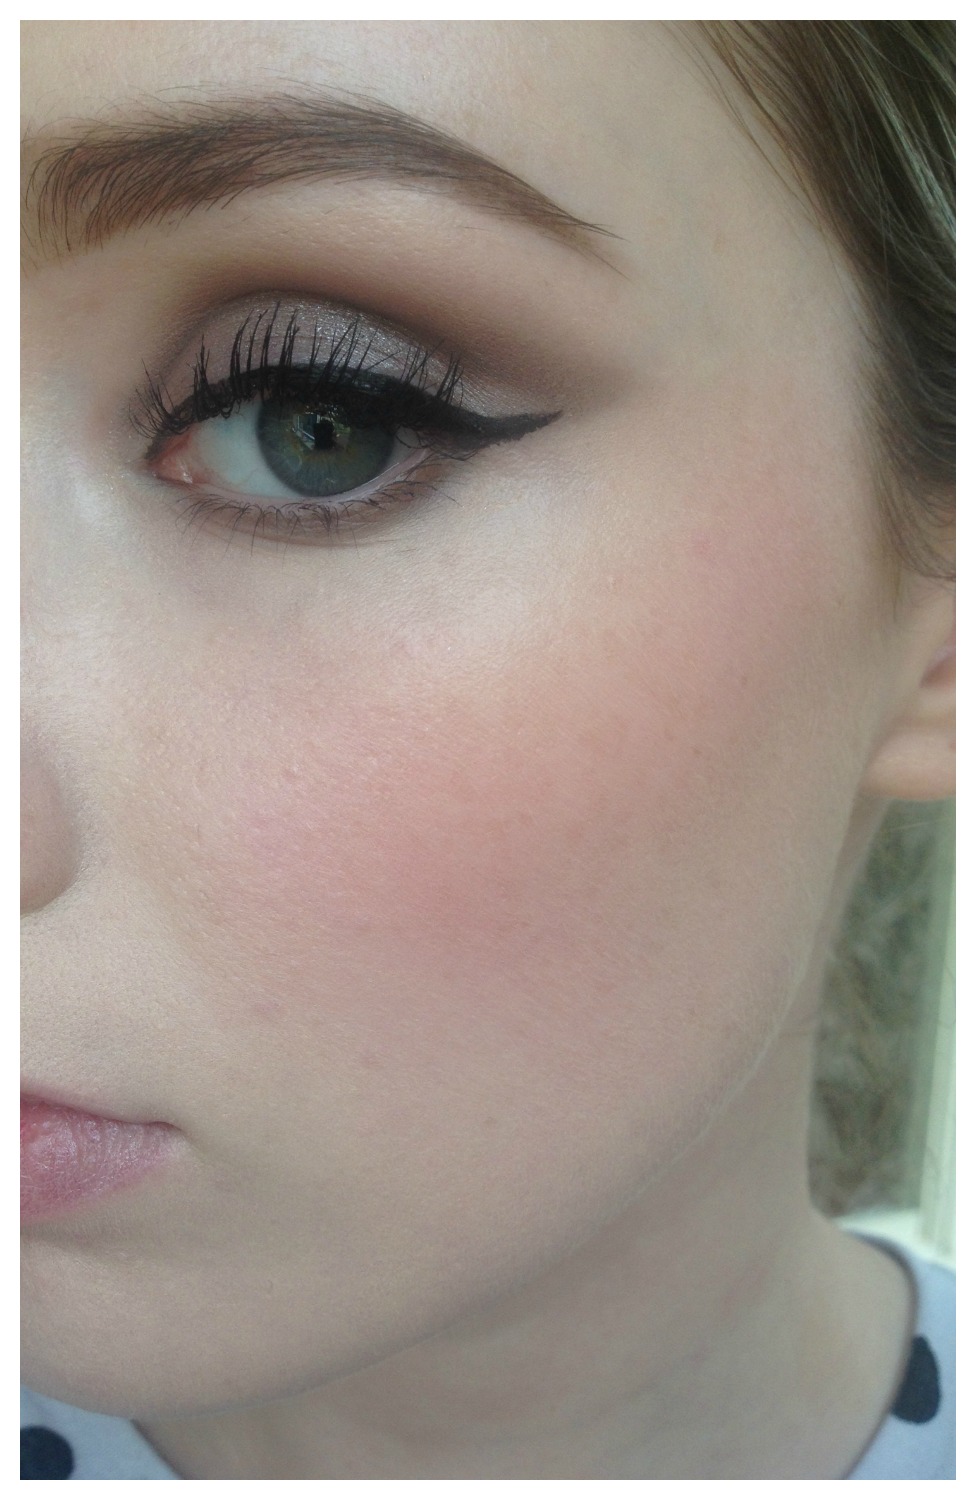
- Using the darkest colour in the palette, line the lower lashline. Pull the line out until it meets the line you made along the crease, and closes into a triangle, as in the first image above left.
- Take a clean fluffy brush and blend! You have to be patient with this step. Run the brush back and forth along the line you've created until it is softened. If you blend aggressively or in a circular motion, youll lose the clean finish which is so important with this look.
- If you make a mistake, don't worry - you can apply some concealer along the edge with a lip brush to get that sharpness back.
- Next, blend some of the darker shadow along the outer triangle and the crease to increase the drama!
Advertised
- Take your time with this step, building the intensity until your'e happy with the effect.
- When you're done - grab a touch of glitter! I'm using the one in the centre of the palette. I'm just dabbing a touch of the glitter right on the centre of my eyelid with the pad of my ring finger.
- Also add a touch to the inner corner of the eye. This makes a tremendous difference and lights up your eyes!
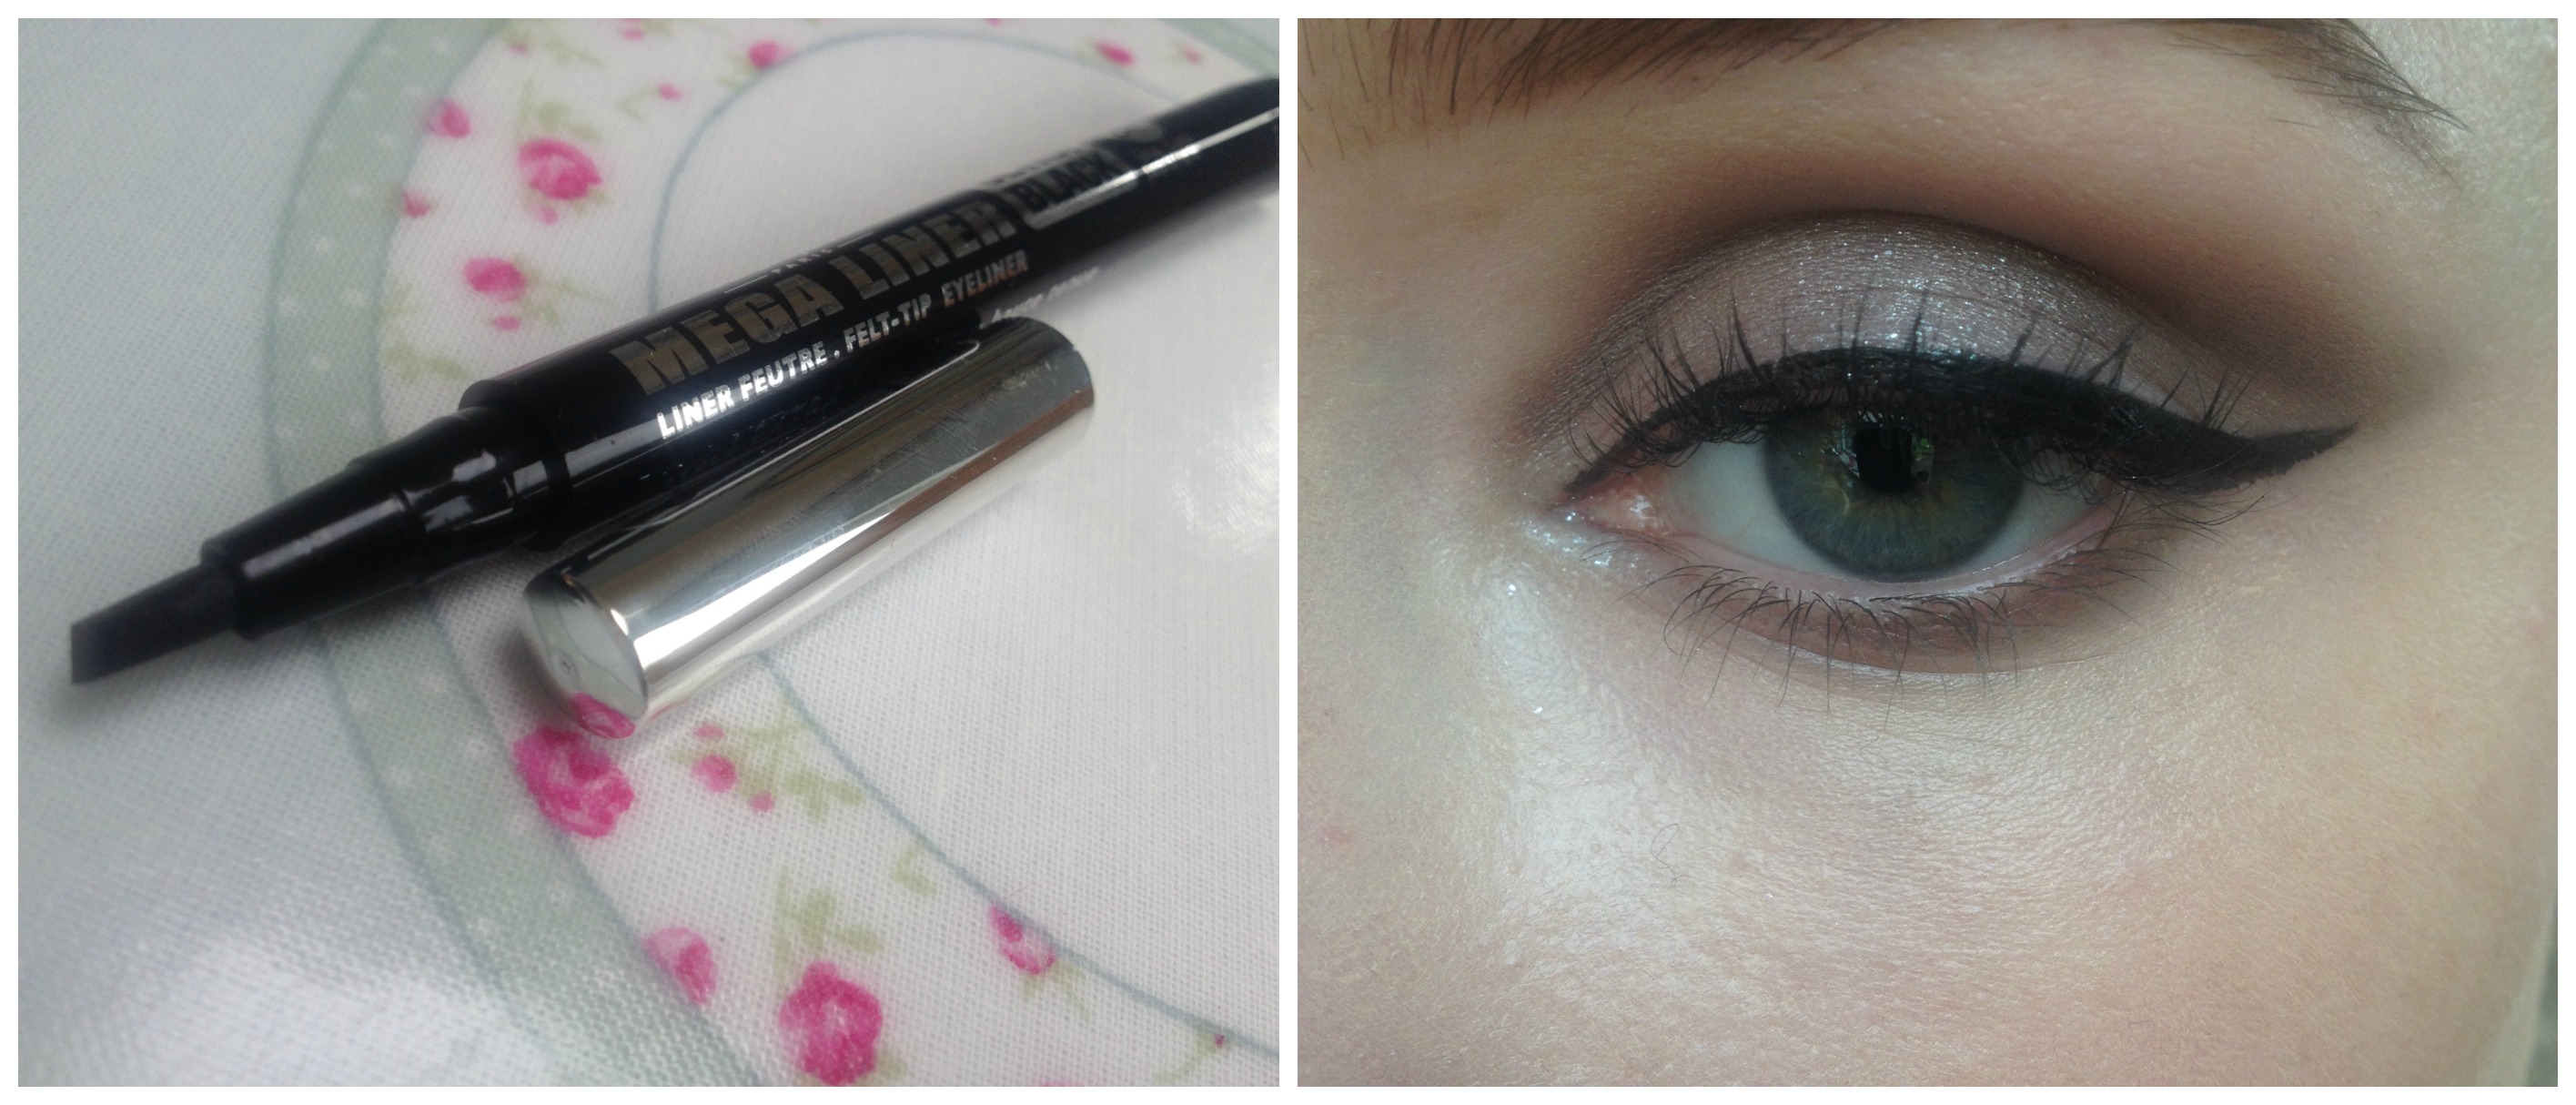
Step Four
- This would not be a '60s eye without liner! Grab your favourite - I'm road testing the new Bourjois Mega Liner (available from October).
- Line thinly along the upper lashline. When you get the the outer edge, follow the triangle of shadow - you'll see above that I've lined right along the clean line of my eyeshadow, then thickened the whole liner, making sure that it's thinnest at the inner corner of the eye.
- Don't forget lashings of mascara! I'm using my must-have Armani Black Ecstasy mascara, but absolutely any volumising mascara you have to hand is just fine.
- Feel free to add big false lashes - they can only enhance this dramatic look. Since I went for this LVL lash lift recently, a touch of mascara creates incredibly dramatic lashes, so I don't have to bother with falsies!
Step Five
- Barbra perfected flawless, glowing skin in 1968 like nobody had before, and she nailed contouring before it was a la mode in the mainstream. Since I'm pale and it's tough to pull of natural looking contour, I'm going with an incredibly subtle accentuation of my cheekbones. I'm using a concealer which is two to three shades darker than my skin tone - in this case, a Mac concealer from my pro palette in NW20.
- I'm blending this in the hollow under my cheekbone with a Real Techniques Expert Face Brush. If you can't feel the hollow, have a poke gently with your thumb- you'll feel it!
- Next, blush. I'm keeping to cream formulations so as to preserve the glow! Powders tend to give a flatter finish. A touch of Clarins cream Multi-Blush in Grenadine (from the last Spring Collection) on the apples of the cheeks warms the look up and adds balance to the face.
- I'm setting the centre of the face with Mac's Studio Fix Powder in NW10. This will take the shine from the centre of the face, add coverage (helping with that 'impossibly perfect skin' finish)and provide a base for the powder highlighter I'm about to whip out.
Step Six
- More highlighter(!), I hear you gasp! How can you even get more on your face!? WATCH ME!
- I'm using my all time favourite, Mac's Soft and Gentle. To mimic that intense '60s highlight on the top of the cheekbone, we need to build up the highlight. Subtle, it ain't. Glamorous, it is!
- To finish the look, whack on a nude lipstick. I've chosen Rimmel's Moisture Renew Lipstick in Nude Delight.
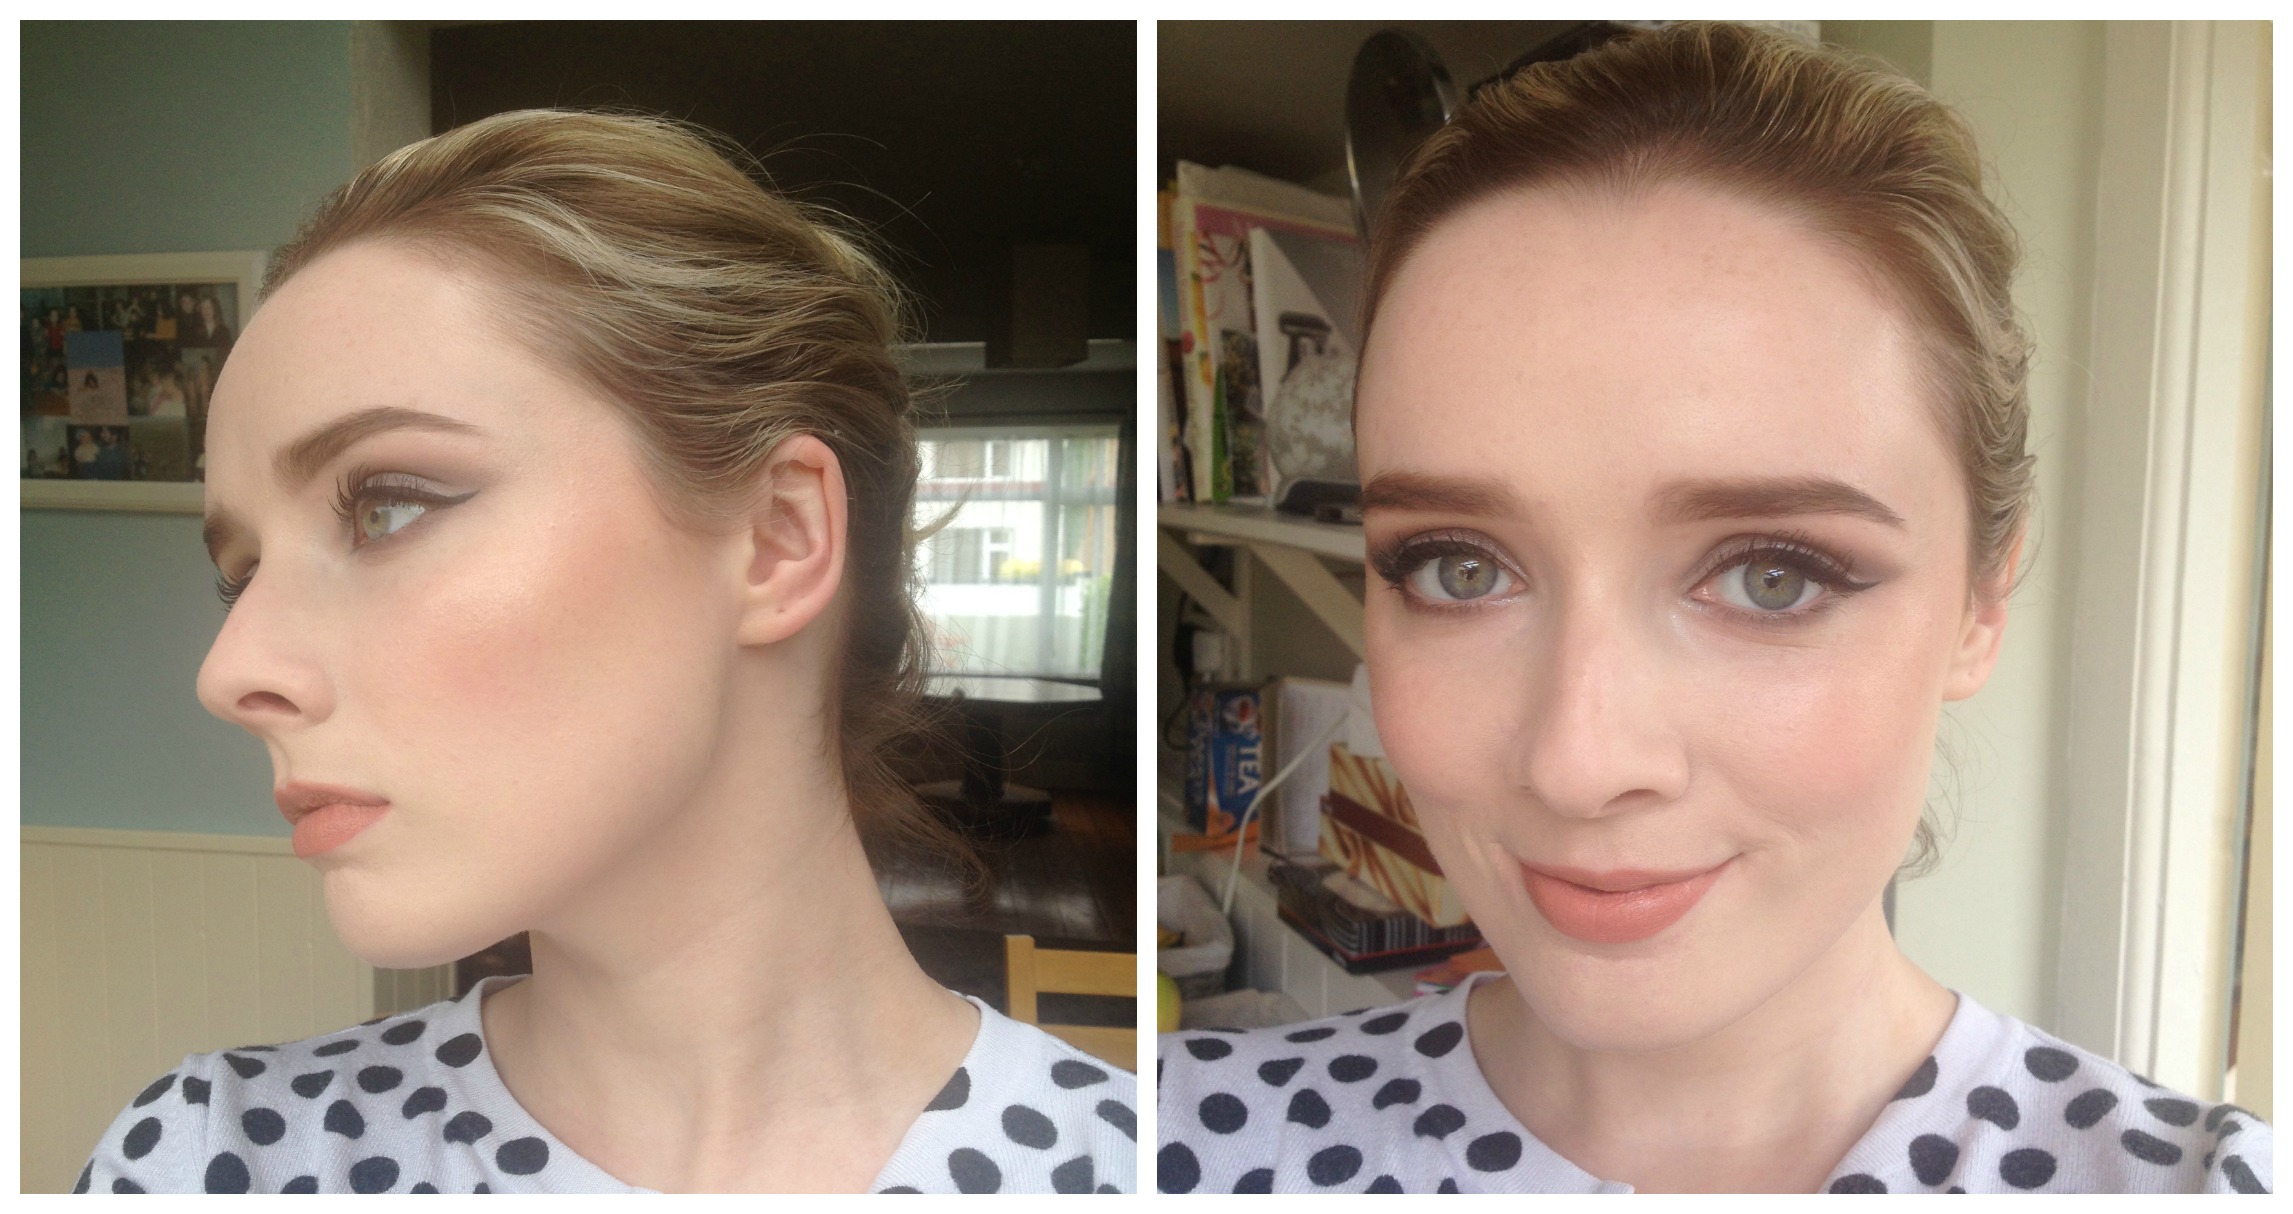
- BAM. Done
Advertised
Now git' your Diva profile face on and don't let anyone rain on your parade! (sorry; couldn't resist)
Are you feeling this one? Will be be sporting '60s makeup tonight? To the comments - get ready with us, and be sure to tweet us any photos of your version of this look!

