

I adore this glittery eye look. It reminds me of a great recipe - it's lazy with delicious results. It looks intricate and complicated, but is easy peasy. The eye itself is also done using only products that I could find in Boots, so no wallet-related agony is necessary.
This is a special occasion look, and while brands like Mac produce divine loose glitters in all sorts of colours, they're both expensive and fiddly to use. I'm a firm believer in keeping it affordable when buying products you won't use too much. And let's face it, this glitter eye is not really suitable for the office. Though if you want to wear it to the office, I salute you!
Step One
- I've applied my base using some of Laura Mercier's Silk Creme Foundation in Soft Ivory mixed with a little Illamasqua Skin Base in SB 02. This gives me good coverage for evening in just the right shade for my skin.
- I've also applied some powder shadow (Mac's Omega) to my brows and set them with some Essence Brow Mascara.
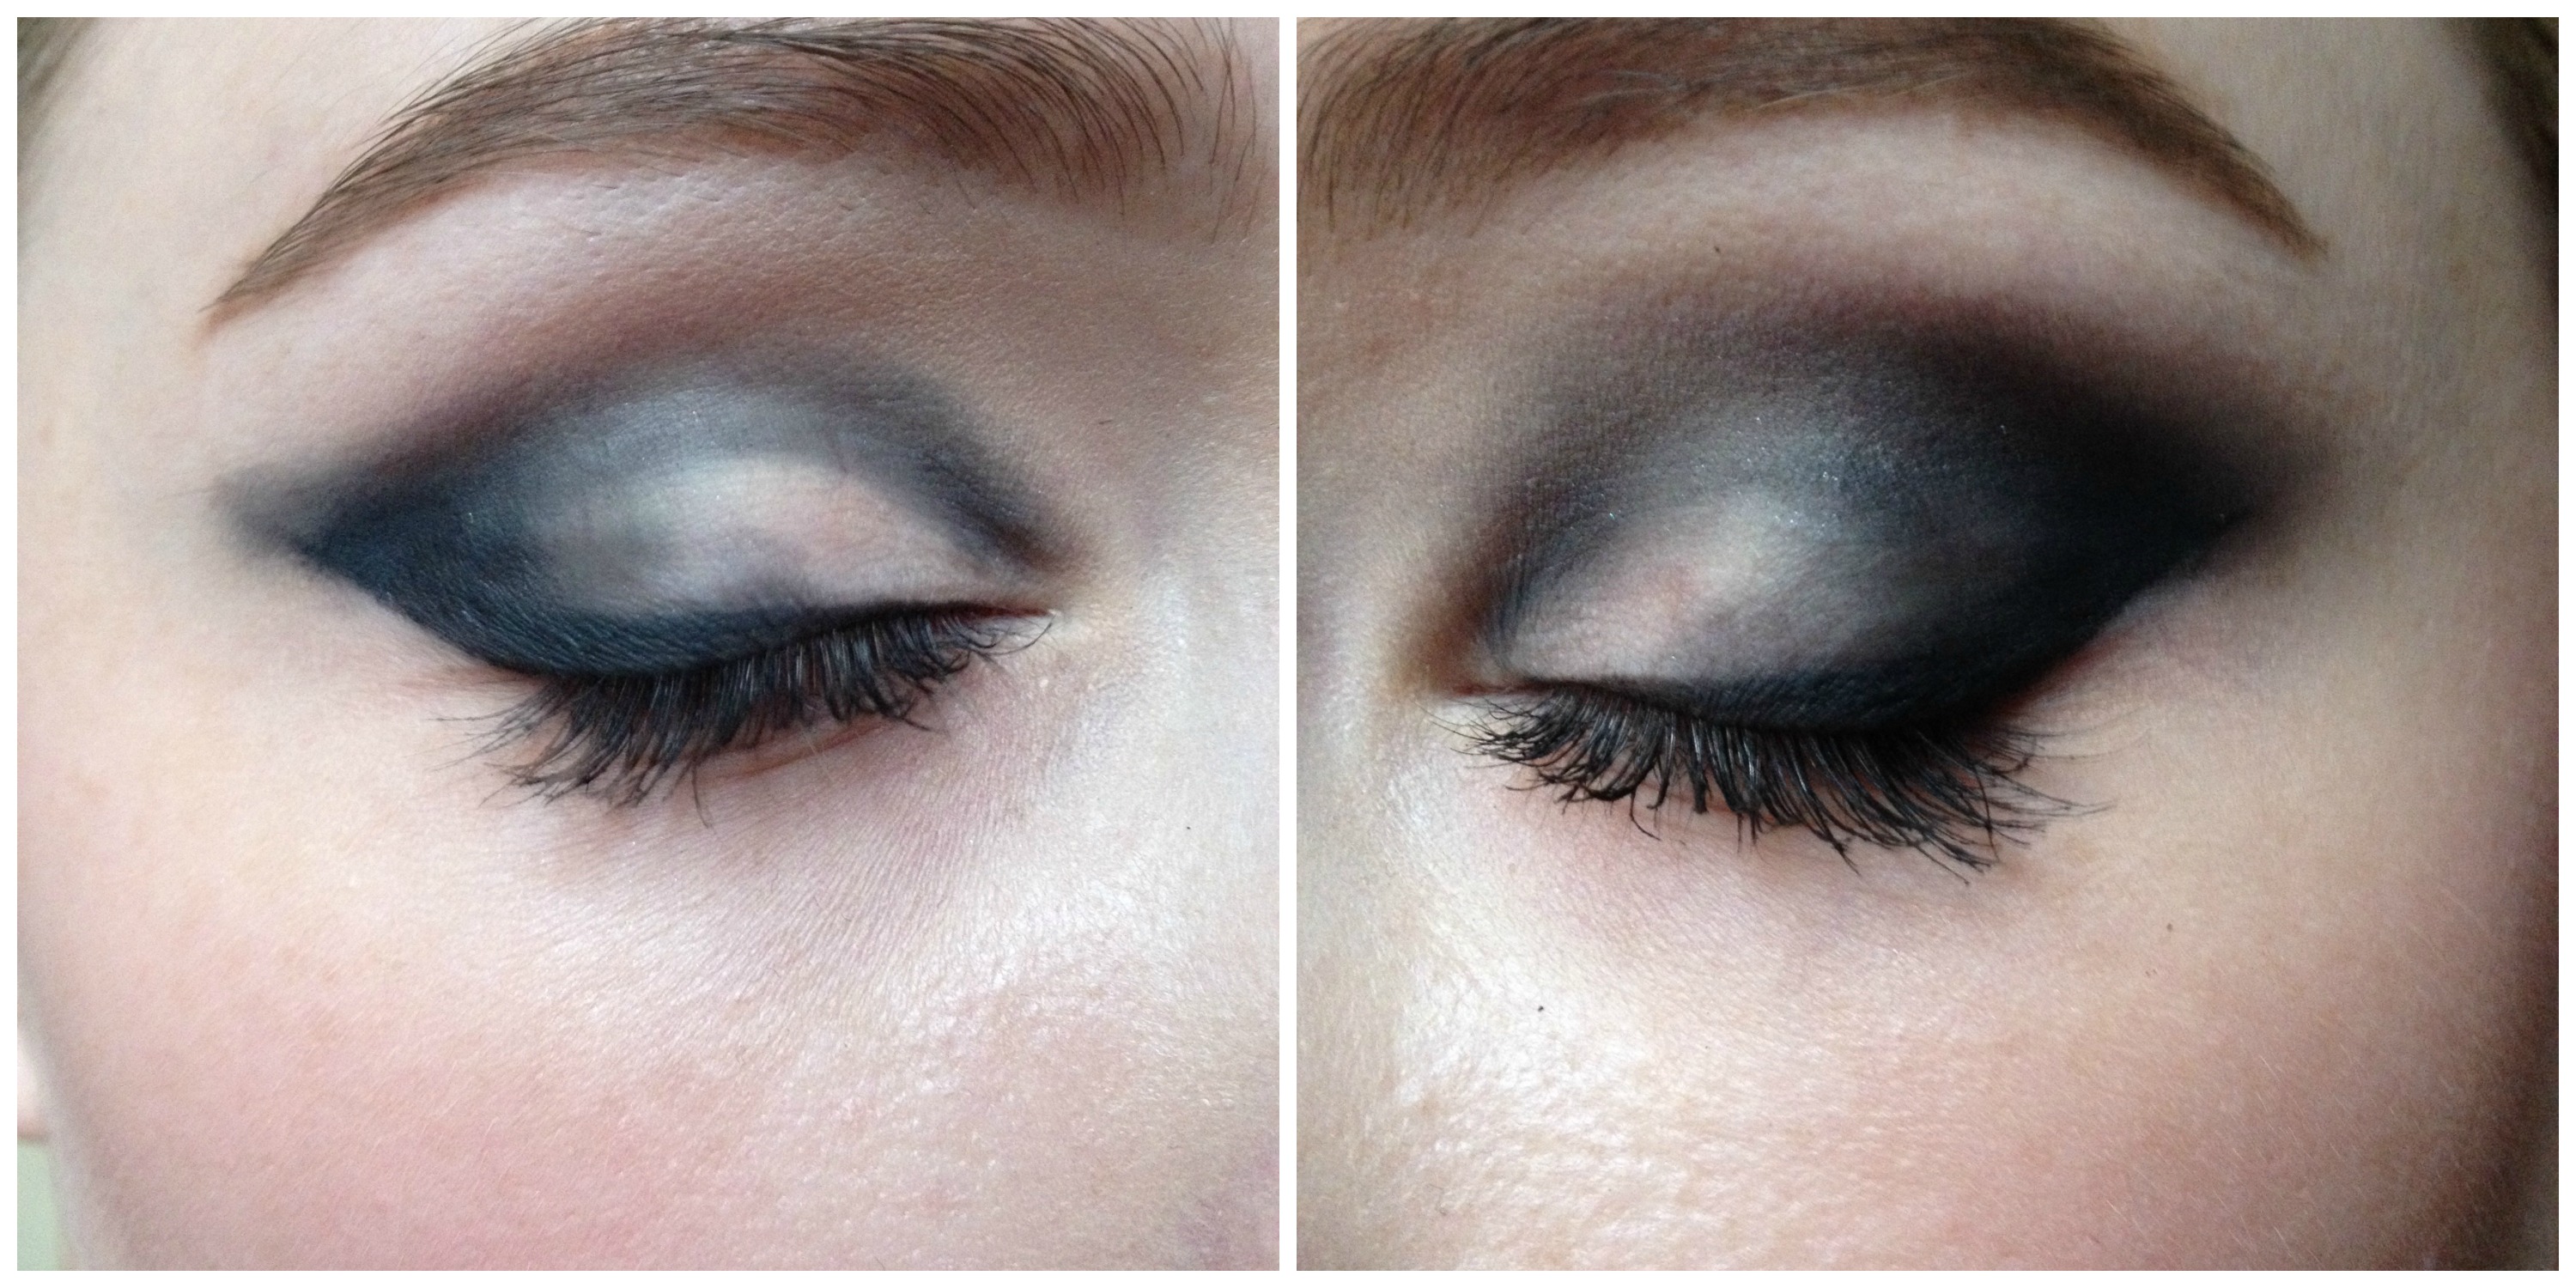
- This eye is easy particularly because it doesn't require much precision. Grab any matte skin- toned shadow - I'm using Vanilla by Mac - and apply it on the lid all the way up to the brow with a flat eyeshadow brush. This is your base.
- Then take a black eyeliner that will smudge before setting. I'm using Maybelline's Master Kajal Khol Liner in Pitch black. I'm lining along the lashline of my lid very thinly, starting where the lashes begin toward the inner corner and then thickening the line up into a wing at the outer corner of my eye. It should look like a cat eye that you applied on a moving bus - messy is absolutely fine! Just try to make sure that the line is even on both eyes.
- Before your liner sets, grab a pencil brush and smudge the liner, keeping a nice sharp V at the outer corner, as in the picture. Using just the liner that's left on the pencil brush, contour your crease. You should have a reasonably tidy outline by now. If you need to tidy the line at the outer corner, just run a cotton bud along the edge.
- Next, with a black sparkly shadow on a fluffy brush, go over the messy edge of your liner to soften it. I'm using Seventeen's Solo Shadow in Darkness.
Step Two
- Loose glitter is a pain in the bum - the falldown is such that you have to finish your eye look before applying foundation. And that's all fine if you have lots of time and like fussy makeup. But this look is for those of you who want easy, glittery eyes right fricking NOW without any compromise on sparkly, twinkly gorgeousness.
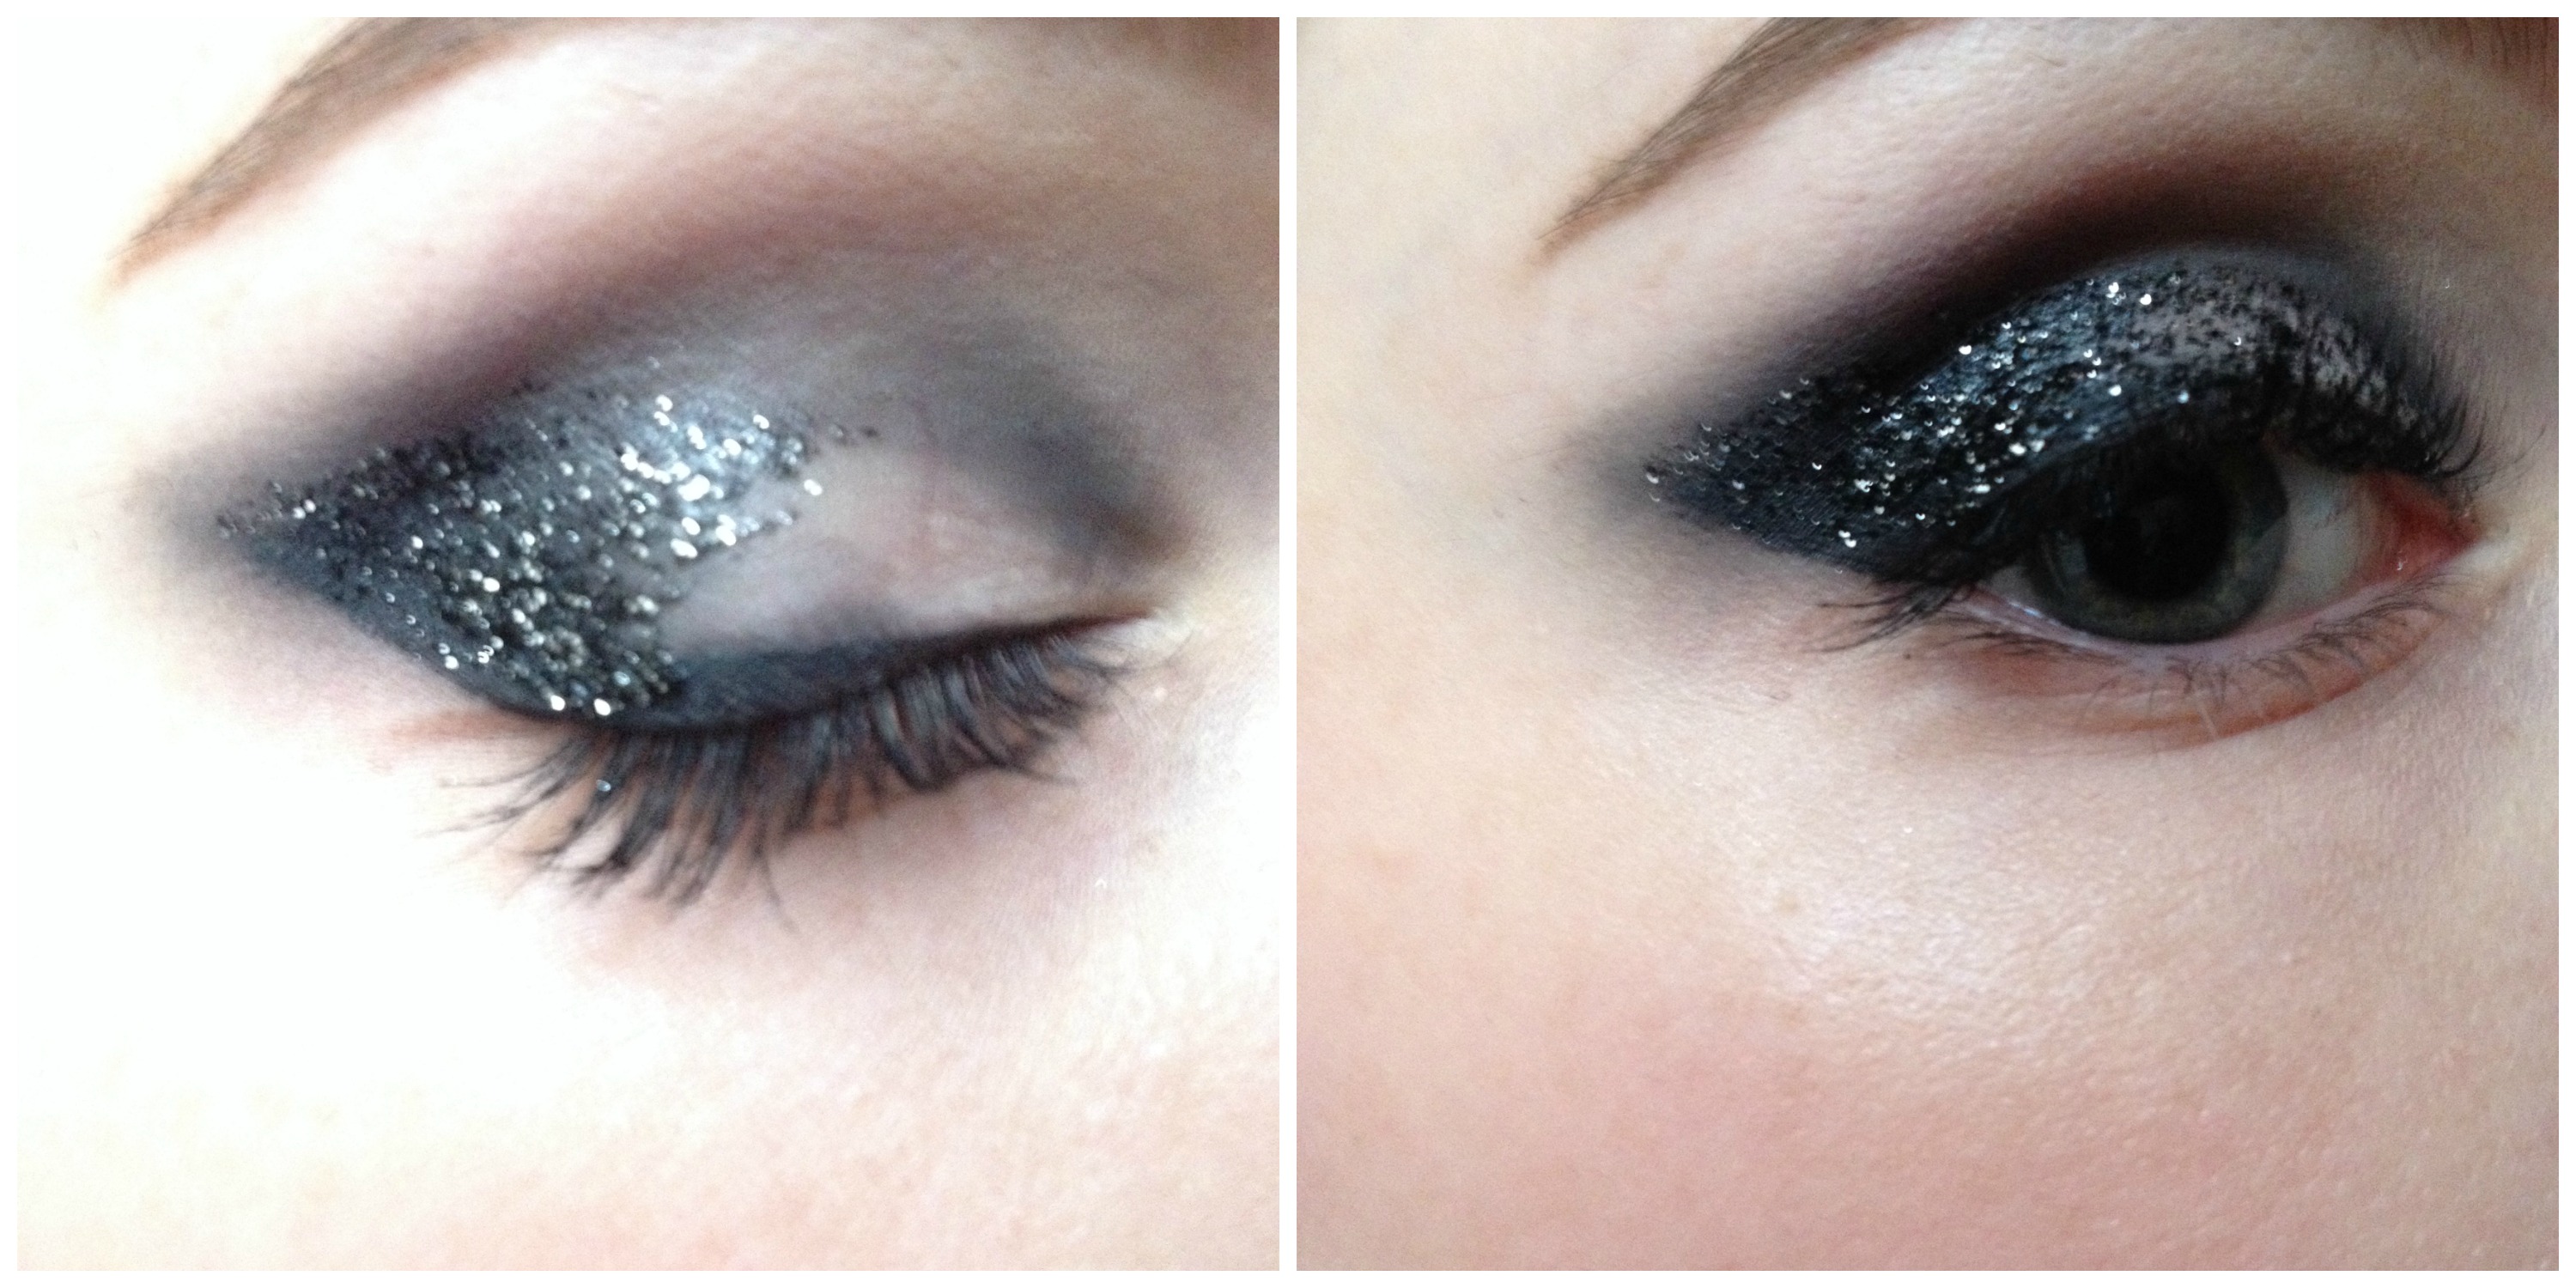
- With that in mind, whip out the naffest, cheapest glitter eyeliner that you own. I'm using Collection's Glam Crystals Dazzling Gel Liner. Given that it costs around five euro, I'm going mad and using two colours. My two chosen shades are Rock Chick - a black glitter shot through with silver, and Hustle, a bluish gunmetal silver glitter. Given that this is an extreme sort of look, it's best to keep the colours subtle and complimentary. But you can do infected red and green Christmas glitter eyes if you like!
- These liners come with a little applicator brush, and taking a fuss-free approach, that's what we'll use to apply the glitter.
- Follow the original outline of the liner you applied in a little V shape. It should remain inside the V of your black shadow, as in the picture. Take this across the outer third of the eyelid.
- Leave this to dry, then apply another layer over the top, this time taking it all the way to the inner corner of the eyelid. Take the glitter as far as the crease where your eyelid meets the socket, and simply paint on a neatish line - don't extend it up beyond the nice smudged line of shadow - keep the glitter only to the lid.
- Keep applying the black glitter until you're happy with how opaque it is.
Advertised
Step Three
- Next, take your silver glitter and apply a couple of thin layers to the inner corners of your eye, just to add dimension and further catch the light.
- Because the black glitter is already shot through with silver, there'll be no obvious line between the glitter you've applied to the inner corner and the black glitter on the rest of the lid, so there's no need to fuss with careful application here.
- Brush on the silver glitter to about the point where your lashes start.
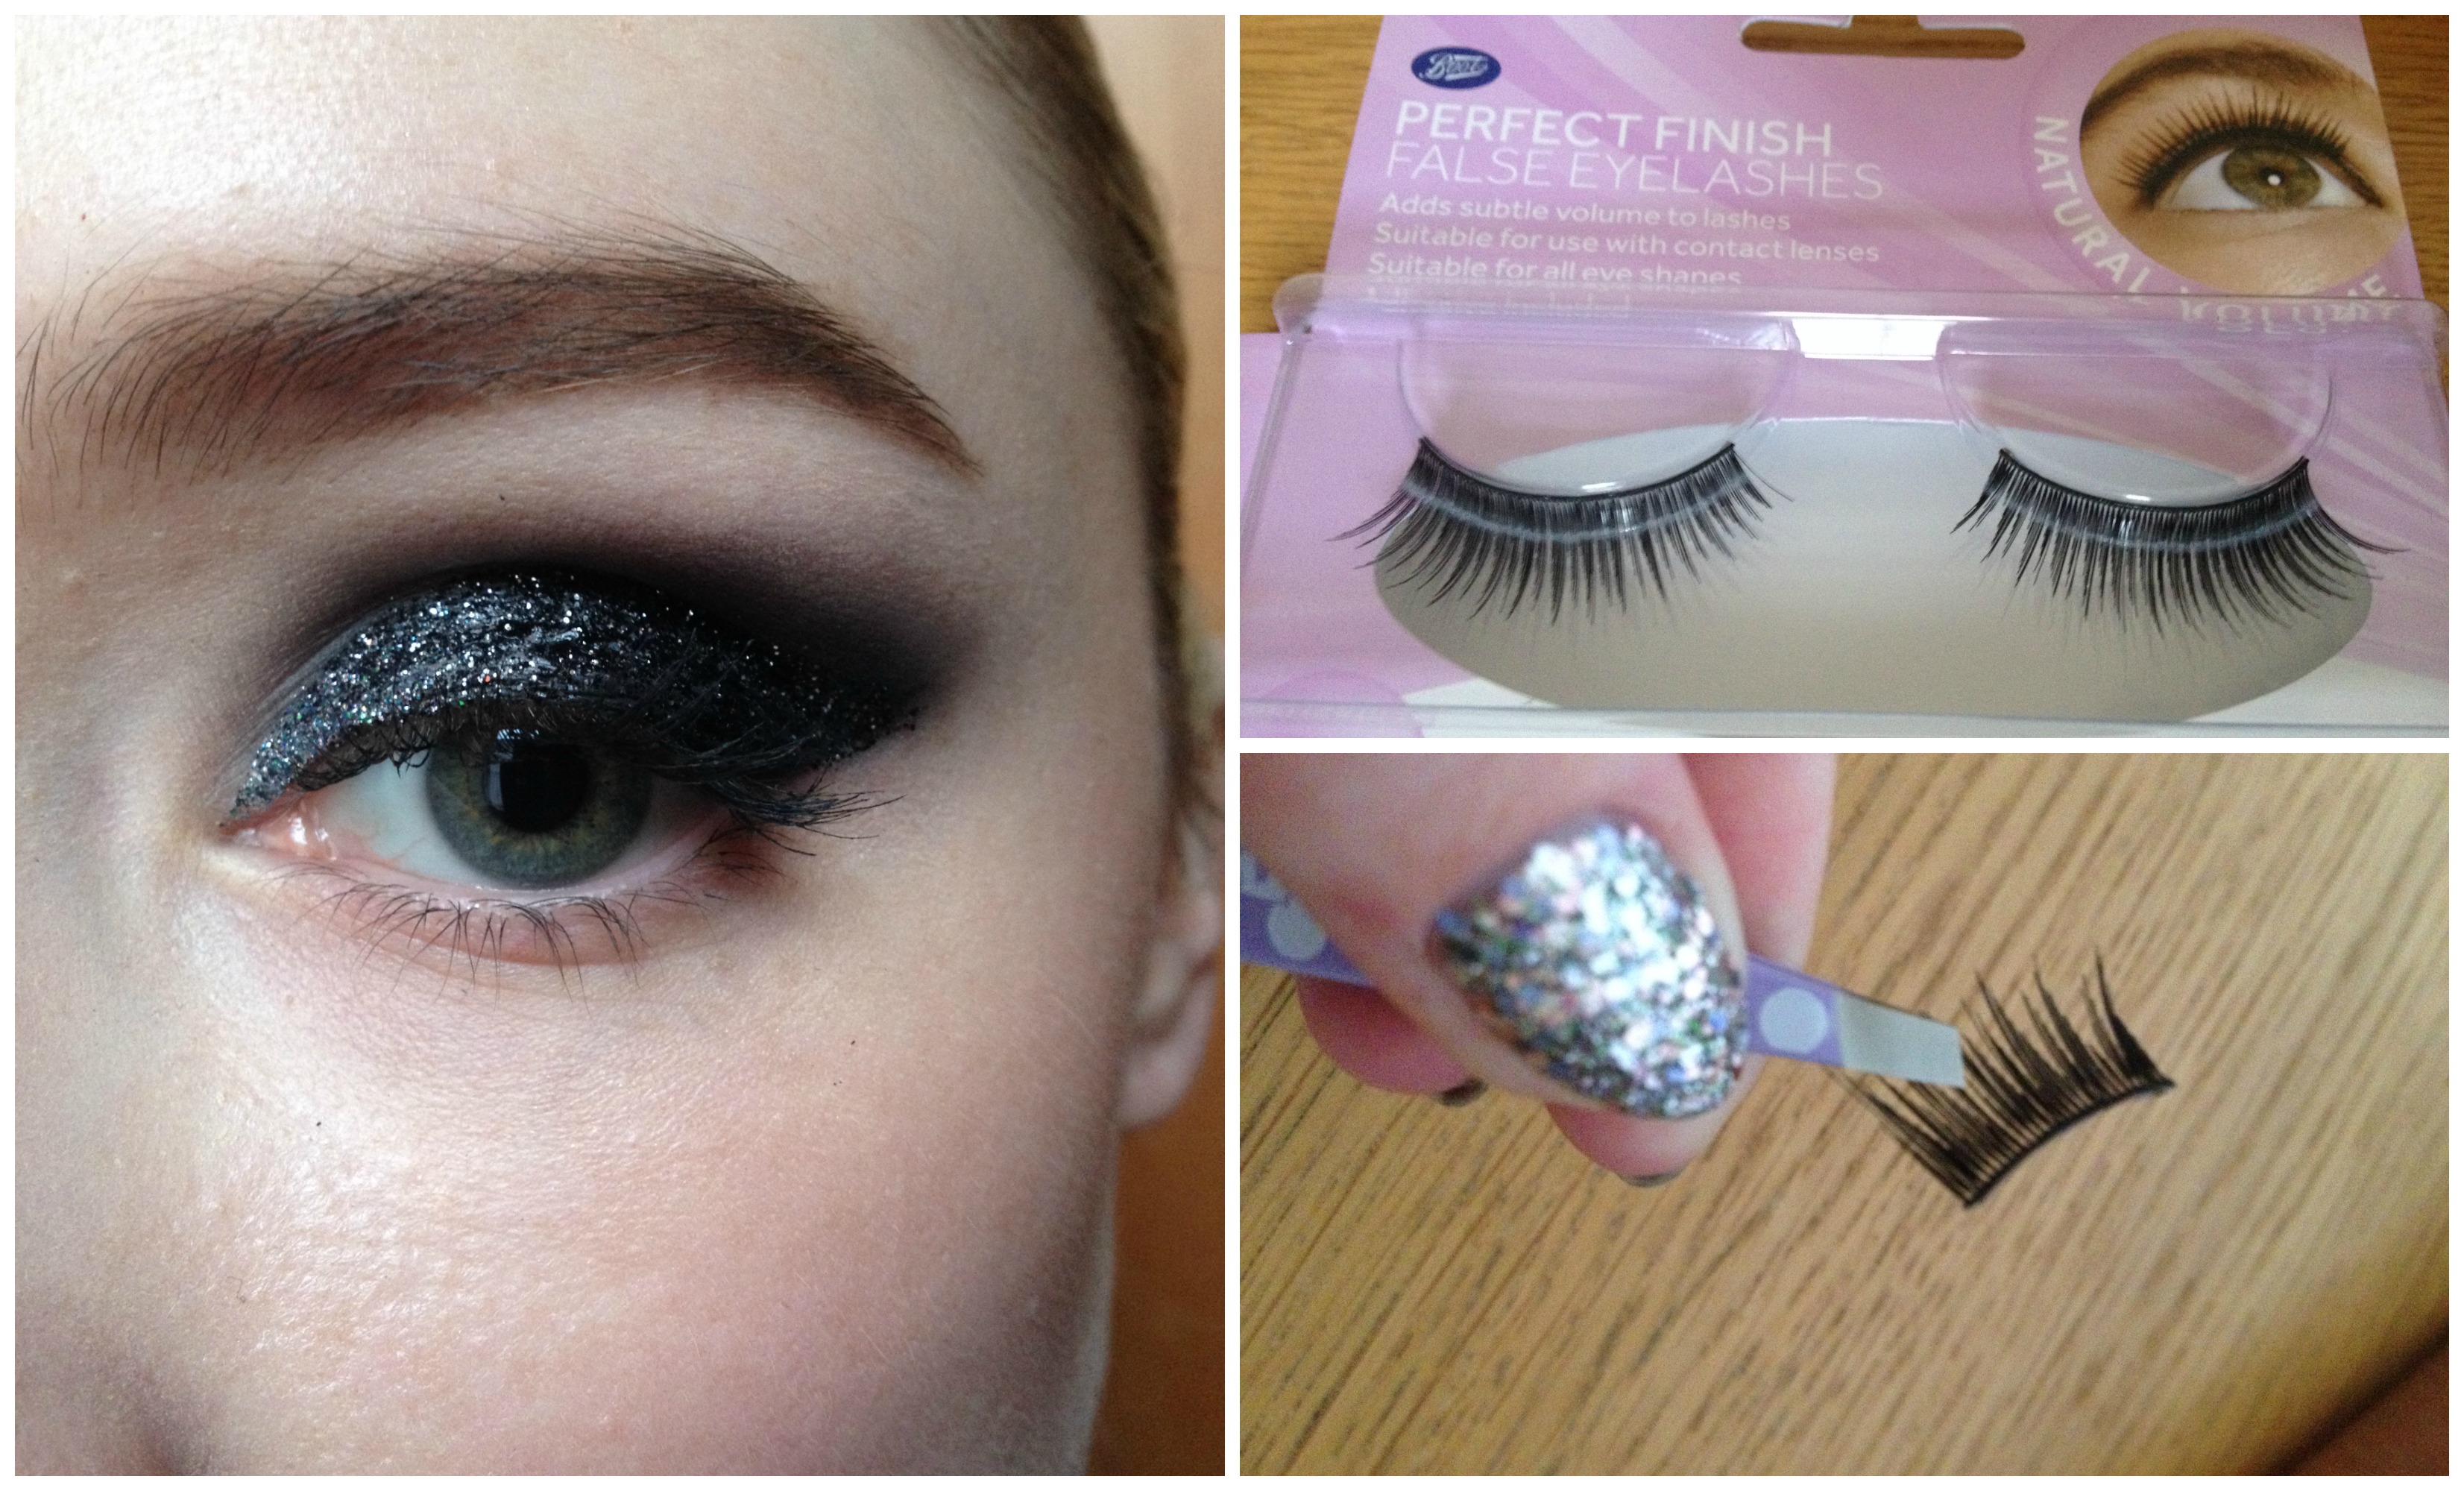
- Apply a couple of coats of your favourite black mascara.
- By now, your eye will be starting to look like the night sky, but such a dramatic look needs lashes! I've used Boots brand lashes in Natural Volume.
- You'll notice that this look is heavy on top and clean under the eye, and this pulls the eye upward. To keep this effect, I'm cutting my lashes and using just the inner third of the lash. I'm applying this to my own outer lashes with Duo Glue in black.
- If you're using cheap lashes like I am, you might want to reapply mascara to integrate the false lashes with your own.
Step Four
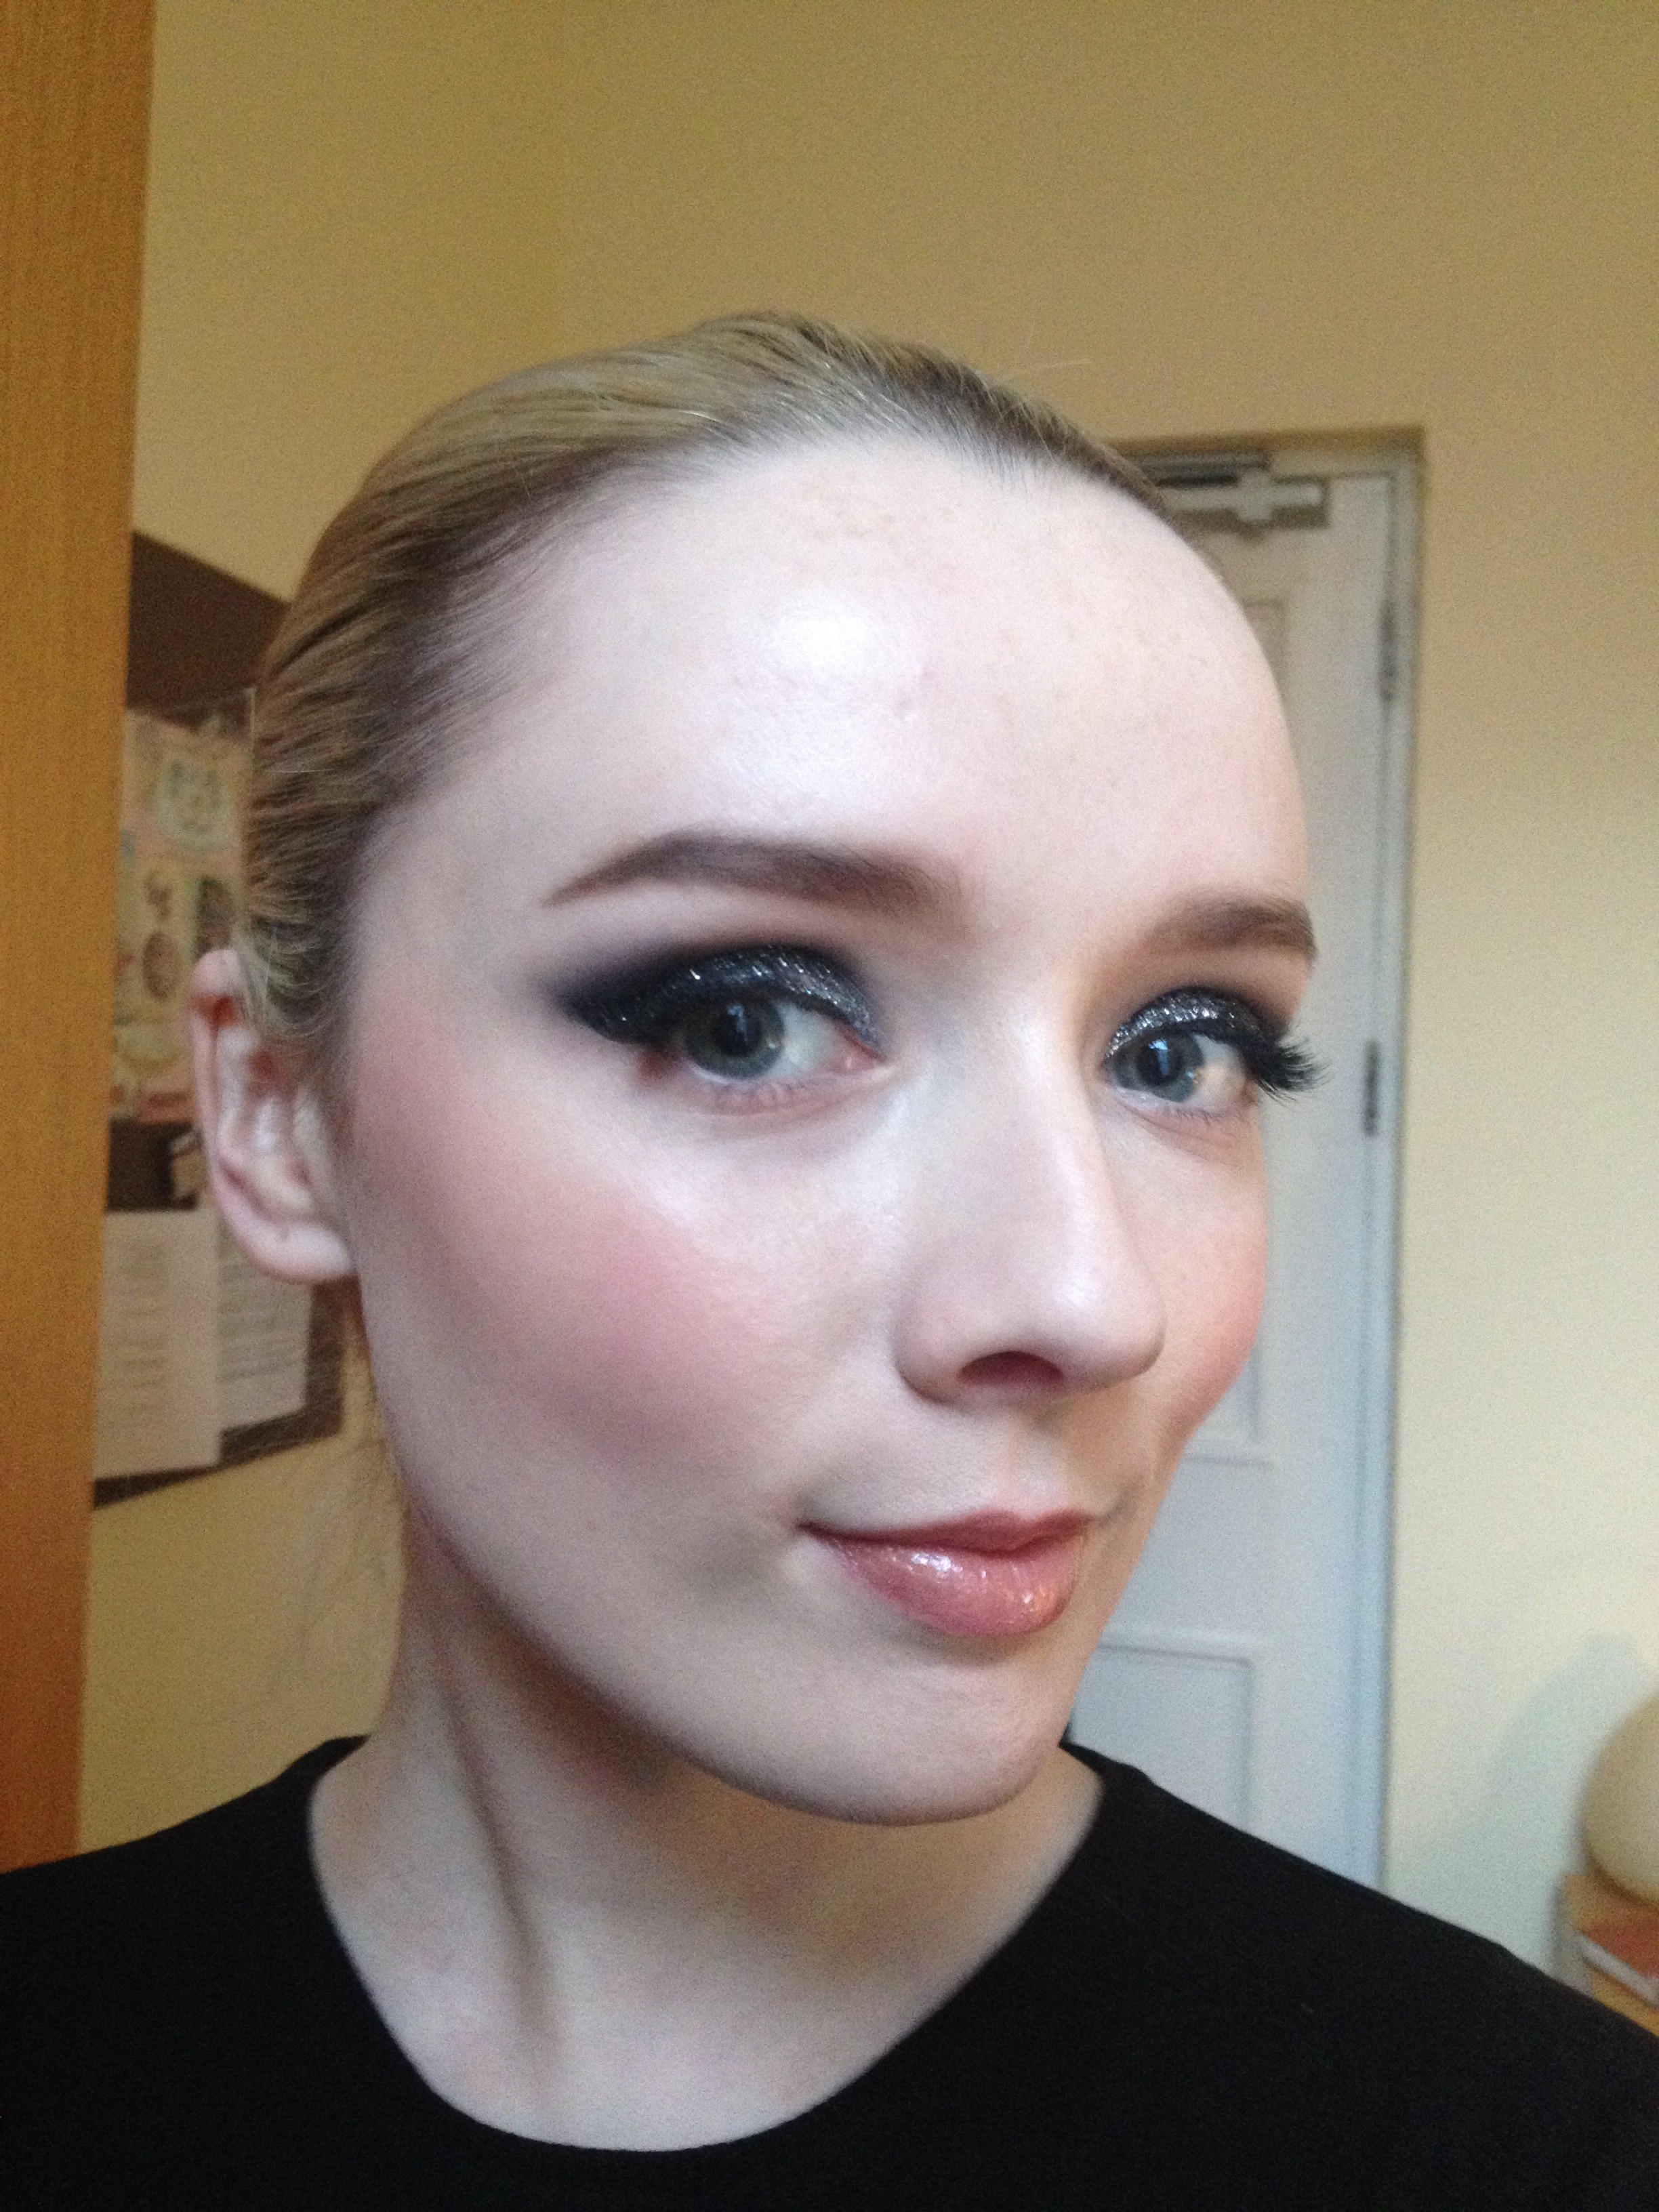
- Now, for the rest of the face - to keep the look clean, I'm skipping contouring. Instead, I'm applying a thin layer of my new favourite blush - Clarins Multi-Blush in Grenadine.
- I'm then applying a nude lip - my latest favourite is Michael Kors lipstick in Diva topped with Muse Gloss from the same range.
- Then a touch of Nars Copacabana Multiple Highlighter along the top of cheekbones and cupid's bow tops off the look.
- Do you notice how the high angle of the eye makeup actually brings out the cheekbones? The clean undereye area pulls the whole face, as it were, up!
Advertised
Do you feel daring enough to go full glitter eye this Christmas or New Years? What are your thought? To the comments!

